All products are selected by our editorial team for quality. If you buy through our links, we may earn a small commission at no extra cost to you.
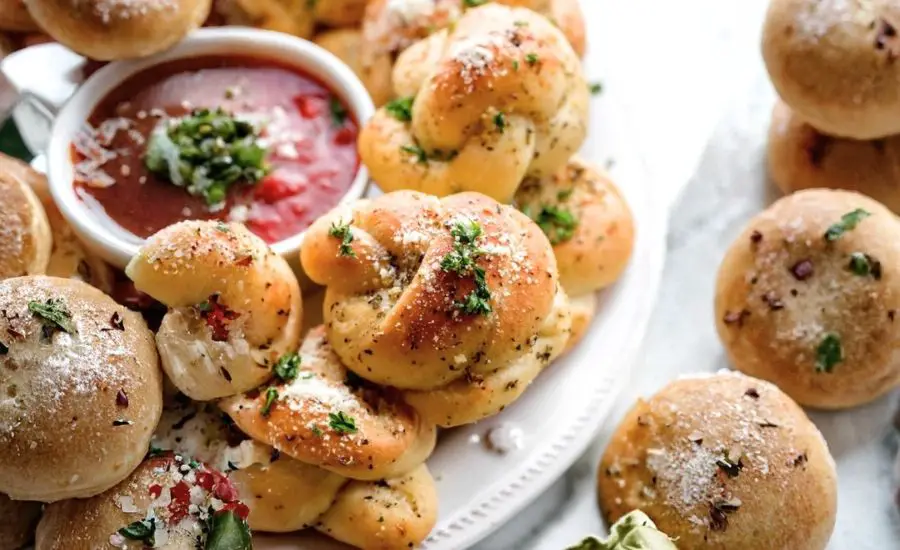
This homemade garlic knots recipe stands out for its irresistible softness and rich flavor, achieved through a perfectly balanced dough and a luscious garlic butter topping.
Unlike store-bought versions, these knots are made from scratch, offering freshness and control over ingredients.
The recipe is satisfying without being heavy, featuring olive oil or butter for healthy fats and moderate salt to keep flavors bright but balanced.
While not a high-protein or fiber-rich dish, it’s a comforting carbohydrate treat that pairs wonderfully with fiber-rich sides or salads for a balanced meal.
The recipe is perfect for everyday cooking due to its straightforward steps and flexible timing for rising dough, making it an approachable baking project for novices and pros alike.

Additionally, the garlic knots freeze well, making them excellent for meal prep or quick snacks, while the aromatic garlic and Italian seasoning add a gourmet touch that elevates any meal.
Must-Have Tools for Perfect Results
Stand Mixer with Dough Hook
Essential for effortlessly mixing and kneading the dough to the perfect texture, saving time and arm strain. Beyond this recipe, it’s indispensable for all your bread, pizza dough, and heavy batter needs.
Sharp Pizza Cutter or Bench Scraper
Provides clean, precise cuts for evenly sized dough strips, ensuring consistent baking. It’s versatile for slicing pizza, dough, or chopping herbs in the kitchen.
Silicone Baking Mats
Non-stick and reusable, these mats guarantee easy release of garlic knots without added oils and make cleanup a breeze. They’re perfect for baking cookies, roasting veggies, and more.
Pastry Brush
Perfect for applying garlic butter evenly on the knots, enhancing flavor and color. It’s a handy tool for glazing pastries, basting meats, and spreading marinades.
Garlic Knots
Equipment
- 1 Stand mixer with dough hook attachment
- 1 Sharp pizza cutter or bench scraper
- 2 Silicone baking mats or parchment papers
- 1 Pastry brush
Ingredients
For the Dough:
- 1 ⅓ cups 320 ml warm water (ideally 100–110°F / 38–43°C)
- 2 ¼ teaspoons 7 g instant yeast (one standard packet)
- 1 tablespoon 13 g granulated sugar
- 3 tablespoons 45 ml olive oil or melted butter (about 43 g)
- 1 teaspoon salt
- ½ teaspoon garlic powder
- 3 ½ cups about 450 g all-purpose flour, plus extra for dusting
For the Topping:
- 5 tablespoons 71 g unsalted butter, melted
- 3 garlic cloves finely minced or 1/2 teaspoon garlic powder
- 1 teaspoon Italian seasoning
- ¼ teaspoon salt
- Optional garnishes after baking:
- ¼ cup grated Parmesan cheese
- 2 tablespoons fresh parsley chopped
Instructions
- Activate the Yeast: In a large mixing bowl or the bowl of a stand mixer, combine the warm water, yeast, and sugar. Stir gently and let it sit uncovered for about 5 minutes, allowing the yeast to become foamy and active.
- Build the Dough: Add the olive oil (or melted butter), salt, garlic powder, and half of the flour to the yeast mixture. Stir or mix briefly just to combine. Gradually add the remaining flour and mix on low speed for 2 minutes using a dough hook or paddle attachment.
- Knead the Dough: Switch to the dough hook if using a mixer, and knead for an additional 5 minutes until the dough becomes smooth and elastic. If kneading by hand, turn the dough out onto a lightly floured surface and knead vigorously for 5 minutes. Add flour sparingly if the dough feels too sticky, aiming for a soft but manageable texture.
- First Rise: Lightly oil a clean bowl and place the dough inside, turning it to coat all sides. Cover tightly with plastic wrap, a kitchen towel, or foil, and let it rise at room temperature for 1 to 2 hours, or until it has doubled in size. For a warm proofing environment, you can place the dough in an oven warmed to 150°F (66°C), then turned off, with the door slightly open.
- Shape the Knots: Once risen, punch the dough down gently to release air. Transfer to a floured surface and roll it into a rectangle about 16 inches long and 5 inches wide. Using a sharp knife or pizza cutter, slice the dough into sixteen 1-inch wide strips. Roll each strip into an 8-inch rope, then tie each rope into a knot. Arrange the knots evenly spaced on two baking sheets lined with silicone mats or parchment paper.
- Second Rise: Cover the baking sheets loosely and let the knots rest for 30 to 45 minutes, allowing them to puff up slightly for a softer final texture.
- Prepare Oven and Topping: Preheat your oven to 400°F (204°C). In a small bowl, mix the melted butter with minced garlic, Italian seasoning, and salt. Reserve a portion for brushing after baking.
- Bake and Brush: Brush the knots generously with the garlic butter mixture. Bake for 20 to 23 minutes until golden brown on top. Remove from the oven and immediately brush with the remaining garlic butter. If desired, sprinkle with Parmesan cheese and fresh parsley.
- Serve and Store: Serve warm as is or with your favorite marinara sauce. Leftovers can be stored at room temperature for up to 2 days or refrigerated for up to a week. You may also freeze fully baked knots for up to 3 months—simply thaw and warm before serving.
Notes
- Flour Tips: Use spooned and leveled all-purpose flour for accurate measurement to avoid a dense dough.
- Yeast Activation: Ensure water is warm but not hot to avoid killing the yeast.
- Kneading Check: Perform a “windowpane test” by stretching a small piece of dough until translucent without tearing to confirm proper gluten development.
- Flavor Variations: Swap Italian seasoning for fresh herbs like rosemary or thyme for a twist.
- Make Ahead: Dough can be refrigerated overnight after the first rise for more flavor development; bring to room temperature before shaping.
- Serving Idea: Garlic knots pair wonderfully with soups, salads, or pasta dishes for a satisfying meal.
Chef’s Secrets for Perfect Garlic Knots
Mastering soft, flavorful garlic knots starts with quality ingredients and attention to detail.
Using warm water between 100–110°F is crucial to activate the yeast without killing it, ensuring a good rise and tender crumb.
Kneading the dough thoroughly develops gluten, giving the knots structure and elasticity; aim for the windowpane test to check readiness.
Be cautious not to add too much flour, as a slightly tacky dough leads to a softer texture after baking.
The double rise—first in the bowl and then shaped on the baking sheets—helps create that light, fluffy interior.
When brushing the garlic butter, reserve some for after baking to maximize flavor and moistness.
Feel free to personalize the topping with fresh herbs or grated cheese for added flair.
Finally, don’t rush the resting times; patience here truly rewards you with melt-in-your-mouth knots.
Serving Suggestions to Impress Guests
Garlic knots shine as a versatile side or appetizer that complements a variety of dishes.
Serve them warm alongside classic Italian meals like spaghetti, lasagna, or creamy Alfredo pasta to soak up rich sauces.
They also pair beautifully with fresh, crisp salads or hearty soups for a balanced meal.
For a casual snack, offer a small bowl of marinara or roasted red pepper sauce for dipping.
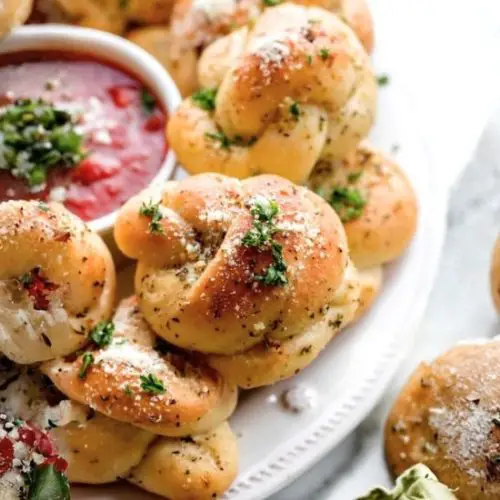
Consider adding a sprinkle of fresh parsley or extra Parmesan cheese right before serving to add vibrant color and flavor.
These knots are equally delightful served at parties or game nights, where their finger-food nature makes them crowd-pleasers.
Warm them briefly before serving to revive their softness and aroma.
Storage Tips to Keep Fresh
To enjoy garlic knots at their best, store them properly to maintain softness and flavor.
At room temperature, keep them in an airtight container or resealable bag for up to two days—ideal for quick consumption.
For longer storage, refrigeration extends freshness up to one week, but bring knots back to room temperature or warm them gently before eating to restore softness.
Garlic knots freeze beautifully when fully baked and cooled. Wrap them tightly in plastic wrap or foil, then place in a freezer bag for up to three months.
When ready to eat, thaw at room temperature and warm in the microwave or oven until heated through.
Avoid storing knots uncovered, as they tend to dry out quickly.
Frequently Asked Questions About Garlic Knots
1. Can I use active dry yeast instead of instant yeast?
Yes, but you’ll need to proof active dry yeast in warm water with sugar for 5–10 minutes before adding other ingredients. Instant yeast can be mixed directly without proofing.
2. What if my dough is too sticky or too dry?
If sticky, sprinkle a little flour gradually while kneading until manageable but still soft. If too dry, add a teaspoon of warm water at a time until the dough feels slightly tacky.
3. Can I make these knots gluten-free?
Traditional gluten-free flours behave differently, so you’ll need a specialized gluten-free bread flour blend and possibly xanthan gum. The texture and rise might vary, but it’s possible with experimentation.
4. How can I make the garlic flavor stronger?
Use fresh minced garlic in the butter topping and brush generously after baking. You can also add a bit of garlic powder to the dough or topping for extra depth.
5. Can I prepare the dough ahead of time?
Absolutely! After the first rise, cover and refrigerate the dough overnight. Bring it to room temperature before shaping to ensure easy handling and proper second rise.
This recipe is inspired by sallysbakingaddiction and has been carefully refined to enhance clarity, streamline preparation steps, and ensure accurate results. We’ve also included health benefits, nutritional highlights, and Must-Have Tools to help you get the best results every time you cook.
