All products are selected by our editorial team for quality. If you buy through our links, we may earn a small commission at no extra cost to you.
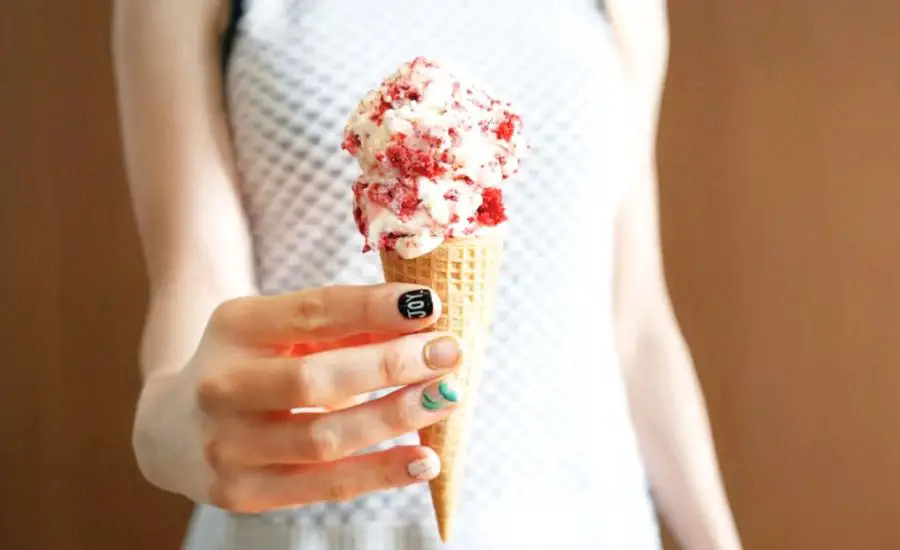
This Red Velvet Cake Ice Cream recipe is a delightful twist on traditional ice cream, combining the creamy richness of cream cheese and heavy cream with the nostalgic flavor of red velvet cake.
What makes this recipe truly special is its balance of indulgence and texture—smooth, luscious ice cream dotted with moist cake crumbs, creating a satisfying bite every time.
While this dessert is a treat, it offers some nutritional perks: cream cheese and heavy cream provide a good source of healthy fats and protein, which help keep you fuller longer.
The use of bourbon adds depth without extra sugar.
This recipe is surprisingly simple and quick, making it ideal for everyday cooking or entertaining.
It requires minimal hands-on time and yields a crowd-pleaser that’s both comforting and elegant—perfect for those who love homemade desserts with a creative twist.
Must-Have Tools for Perfect Results
Food Processor with Blade Attachment
Essential for blending the cream cheese, milk, and cream smoothly to achieve the perfect ice cream base. Beyond this recipe, it’s invaluable for pureeing sauces, chopping nuts, and making dough effortlessly.
Ice Cream Maker
This appliance is the heart of the recipe, churning the mixture to create creamy, smooth ice cream with ideal texture. A must-have for homemade frozen treats and perfect for experimenting with flavors all year round.
Large Freezer-Safe Container
Used to freeze the churned ice cream and cake mixture until firm, ensuring proper set and easy storage. A versatile kitchen staple for meal prep, leftovers, and batch cooking.
Measuring Cups and Spoons
Precision in measuring ingredients like sugar, salt, and bourbon ensures consistent results every time. These tools are fundamental for all cooking and baking needs.
Mixing Bowls
Used to combine ingredients and mix the cake pieces in. Durable mixing bowls are essential for prepping ingredients and can double as serving bowls.
Red Velvet Cake Ice Cream
Equipment
- 1 Large Food Processor with blade attachment
- 1 Ice Cream Maker
- 1 Large Freezer-Safe Container
- Measuring cups and spoons set
- 1 Set of Mixing Bowls
Ingredients
- 8 ounces cream cheese softened to room temperature
- 1 cup whole milk
- 1 cup heavy cream
- 1 heaping cup granulated sugar
- ¼ teaspoon fine sea salt
- 1 tablespoon bourbon optional, but enhances flavor
- 2 cups red velvet cake crumbled into bite-sized pieces (homemade or store-bought)
- Sugar cones for serving (optional)
Instructions
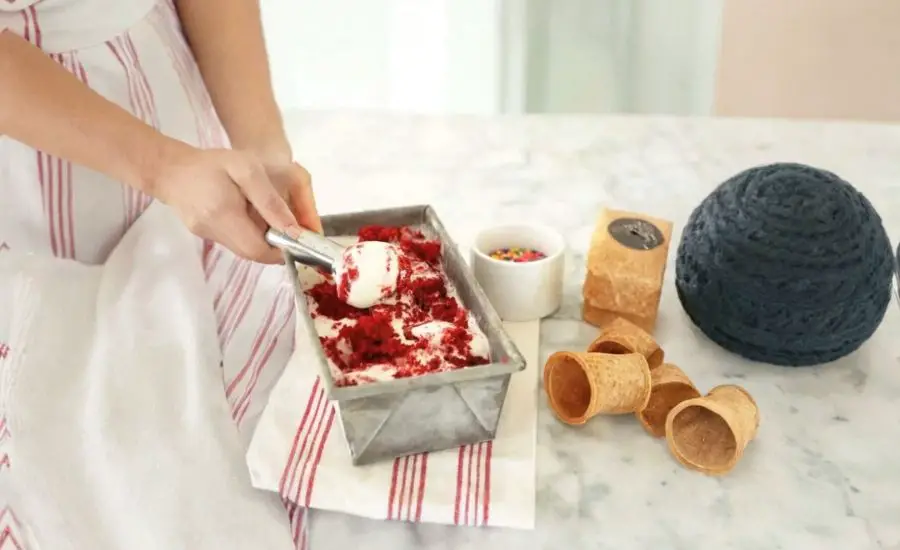
- Prepare the Creamy Ice Cream Base: In a food processor fitted with a blade attachment, combine the softened cream cheese, whole milk, heavy cream, granulated sugar, salt, and bourbon (if using). Blend on high speed until the mixture becomes smooth and silky. It’s normal to see tiny flecks of cream cheese if it wasn’t completely softened, which won’t affect the texture.
- Churn the Ice Cream Mixture: Transfer the smooth base into your ice cream maker. Follow your machine’s instructions to churn, usually between 30 and 45 minutes, until the mixture thickens to a creamy soft-serve consistency.
- Fold in Cake Crumbles: Once the ice cream reaches the perfect texture, gently fold in the crumbled red velvet cake pieces. Use a large spoon or spatula to evenly distribute the cake bits throughout the ice cream without breaking them down too much.
- Freeze Until Firm: Move the mixture to a large, freezer-safe container. Press a piece of plastic wrap directly onto the surface to prevent ice crystals from forming, then seal with a lid. Freeze for at least 4 hours, or until the ice cream firms up to a scoopable consistency.
- Serve and Enjoy: Scoop the ice cream into sugar cones or bowls and enjoy immediately for the best creamy and cakey texture.
Notes
- Cream Cheese Texture: For the smoothest ice cream base, let your cream cheese sit out until it’s completely soft. This ensures a better blend and creamier texture.
- Bourbon Option: Adding bourbon adds a subtle warmth and depth but can be omitted if preferred, especially for kids or those avoiding alcohol.
- Cake Variety: Use any red velvet cake you like—homemade, boxed mix, or leftover cake. Ensure it’s crumbled but not too finely, so you get delightful chunks in each bite.
- Storage: Keep the ice cream tightly sealed and consume within one week for the best flavor and texture. If it hardens too much in the freezer, let it thaw a few minutes before scooping.
- No Ice Cream Maker? For a no-churn option, whip heavy cream to stiff peaks, fold into the cream cheese mixture, then mix in cake crumbs and freeze. Stir every hour until firm.
Chef’s Secrets for Creamy Texture
Achieving the perfect creamy texture in this Red Velvet Cake Ice Cream starts with using room-temperature cream cheese.
Softened cream cheese blends more smoothly, preventing lumps and ensuring a velvety base.
Don’t rush the churning process—allow your ice cream maker enough time to fully aerate and thicken the mixture for that luscious mouthfeel.
When folding in the cake crumbs, be gentle to maintain their soft, moist texture rather than crushing them into the ice cream.
Adding bourbon is optional but highly recommended; it not only enhances the overall flavor complexity but also slightly lowers the freezing point, resulting in a creamier texture.
Finally, sealing the ice cream with plastic wrap directly on the surface during freezing helps prevent ice crystals and keeps the texture perfect for scooping.
Serving Suggestions to Impress Guests
Serve this indulgent Red Velvet Cake Ice Cream in classic sugar cones for a nostalgic touch or in elegant dessert bowls topped with fresh berries or a drizzle of chocolate sauce to elevate presentation.
For a festive twist, sprinkle crushed toasted pecans or candied walnuts on top for added crunch and flavor contrast.
This dessert pairs beautifully with a warm cup of coffee or a glass of dessert wine, balancing the sweetness with a rich, comforting beverage.
It also works wonderfully as a decadent finish to a dinner party or special occasion.
For kids, try topping it with colorful sprinkles or mini chocolate chips to make it even more fun and appealing.
Storage Tips for Best Freshness
To maintain the ice cream’s creamy texture and flavor, store it in an airtight, freezer-safe container.
Press a layer of plastic wrap or parchment paper directly on the ice cream’s surface before sealing the lid to prevent ice crystals from forming.
Keep it in the coldest part of your freezer, ideally at 0°F (-18°C) or below.
Avoid frequent temperature fluctuations by minimizing the time the container is open.
For best taste and texture, consume within one week. If the ice cream becomes too firm after prolonged freezing, let it sit at room temperature for 5-10 minutes before scooping to soften.
Always use clean, dry utensils to avoid introducing moisture or contaminants that can affect quality.
Frequently Asked Questions (FAQs)
1. Can I use store-bought red velvet cake?
Absolutely! Using store-bought cake or leftovers works perfectly. Just crumble it into bite-sized pieces and fold it in gently to keep those delightful chunks throughout the ice cream.
2. Is bourbon necessary in the recipe?
No, bourbon is optional. It adds flavor depth and improves texture by lowering the freezing point, but you can omit it for a kid-friendly or alcohol-free version without sacrificing much taste.
3. How do I soften cream cheese quickly?
To speed up softening, cut cream cheese into smaller cubes and leave it at room temperature for 30 minutes. Alternatively, microwave in short bursts (10 seconds) on low power, stirring in between, until soft but not melted.
4. What if I don’t have an ice cream maker?
You can make a no-churn version by whipping heavy cream until stiff peaks form, folding it into the cream cheese mixture, stirring in cake pieces, and freezing in a container. Stir every 30-60 minutes until firm.
5. How long can I store this ice cream?
For best texture and flavor, enjoy within one week. Proper airtight storage and freezing at a consistent temperature will keep it fresh and creamy during this time.
This recipe is inspired by joythebaker and has been carefully refined to enhance clarity, streamline preparation steps, and ensure accurate results. We’ve also included health benefits, nutritional highlights, and Must-Have Tools to help you get the best results every time you cook.
