
All products are selected by our editorial team for quality. If you buy through our links, we may earn a small commission at no extra cost to you.
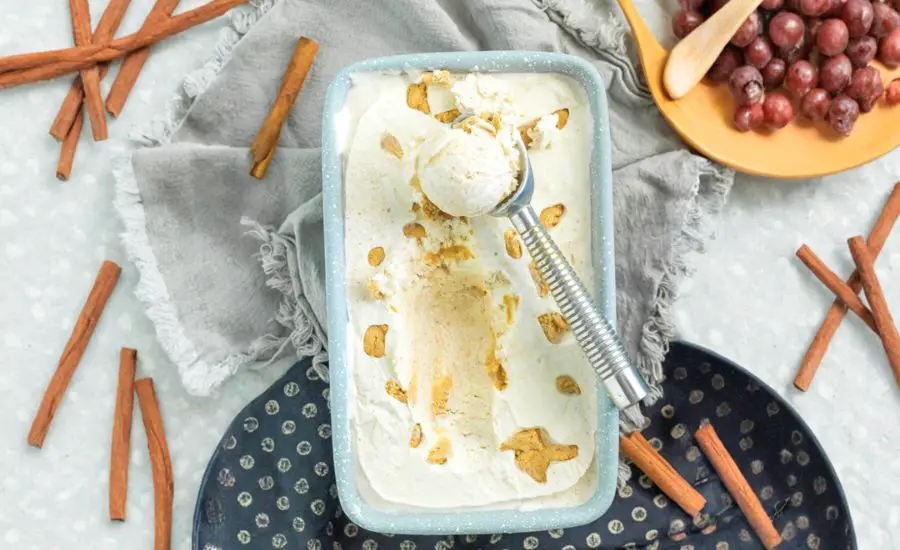
This no-churn Cinnamon Roll Ice Cream stands out as a cozy, indulgent treat that blends the comforting flavors of cinnamon rolls with creamy homemade ice cream—without the hassle of an ice cream maker.
The luscious whipped cream base combined with sweetened condensed milk creates a rich texture that’s delightfully smooth yet easy to prepare.
What makes this recipe even more appealing is the addition of tender, no-bake cinnamon dough chunks folded throughout, delivering a playful texture contrast that elevates every bite.
While indulgent, it balances sweet satisfaction with real ingredients, and by controlling portion size, it’s a fun dessert that fits well into everyday life.
This recipe is perfect for quick assembly, requires minimal hands-on time, and freezes while you relax or prepare other dishes, making it an ideal option for effortless entertaining or family treats.
Must-Have Tools for Perfect Results
Hand Blender
This versatile tool is essential for whipping the cream to perfect stiff peaks quickly and evenly. Beyond this recipe, it’s a kitchen staple for pureeing soups, blending smoothies, and emulsifying sauces, saving you time and effort.
Loaf Pan
The loaf pan is perfect for layering and freezing your cinnamon roll ice cream, providing a neat shape and easy slicing once frozen. It’s also invaluable for baking breads, casseroles, and meatloafs.
Spatula
A flexible spatula allows for gentle folding of the whipped cream and dough chunks without deflating the mixture, ensuring the ice cream stays light and airy. It’s also perfect for scraping bowls clean and mixing batters.
Ice Cream Scoop
This tool helps portion out consistent, perfectly rounded servings of ice cream, enhancing presentation and serving ease. It doubles as a handy scoop for cookie dough, melon balls, and more.
Cozy No-Churn Cinnamon Roll Ice Cream Recipe
Equipment
- 1 Hand Blender
- 1 Loaf Pan
- 1 Spatula
- 1 Ice-Cream Scoop
Ingredients
Ice Cream Base:
- 2 cups whipping cream
- 1 15 oz can sweetened condensed milk
- 1 teaspoon vanilla extract
- 1 teaspoon ground cinnamon
Cinnamon Dough Bits:
- ½ cup all-purpose flour + 2 tablespoons heat treated
- ¼ cup butter room temperature
- ½ cup brown sugar
- ¼ teaspoon sea salt
- 1 –2 tablespoons cream cinnamon-flavored optional
- ½ teaspoon vanilla extract
Instructions
- Prepare Heat-Treated Flour for Safety: Before starting your dough bits, it’s crucial to heat-treat the flour to eliminate any harmful bacteria since this flour will not be baked later.Measure out half a cup of all-purpose flour plus an additional 2 tablespoons. Spread the flour evenly on a microwave-safe plate. Microwave the flour in 30-second bursts, stirring or shaking the flour between intervals, until the internal temperature reaches 165°F (75°C). This usually takes about 60 to 90 seconds total, but keep an eye to avoid burning. Allow the flour to cool completely before using it in the dough mixture.
- Cream Butter and Sugar Until Smooth: Take ¼ cup of room temperature butter and ½ cup of brown sugar. Place them in a mixing bowl. Using a spatula or an electric mixer on medium speed, cream the butter and sugar together thoroughly. This process incorporates air into the mixture, making the dough lighter and more tender. Continue mixing until the mixture is smooth, glossy, and evenly combined without any visible lumps of butter.
- Add Flavorful Liquids and Salt: To the creamed butter and sugar, add ¼ teaspoon of sea salt, ½ teaspoon of vanilla extract, and 1 to 2 tablespoons of cream. The cream can be regular or flavored (such as cinnamon coffee creamer) to enhance the cinnamon taste. Stir gently but thoroughly to combine these ingredients into a smooth, cohesive dough base. The salt will balance the sweetness, while vanilla and cream deepen the flavor complexity.
- Incorporate Heat-Treated Flour and Form Dough: Now, sift the cooled, heat-treated flour into the butter-sugar mixture. Gently fold it in using a spatula. The dough should begin to thicken into a texture similar to thick cookie dough—not too soft or sticky.If the dough feels too loose, add the extra 2 tablespoons of flour gradually until the dough holds its shape but remains pliable. Once the flour is fully incorporated, cover the bowl with plastic wrap and refrigerate for 30 minutes, or alternatively, freeze for 10 minutes to firm the dough quickly.
- Whip Cream to Stiff Peaks: While the dough chills, prepare the ice cream base. Pour 2 cups of cold whipping cream into a large mixing bowl.Using a hand blender or stand mixer, whip the cream on high speed until stiff peaks form. This means when you lift the beaters, the cream holds firm peaks without collapsing. Properly whipped cream ensures the ice cream base is airy and creamy.
- Fold in Sweetened Condensed Milk Gently: Measure 1 (15 oz) can of sweetened condensed milk and gently fold it into the whipped cream using a spatula. Folding should be done carefully to maintain the whipped cream’s light texture, incorporating the condensed milk without deflating the mixture. The condensed milk sweetens and adds creaminess, forming the rich no-churn ice cream base.
- Divide and Flavor Ice Cream Base: Spoon out approximately one-third of the ice cream mixture into a separate bowl. To the remaining two-thirds, add 1 teaspoon of ground cinnamon. Gently fold the cinnamon into the ice cream base until evenly distributed, creating a fragrant cinnamon-flavored ice cream component. Keep the reserved one-third as plain ice cream for layering and swirling.
- Prepare Dough Chunks for Mixing: Retrieve the chilled or slightly frozen cinnamon dough from the refrigerator or freezer.Take half of this dough and pinch off small chunks—about marble-sized pieces. These dough bits will add delightful texture to the ice cream. Set aside the remaining dough for another use or incorporate mini chocolate chips if you prefer a quick snack treat.
- Layer and Swirl Ice Cream and Dough in Loaf Pan: Start by spreading one-third of the cinnamon-flavored ice cream into the bottom of a loaf pan. Next, spoon dollops of the plain ice cream mixture over the surface randomly. Using a wooden skewer or a thin knife, gently swirl the two ice cream layers together, creating a marbled effect without overmixing. Then, sprinkle one-third of the cinnamon dough chunks evenly on top. Repeat this layering process two more times: cinnamon ice cream, plain ice cream dollops, swirl, and dough chunks until all ingredients are used.
- Cover and Freeze for Ideal Texture: Lay a piece of plastic wrap directly onto the surface of the ice cream in the loaf pan. Press it gently to eliminate air pockets and prevent ice crystals from forming, which can ruin the creamy texture.Cover the loaf pan completely with plastic wrap or a lid if available. Place the pan in the freezer and allow it to freeze for at least 6 hours, though overnight freezing is recommended for the best texture and ease of slicing.
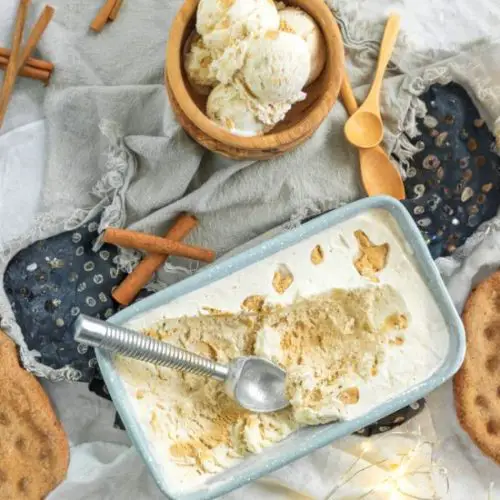
- Serve and Enjoy Your Homemade Cinnamon Roll Ice Cream: Once fully frozen, remove the ice cream from the freezer about 5 minutes before serving to soften slightly for easier scooping. Use an ice cream scoop to portion out generous servings, enjoying the creamy texture dotted with tender cinnamon dough pieces. This homemade treat makes a perfect dessert to impress guests or satisfy a cozy craving anytime.
Notes
- Heat-treat the flour carefully to avoid raw flour taste and ensure safety.
- Use room temperature butter for easy creaming and better dough texture.
- Whip the cream to stiff peaks to achieve a smooth, airy ice cream base.
- Gently fold ingredients to maintain lightness and prevent deflating whipped cream.
- Swirl ice cream mixtures just enough for marbling; overmixing loses the effect.
- Freeze the ice cream overnight for best texture and ease of serving.
- Dough chunks can be saved or customized with add-ins like mini chocolate chips.
Chef’s Secrets to Ice Cream Success
To craft this luscious cinnamon roll ice cream, mastering texture and flavor layering is key.
The secret begins with properly heat-treating the flour to ensure safety without sacrificing dough tenderness.
When creaming butter and sugar, make sure the butter is soft but not melted, which allows smooth incorporation and a tender dough.
Whipping the cream to stiff peaks is essential — this creates the airy structure that makes no-churn ice cream so delightful.
Folding the sweetened condensed milk and cinnamon must be done gently to maintain volume.
Finally, when layering and swirling, resist the urge to overmix, as this preserves beautiful marbling and distinct flavor pockets.
Using cinnamon-flavored cream for the dough adds a subtle, enriching depth, and refrigerating or lightly freezing the dough before mixing helps maintain perfect bite-sized chunks throughout the ice cream.
Serving Suggestions for Best Enjoyment
This cinnamon roll ice cream shines when served slightly softened to scoop easily yet still chilled enough to hold its creamy texture.
Pair it with warm desserts like apple pie or a simple brownie for a comforting dessert ensemble. It also pairs beautifully with a drizzle of caramel sauce or a sprinkle of toasted pecans for added crunch and contrast.
For a fun twist, serve it in waffle cones or alongside cinnamon-spiced coffee or chai tea to complement its warm notes.
Because it’s rich and indulgent, small portions work well as a delightful finish to any meal or a special treat during cozy gatherings.
Storage Tips to Maintain Freshness
Store this ice cream tightly covered with plastic wrap pressed onto the surface or in an airtight container to prevent ice crystal formation.
Keep it frozen at a steady temperature, ideally below 0°F (-18°C), to maintain creaminess and flavor integrity.
If the ice cream hardens excessively, let it sit at room temperature for 5–10 minutes before scooping to soften slightly.
Avoid frequent temperature fluctuations by minimizing how often the freezer door is opened.
Leftover dough bits can be wrapped tightly and frozen separately for up to a month, perfect for adding to future batches or enjoying as a quick snack.
Frequently Asked Questions (FAQs)
Q1: Why do I need to heat-treat the flour?
Heat-treating flour kills any potential bacteria present in raw flour, which is crucial since the dough bits in this recipe are not baked. It ensures safety while keeping the flour usable in no-bake recipes.
Q2: Can I use a flavored creamer other than cinnamon?
Absolutely! While cinnamon coffee creamer enhances the flavor, vanilla or even caramel-flavored creamers can add unique twists to the dough bits, giving you room to customize.
Q3: Is an ice cream maker required?
No ice cream maker is needed for this recipe. Whipping the cream to stiff peaks and folding in condensed milk creates a rich, no-churn ice cream that freezes solid and creamy.
Q4: How long can I store this ice cream?
Properly stored, this ice cream can last up to 2 weeks in the freezer without significant loss of texture or flavor. For best taste, consume within this timeframe.
Q5: Can I make the dough bits ahead of time?
Yes! You can prepare the dough bits ahead and freeze them separately. When ready to make ice cream, simply fold frozen chunks into the base for a quick assembly.
This recipe is inspired by pipercooks and has been carefully refined to enhance clarity, streamline preparation steps, and ensure accurate results. We’ve also included health benefits, nutritional highlights, and Must-Have Tools to help you get the best results every time you cook.
