All products are selected by our editorial team for quality. If you buy through our links, we may earn a small commission at no extra cost to you.
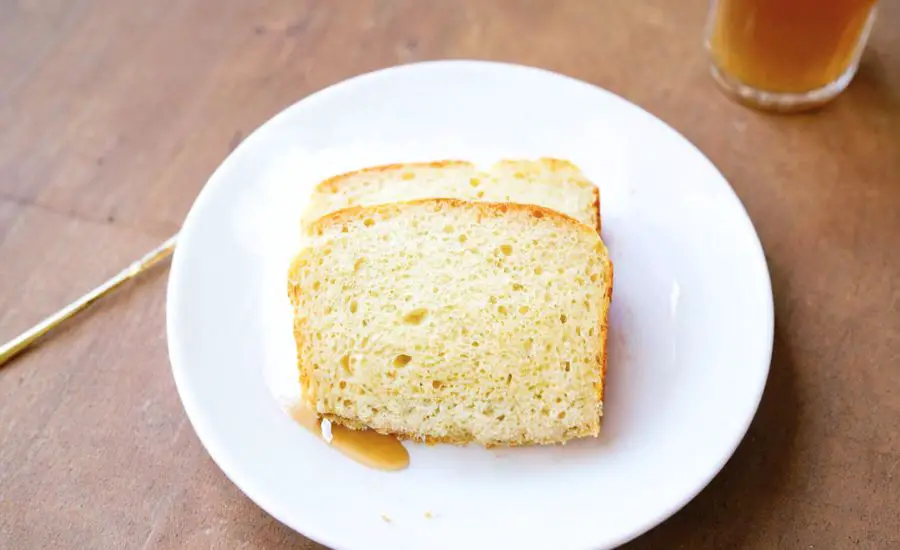
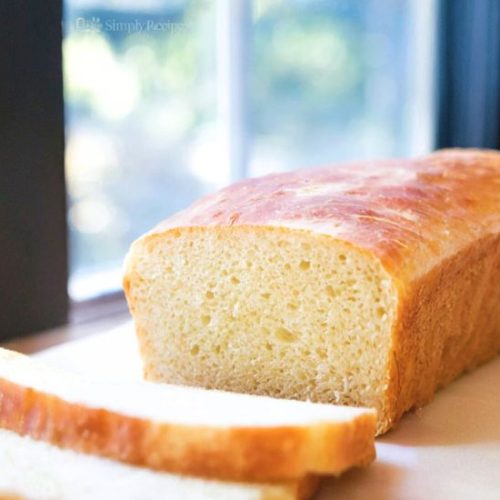
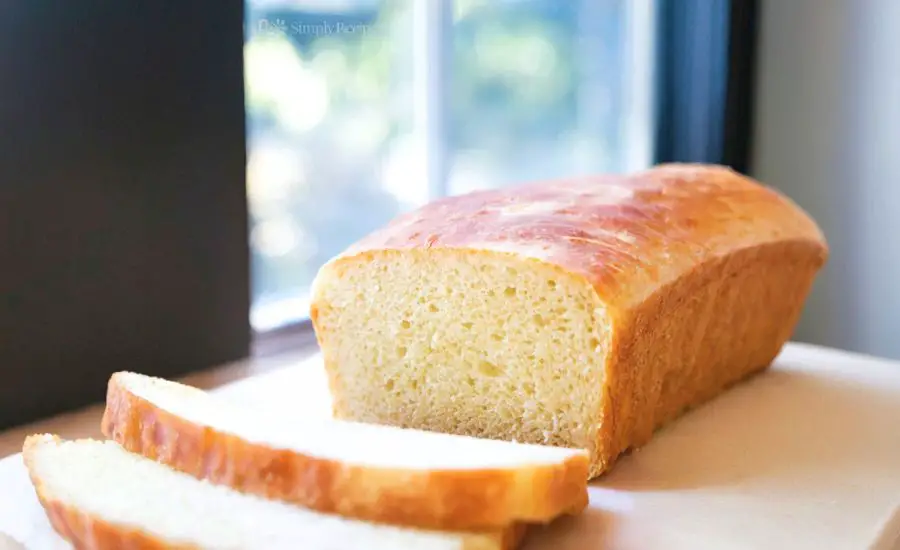
This homemade potato bread recipe stands out for its wonderfully soft, moist crumb thanks to the addition of mashed potatoes—a simple ingredient that transforms traditional bread into a tender, flavorful loaf.
Beyond its delightful texture, the recipe offers subtle nutritional benefits: potatoes provide dietary fiber and essential vitamins, while olive oil contributes heart-healthy monounsaturated fats.
This bread is naturally low in saturated fat and uses instant yeast for a quicker rise, making it approachable for bakers of all levels.
Its mild flavor and satisfying density make it an excellent choice for everyday meals, whether for sandwiches, toast, or alongside soups and stews.
Plus, the recipe’s flexibility to use potato cooking water in place of milk adds a sustainable twist that reduces waste.

Perfect for meal prep, this bread freezes well and keeps fresh for days, making it a practical and delicious staple in any kitchen.
Must-Have Tools for Perfect Results
Stand Mixer with Dough Hook
This versatile kitchen powerhouse effortlessly kneads the dough to the perfect consistency, saving time and ensuring an even mix. Beyond bread baking, it’s indispensable for whipping, mixing batters, and preparing doughs for all your baking projects.
Microwave Oven
A quick and convenient way to cook the potato without heating up the kitchen. Its fast heating capability is great for prepping ingredients in numerous recipes, from melting butter to steaming vegetables.
Loaf Pans (8×4 inches)
These pans shape the bread into classic loaves with even baking and a beautiful crust. They are a kitchen essential for baking breads, pound cakes, and meatloafs alike, providing versatility for savory and sweet dishes.
Pastry Scraper
Perfect for dividing and handling dough, this tool simplifies working with sticky bread dough, ensuring precise portions and minimal mess. It also doubles as a handy surface cleaner for chopping and scraping counters.
Kitchen Thermometer
A reliable tool to check the internal temperature of baked bread, guaranteeing perfectly baked loaves every time. It’s also useful for roasting meats, candy making, and other temperature-sensitive cooking.

Soft & Moist Potato Bread Flavorful Baking
Equipment
- 1 Stand mixer with dough hook attachment
- 1 Microwave oven (or stove for boiling)
- 2 Loaf pans (8 x 4 inches)
- 1 Pastry scraper
- 1 Kitchen thermometer
Ingredients
- 1 large russet potato about 12 ounces
- 2 cups 475 ml milk
- 2 teaspoons salt
- 1 teaspoon sugar
- 2 tablespoons extra virgin olive oil plus extra for greasing
- 1 packet 2 1/4 teaspoons instant yeast
- 5 cups 680 g all-purpose flour, divided, plus extra for dusting
Instructions
- Prepare the Potato for Mash: Start by selecting a large russet potato weighing about 12 ounces. You can cook the potato in one of two ways:
- Microwave Method: Pierce the potato several times with a fork to allow steam to escape during cooking. Place it on a microwave-safe plate and microwave on high for 4 minutes. Carefully flip the potato and microwave for an additional 4 minutes. Let it cool until safe to handle.
- Boiling Method: Peel the potato and cut it into large chunks. Place the pieces in a pot and cover with cold water. Bring to a gentle simmer and cook for about 10 minutes or until a fork easily pierces the potato. Drain and reserve the cooking water if you wish to use it later in the recipe for added flavor and nutrients. Once cooled, peel the potato if you boiled it, and mash it thoroughly with a fork until smooth and lump-free. You should have between ¾ to 1 cup (6 to 8 ounces) of mashed potato for the bread.
- Warm the Milk and Infuse Ingredients: Pour 2 cups (475 ml) of milk into a medium saucepan. Add 2 teaspoons of salt and 1 teaspoon of sugar, stirring gently. Heat the milk over medium heat, watching closely until tiny bubbles form around the edges but it does not boil.This warming step helps dissolve the salt and sugar, enhancing the bread’s flavor and texture. Remove the pan from heat. While the milk is still warm, whisk in 2 tablespoons of extra virgin olive oil, ensuring it is fully incorporated. Then add the mashed potato to the milk mixture and whisk vigorously until the potato is evenly distributed, resulting in a creamy, slightly thickened liquid base. Allow this mixture to cool until it feels warm but not hot to the touch—ideally under 130°F (54°C)—to protect the yeast’s vitality in the next step.
- Activate and Mix Yeast with Flour: Transfer the cooled potato-milk mixture into the bowl of your stand mixer fitted with the paddle attachment. Sprinkle 1 packet (2 1/4 teaspoons) of instant yeast evenly over the liquid. Add 2 cups (272 g) of the all-purpose flour. Using medium-high speed, mix for 4 minutes. This mixing time helps break down any small lumps of potato, ensuring a smooth, uniform dough base and starting the gluten development process.If you don’t have a stand mixer, you can combine everything in a large bowl and stir vigorously with a wooden spoon or spatula until combined.
- Incorporate Remaining Flour and Knead Dough: Switch your stand mixer to the dough hook attachment. Gradually add the remaining 3 cups (408 g) of flour a little at a time. Mix on medium-low speed for about 8 minutes, allowing the dough to develop elasticity and structure. The dough should become tacky—meaning it sticks slightly to your fingers but is not wet or overly sticky.If the dough feels too sticky, add a tablespoon more flour at a time until it reaches this tacky consistency.If using a bread machine, add the potato-milk mixture, yeast, and all the flour to the machine and select the dough kneading cycle for about 8 minutes, skipping this step.
- First Rise – Let Dough Double in Size: Lightly grease a large mixing bowl with olive oil to prevent sticking. Transfer the kneaded dough into the bowl, turning once to coat the entire surface lightly with oil. This prevents the dough from drying out during the rising process. Cover the bowl tightly with plastic wrap or place a damp kitchen towel over the top to retain moisture. Find a warm, draft-free spot in your kitchen (such as inside a turned-off oven with the light on) and allow the dough to rise undisturbed for approximately 2 hours. Alternatively, you may refrigerate the dough overnight for a slower fermentation, which enhances flavor. You’ll know the dough has risen sufficiently when it has roughly doubled in volume.To test, gently press your fingertip into the dough; if the indentation remains and doesn’t spring back quickly, the dough is ready.
- Shape Dough and Prepare Loaf Pans: Once risen, gently deflate the dough by pressing down with your hand to release built-up gases. Turn the dough onto a clean, lightly floured surface. Knead it a few times to smooth and redistribute the yeast. Using a pastry scraper or sharp knife, divide the dough into two equal portions for two loaves. Lightly grease two 8×4-inch loaf pans with olive oil, ensuring every surface is coated to prevent sticking. Place each half of the dough into its prepared pan, pressing gently to fit it evenly across the bottom. Smooth the surface lightly with your fingertips.
- Second Rise – Prepare for Baking: Brush the top of each loaf lightly with olive oil to keep the crust tender during the final rise and baking. Cover the pans loosely with plastic wrap to protect the dough and place them in a warm spot. Allow the dough to rise again for 45 minutes to 1 hour, or until it has doubled in size and rises just above the edges of the pans.
- Preheat Oven and Bake Bread: About 15 minutes before baking, preheat your oven to 350°F (175°C) and position the rack in the middle. Remove the plastic wrap from the loaf pans. Place the pans carefully on the middle rack of the oven. Bake for 40 to 45 minutes. Begin checking the bread at 35 minutes to monitor browning. The bread is done when it develops a rich golden-brown crust and registers an internal temperature between 190°F and 200°F (88°C to 93°C). If you prefer a crispier crust, carefully remove the loaves from the pans after baking and place them directly on the oven rack for an additional 5 minutes to firm up the sides with direct heat.
- Cooling and Removing Bread from Pans: Once baked, immediately run a dull knife or butter knife around the edges between the bread and pan to loosen the loaves gently. Turn the pans upside down onto a wire cooling rack to release the bread. Allow the loaves to cool completely at room temperature before slicing to ensure the crumb sets properly and prevents tearing.
- Serving and Storing Your Homemade Potato Bread: Slice the bread with a serrated knife and enjoy fresh with butter, jam, or your favorite sandwich fillings. Leftover bread can be stored in an airtight container at room temperature for up to 3 days or frozen for longer storage. To freeze, slice first and wrap each slice or loaf tightly in plastic wrap and foil. Thaw at room temperature or toast directly from frozen.
Notes
- Use russet potatoes for the best texture and flavor; waxy potatoes may alter the crumb.
- Save the potato cooking water to substitute part or all of the milk, adding subtle flavor and reducing waste.
- Make sure the potato-milk mixture is warm, not hot—yeast dies at temperatures above 130°F (54°C).
- If the dough feels too sticky during kneading, add flour gradually, but avoid over-flouring to keep bread soft.
- Rising times may vary depending on your kitchen’s temperature and humidity; allow the dough to fully double in size.
- For a crispier crust, remove the bread from the pans after baking and place it directly in the oven for 5 minutes.
- This bread freezes well; slice before freezing for easy thawing and use.
Chef’s Secrets for Tender Potato Bread
The secret to this bread’s soft, moist crumb lies in the mashed potato addition.
Potatoes add moisture and starch that keep the bread tender longer than traditional recipes.
Heating the milk with salt and sugar not only dissolves ingredients but also helps develop a balanced flavor that complements the potato’s mild earthiness.
Using instant yeast ensures a reliable, quick rise without the fuss of proofing active dry yeast, making the process easier for all bakers.
Be mindful of the dough’s temperature at every stage to protect the yeast’s activity; warm, not hot liquids and a draft-free rising spot will yield the best rise and texture.
Lastly, a gentle kneading with the dough hook develops gluten gradually, preserving softness while providing enough structure for a satisfying chew.
Serving Suggestions That Delight Every Time
This potato bread is incredibly versatile—serve it fresh toasted with butter and jam for breakfast, or use it as the base for hearty sandwiches filled with deli meats, cheeses, or roasted vegetables.
Its slightly sweet and earthy flavor pairs beautifully with creamy soups like tomato bisque or roasted butternut squash.
For a fun twist, turn slices into French toast or bread pudding, where the tender crumb soaks up custards and sauces beautifully.
For gatherings, cut the bread into cubes for crostini topped with avocado or tapenade.
The bread’s tender yet sturdy texture holds up well to both spreads and robust fillings, making it a dependable choice for any meal.
Storage Tips for Freshness and Flavor
To keep your potato bread fresh, store it at room temperature in a paper bag or loosely wrapped in a clean kitchen towel to allow some airflow and prevent moisture buildup, which causes sogginess.
Avoid plastic wrap or airtight containers unless freezing. If you plan to store bread longer than a few days, slice it first, wrap slices individually or the whole loaf tightly in plastic wrap followed by foil, and freeze.
To thaw, leave at room temperature or toast slices directly from frozen for a fresh-baked taste anytime.
Reheat leftover bread in the oven at low temperature for a few minutes to revive crust crispness without drying the crumb.
Frequently Asked Questions About This Bread
Q1: Can I substitute the milk with a non-dairy alternative?
Yes, you can replace milk with unsweetened plant-based milk such as almond or oat milk. The texture may be slightly different but the bread will still be delicious.
Q2: What if I don’t have instant yeast?
You can use active dry yeast instead, but dissolve it in warm water or milk first and allow it to proof for 5-10 minutes until bubbly before adding to the dough.
Q3: How do I know when the bread is fully baked?
The internal temperature should be between 190°F and 200°F (88°C to 93°C). The crust will be golden brown and sound hollow when tapped on the bottom.
Q4: Can I make this bread gluten-free?
This recipe relies on gluten for structure, so it is not suitable for gluten-free baking without specialized flours and binding agents.
Q5: How long can I store homemade potato bread?
At room temperature, it stays fresh for about 2-3 days. Refrigeration is not recommended as it speeds up staling. Freezing extends shelf life up to 3 months.
This recipe is inspired by simplyrecipes and has been carefully refined to enhance clarity, streamline preparation steps, and ensure accurate results. We’ve also included health benefits, nutritional highlights, and Must-Have Tools to help you get the best results every time you cook.


