All products are selected by our editorial team for quality. If you buy through our links, we may earn a small commission at no extra cost to you.
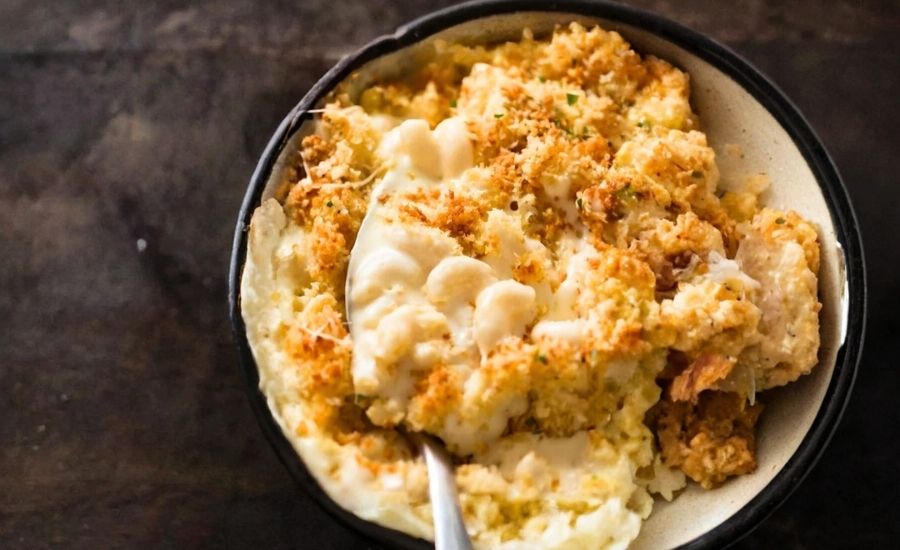
Nagi’s Baked Mac and Cheese stands out as a comforting classic elevated by a rich, creamy cheese sauce featuring Gruyere and mozzarella for an indulgent yet balanced flavor and melt.
Beyond its irresistible taste and crunchy panko topping, this recipe offers substantial protein with 23 grams per serving, making it more than just comfort food—it’s nourishing too.
Though indulgent, it delivers calcium and potassium, with a modest fiber content from the pasta.
The use of homemade cheese sauce without processed shredded cheese ensures a smooth texture and quality taste.
This recipe is perfect for everyday cooking because it’s straightforward, with a prep time under 15 minutes and the ability to be made ahead or frozen for convenience.
The combination of familiar ingredients, hearty portion sizes, and meal-prep flexibility make it a satisfying, crowd-pleasing dish ideal for family dinners or potlucks.
Must-Have Tools for Perfect Results
Large Pot
Essential for boiling the macaroni to the perfect al dente texture. A heavy-duty pot ensures even heating and prevents pasta from sticking, making it indispensable for any pasta-based recipe.
Whisk
Crucial for stirring the roux and milk mixture to create a smooth, lump-free cheese sauce. A quality whisk helps incorporate ingredients evenly and is versatile for sauces, dressings, and batters.
Ovenproof Skillet (e.g., Lodge 26cm Cast Iron)
Perfect for making the sauce and then transferring directly to the oven for baking. Cast iron retains heat well, promoting even cooking and making cleanup easier since you use one pan.
Cheese Grater
Freshly shredding cheese is key to a creamy sauce without the powdery texture of pre-shredded cheese. A sharp, sturdy grater ensures quick, uniform shredding, which enhances flavor and melt.
Measuring Cups and Spoons
Accurate measurement of flour, butter, milk, and seasoning ensures consistent texture and taste. Essential for any baking or cooking to achieve reliable results.
Baked Macaroni and Cheese
Equipment
- 1 Large Pot – for boiling pasta
- 1 whisk (for sauce preparation)
- 1 ovenproof skillet or 2.5L baking dish (for assembling and baking)
- 1 cheese grater (for shredding cheese)
- Measuring cups and spoons (for precise ingredient measurement)
Ingredients
For the Pasta:
- 250 g 8 oz elbow macaroni
- 1 tablespoon 15g unsalted butter or 2 teaspoons vegetable oil
For the Crunchy Topping:
- ⅔ cup panko breadcrumbs
- 2 tablespoons 30g unsalted butter, melted
- ¼ teaspoon salt
For the Cheese Sauce:
- 4 tablespoons 60g unsalted butter
- ⅓ cup all-purpose flour
- 3 cups warm milk whole or low-fat
- 2 cups shredded Gruyere cheese or preferred melting cheese like cheddar or Colby
- 1 cup shredded mozzarella cheese
- ¾ teaspoon salt
Optional Seasonings:
- 1 teaspoon garlic powder
- ½ teaspoon onion powder
- ½ teaspoon mustard powder
Instructions
- Cook Pasta to Almost Done: Fill a large pot with water and bring it to a rolling boil. Add the elbow macaroni and cook according to the package instructions, but reduce the cooking time by one minute to keep the pasta firm. Drain well and immediately toss the hot pasta with the butter or oil to lightly coat and prevent sticking. Set aside to cool while you prepare the sauce.
- Prepare the Breadcrumb Topping: In a small bowl, combine the panko breadcrumbs, melted butter, and salt. Mix thoroughly to evenly coat the breadcrumbs. Set this aside for later use.
- Make the Cheese Sauce (Roux and Milk Base): In a large saucepan or oven-safe skillet, melt the butter over medium heat. Sprinkle in the flour and stir constantly with a whisk for about one minute, allowing the mixture to form a smooth paste (roux).Slowly pour in about one cup of the warm milk, whisking continuously to dissolve the roux completely. Gradually add the remaining milk, whisking to ensure the sauce is lump-free.
- Thicken and Flavor the Sauce: Continue cooking the sauce over medium heat, stirring regularly, for 5 to 8 minutes until it thickens to a creamy consistency. When the sauce coats the back of a spoon and leaves a clean path when you run your finger across, it’s ready. Stir in the salt and optional seasonings like garlic, onion, and mustard powders to enhance flavor.
- Add Cheese to Sauce: Remove the sauce from heat and quickly stir in the shredded Gruyere and mozzarella cheeses until evenly combined. The cheese should melt smoothly into the warm sauce without needing to cook further.
- Combine Pasta and Cheese Sauce: Pour the cheese sauce over the buttered pasta in the pot and stir gently but thoroughly to coat all noodles evenly. Transfer this cheesy pasta mixture into your ovenproof skillet or baking dish.
- Add Topping and Bake: Sprinkle the buttery panko breadcrumb mixture evenly over the top of the pasta. Place the dish in a preheated oven at 180°C (350°F) and bake uncovered for about 25 minutes or until the topping turns a light golden brown. Avoid overbaking to maintain a creamy sauce beneath.
- Serve and Enjoy: Remove from the oven and let it rest briefly. Serve immediately, optionally garnished with fresh parsley for a touch of color and freshness.
Notes
- Breadcrumb Choice: Panko breadcrumbs create a delightfully crunchy topping due to their larger, airy flakes. If unavailable, regular breadcrumbs can be substituted but may result in a less crisp crust.
- Cheese Selection: Gruyere offers a fantastic balance of rich flavor and meltability. Cheddar, Colby, Monterey Jack, or provolone can be used as alternatives. Mozzarella adds a wonderful stretch and creaminess without excess saltiness. Always grate cheese fresh to avoid the anti-caking agents found in pre-shredded varieties, which can affect sauce texture.
- Salt Adjustment: Cheese saltiness varies. Taste your sauce before adding extra salt, especially if using milder cheeses like Jarlsberg.
- Pasta Butter Toss: Coating pasta with butter after draining helps prevent the noodles from absorbing too much sauce and becoming mushy during baking. Cooling the pasta before mixing with sauce also contributes to better texture.
- Baking Dish Size: A 2.5-liter (10-cup) baking dish or a 9×13 inch pan works well. Avoid using too large a dish, as the mixture will spread thin and bake unevenly.
- Make-Ahead and Storage: This dish is best fresh but can be prepared in advance. Cook and butter the pasta, make the sauce, combine, top with breadcrumbs, then refrigerate or freeze. When ready, thaw fully if frozen, cover with foil, and bake at 180°C (350°F) for 15 minutes before uncovering and baking an additional 25 minutes. Leftovers reheat well in the microwave followed by a quick crisp under a broiler or grill.
Chef’s Secrets for Creamy Perfection
Achieving the perfect baked mac and cheese is all about layering flavors and textures thoughtfully.
The key lies in making a smooth, lump-free cheese sauce by slowly whisking warm milk into the roux and cooking it just until thickened.
Using freshly grated cheese, especially a mix like Gruyere and mozzarella, ensures optimal meltability and flavor without the chalky texture that pre-shredded cheeses can bring.
Tossing the pasta with butter right after draining is a subtle but effective technique that prevents the noodles from swelling excessively during baking, keeping the final dish creamy rather than gluey.
Lastly, don’t overbake! Bake just until the topping is golden and the sauce is bubbly to maintain that luscious creaminess beneath the crunchy crust.
If you like, sprinkle fresh herbs like parsley just before serving for a fresh contrast.
Serving Suggestions to Impress Guests
This baked mac and cheese shines as a comforting side for weeknight dinners or a star on your holiday table.
Pair it with a crisp green salad tossed in a tangy vinaigrette to balance the richness of the cheese.
Roasted or steamed vegetables such as broccoli, green beans, or asparagus complement the dish well, adding freshness and texture contrast.
For heartier meals, serve alongside roasted chicken, grilled steak, or baked fish to round out your plate.
This dish also works perfectly for casual potlucks or family gatherings—consider making it a crowd-pleaser centerpiece by adding a crispy bacon or caramelized onion topping variation.
Leftovers can be a delicious base for a quick lunch, simply reheated with a sprinkle of fresh herbs or extra cheese.
Storage Tips for Best Freshness
Baked mac and cheese is best enjoyed fresh but can be stored successfully for future meals. Allow the dish to cool completely before transferring leftovers to an airtight container.
It will keep well in the refrigerator for up to 3-4 days.
To reheat, microwave until warmed through, then finish under the broiler or grill for a minute or two to revive the crunchy topping.
For longer storage, freeze the baked dish before baking or after cooling post-bake.
Wrap tightly with foil and plastic wrap to prevent freezer burn, and thaw fully in the refrigerator before reheating.
Avoid reheating multiple times, as this can dry out the pasta and sauce.
Frequently Asked Questions Answered
1. Can I use different types of pasta?
Yes! While elbow macaroni is traditional, small pasta shapes like shells, cavatappi, or penne work well since they hold sauce nicely. Just adjust cooking times accordingly.
2. Is it okay to use pre-shredded cheese?
Freshly grated cheese is recommended because pre-shredded varieties often contain anti-caking agents that prevent smooth melting and can give a gritty texture.
3. Can I make this recipe dairy-free or vegan?
You can substitute plant-based milk and use vegan butter and cheese alternatives. The sauce texture may vary, so consider adding nutritional yeast for cheesy flavor and a thickener like cornstarch.
4. How do I prevent the sauce from being too thick or thin?
Cook the sauce until it coats the back of a spoon. If too thick, whisk in a splash of milk to loosen; if too thin, cook a bit longer to reduce it.
5. Can I prepare this recipe ahead of time?
Absolutely! Prepare the pasta and sauce separately, combine, add topping, then refrigerate or freeze. Bake when ready, adding extra baking time if baking from cold.
This recipe is inspired by recipetineats and has been carefully refined to enhance clarity, streamline preparation steps, and ensure accurate results. We’ve also included health benefits, nutritional highlights, and Must-Have Tools to help you get the best results every time you cook.
