All products are selected by our editorial team for quality. If you buy through our links, we may earn a small commission at no extra cost to you.
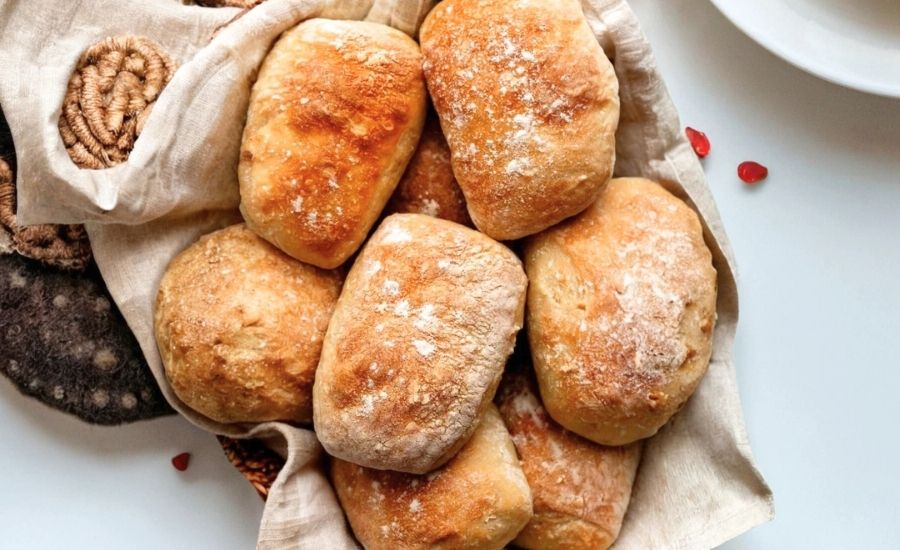
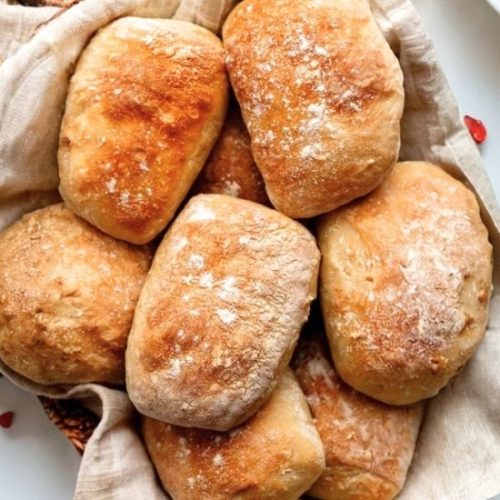
This homemade ciabatta bread recipe captures the essence of traditional Italian baking with its rustic flour-dusted crust and delightfully chewy, airy crumb.
What makes this recipe especially appealing is its minimal ingredient list—just flour, yeast, salt, and water—yet it produces complex flavors through the slow fermentation process of the biga (preferment).
This extended fermentation enhances digestibility and flavor development naturally.
Nutritionally, ciabatta bread offers moderate protein content (about 7.4 grams per roll), making it a decent plant-based protein source for bread.
It’s relatively low in fat, with only 2.8 grams per serving, primarily from the small amount of olive oil used for handling the dough, which adds heart-healthy monounsaturated fats.
The bread is carbohydrate-rich, supplying energy while being low in sugar and cholesterol-free.
This recipe’s reliance on bread flour contributes to a strong gluten network, resulting in its characteristic chewiness and open crumb.
A great choice for everyday cooking, this ciabatta bread is perfect for meal prep, sandwiches, or serving alongside soups and salads.
While it requires patience for resting and rising, the active hands-on time is minimal, making it a satisfying baking project that rewards you with bakery-quality bread at home.
Must-Have Tools for Perfect Results
Kitchen Scale
Essential for accurately measuring flour and water by weight, ensuring consistent dough hydration and perfect texture every time.
A kitchen scale elevates all your baking by improving precision and reducing guesswork.
Stand Mixer with Dough Hook
This tool simplifies kneading the sticky ciabatta dough, saving time and effort while developing gluten effectively.
Beyond bread, it’s versatile for mixing batters, whipping cream, and more.
Bench Scraper
Crucial for handling and shaping the wet, sticky dough without deflating it.
It doubles as a cleanup tool to scrape flour and dough residue, making it indispensable for any bread baker’s toolkit.
Silicone Spatula
Perfect for mixing the preferment and initial dough ingredients gently without tearing the dough.
Its heat resistance and flexibility also make it ideal for a wide range of cooking tasks.
Instant-Read Thermometer
Ensures your bread reaches the ideal internal temperature (205–210°F), guaranteeing perfect doneness with a crisp crust and chewy interior.
This tool also enhances cooking accuracy in various recipes beyond bread.
Ciabatta Bread
Equipment
- 1 Large Mixing Bowl (for preferment and dough)
- 1 stand mixer with dough hook (optional but recommended)
- 1 Silicone Spatula or Wooden Spoon (for mixing)
- 1 Bench Scraper (for shaping and cutting dough)
- Baking Sheets or Parchment-lined Baking Surface (for baking)
- Instant-Read Thermometer (to test bread doneness)
- Cooling Rack (for bread cooling)
Ingredients
For the Preferment (Biga)
- 130 grams bread flour approximately 1 cup, lightly spooned
- ⅛ teaspoon active dry or instant yeast
- 120 milliliters room temperature water about 70°F / 21°C
For the Dough
- 1 teaspoon active dry or instant yeast
- 240 milliliters warm water around 100–110°F / 38–43°C
- 325 grams bread flour about 2 ½ cups, lightly spooned, plus extra for dusting
- 1 ½ teaspoons fine table salt
- Olive oil for coating hands and utensils
Instructions
- Prepare the Preferment (Biga): In a large mixing bowl, combine the bread flour and yeast. Pour in the room temperature water and stir with a flexible spatula until all flour is hydrated and the mixture forms a thick, sticky batter. Cover the bowl tightly with plastic wrap or a reusable cover and leave it to ferment at room temperature for 8 to 24 hours. This slow fermentation will develop flavor and improve dough texture.
- Activate the Yeast for the Dough: In a clean large bowl or the stand mixer bowl, sprinkle the yeast over the warm water. Let it sit undisturbed for 5 to 10 minutes until it becomes foamy and active, signaling the yeast is ready to work.
- Combine Dough Ingredients: Add the preferment (biga) to the activated yeast mixture. Sprinkle in the bread flour and salt. Using a silicone spatula or wooden spoon, gently mix until the dough comes together into a shaggy, uneven mass with no dry flour patches. If you’re using a stand mixer, fit it with a dough hook and mix on medium speed until uniform. The dough will be very sticky—that’s expected for ciabatta.
- Rest and Begin Stretch-and-Fold: Cover the bowl with plastic wrap or a towel and let the dough rest at room temperature for 30 minutes. After resting, perform the first stretch-and-fold: lightly oil your hands and the edge of a spatula. Visualize the dough as a clock face, lift the dough at 12 o’clock, stretch it gently upward, then fold it down over the center. Turn the bowl 90 degrees and repeat until you’ve folded the dough eight times in total (two full rotations). Cover and rest for another 30 minutes.
- Repeat Stretch-and-Folds: Repeat the stretch-and-fold process three more times, allowing the dough to rest for 30 minutes between each set. This technique strengthens the gluten while handling the wet dough gently. After the fourth stretch-and-fold, cover the bowl and refrigerate the dough for at least one hour, or up to 24 hours, to develop flavor and improve texture.
- Shape the Dough: Generously dust your work surface with flour. Lightly oil your hands or a spatula, then gently scrape the dough onto the floured surface. Sprinkle flour over the dough as well to keep it manageable. Carefully stretch the dough into a rough rectangle approximately 10 by 7 inches.
- For rolls: Using a floured bench scraper or knife, cut the dough into 8 roughly equal pieces (about 2.5 by 3.5 inches each).
- For loaves: Cut the dough into two equal rectangles (roughly 5 by 7 inches each).
- Lift each piece carefully with floured hands and place on a parchment-lined tray, spacing them at least 2 inches apart to allow for expansion. If the dough loses shape, gently reshape without pressing too hard.
- Final Proof: Lightly dust the dough pieces with flour and cover loosely with a clean kitchen towel or parchment paper. Leave to proof at room temperature for 1 hour, until puffy and slightly risen.
- Preheat Oven and Prepare Steam: Position one oven rack at the bottom and one in the middle. Place a baking sheet on the middle rack and preheat the oven to 450°F (232°C) for about 1 hour.Just before baking, place a shallow metal pan or cast-iron skillet on the bottom rack and fill it with several cups of ice cubes to create steam during baking.
- Bake the Bread: Remove the baking sheet from the oven carefully. Slide the parchment with the proofed dough onto the hot baking sheet. Optionally, lightly mist or flick water over the dough surface for extra steam. Quickly place the pan with ice cubes in the oven’s bottom and close the door immediately to trap steam.
- Bake for 20–25 minutes, until the crust is deeply golden and the bread sounds hollow when tapped. For accuracy, use an instant-read thermometer to ensure the internal temperature reaches between 205°F and 210°F (96–99°C).
- Cool Before Serving: Remove the bread from the oven and transfer to a cooling rack. Allow it to cool completely, about 45 minutes, before slicing to avoid a gummy texture inside.
Notes
- Flour Choice: Bread flour is recommended for optimal gluten development and chewy texture. You can substitute with all-purpose flour, but expect a softer crumb and less rise. Avoid whole wheat flour here, as it changes dough behavior significantly.
- Yeast Options: Both active dry and instant yeast work well; instant yeast tends to activate faster. No adjustments needed if switching types.
- Make Ahead: The preferment can ferment up to 24 hours. After all stretch-and-folds, the dough can be refrigerated up to 24 hours to improve flavor.
- Freezing: Fully baked ciabatta freezes well for up to 3 months. Thaw at room temperature before serving.
- Flavor Variations: For herb-infused bread, add 2½ tsp fresh chopped rosemary or 1 tsp dried rosemary plus 2 minced garlic cloves when adding salt. Substitute herbs as you like.
- Alternative Baking Surfaces: A pizza stone preheated for an hour can replace a baking sheet. Place dough directly on the stone when baking.
- Using Sourdough: To incorporate sourdough starter, replace 50g each of flour and water in the dough with 100g active starter. Maintain the yeast amounts to ensure good rise.
Chef’s Secrets for Perfect Ciabatta
Achieving the signature airy crumb and chewy texture of ciabatta starts with patience and technique.
The slow fermentation of the biga (preferment) is key—it not only builds flavor but also strengthens the dough’s gluten network.
Resist the temptation to add extra flour during mixing; the dough should be wet and sticky.
This moisture helps create those beautiful, irregular air pockets inside the bread.
The stretch-and-fold method gently develops the dough’s structure without aggressive kneading, which can deflate the bubbles.
Generously flouring your hands and work surface when shaping helps manage the sticky dough without compressing it.
Finally, baking with steam—created by ice cubes in a hot pan—forms a crisp, crackly crust that contrasts perfectly with the soft interior.
Using an instant-read thermometer to check doneness ensures your bread is fully baked and avoids a gummy center.
Serving Suggestions for Ciabatta Bread
Ciabatta’s rustic charm and open crumb make it a versatile accompaniment for many dishes.
Serve freshly sliced rolls with a drizzle of good-quality olive oil and balsamic vinegar for dipping.
It’s excellent alongside hearty soups like tomato basil or minestrone, as the porous texture soaks up broths beautifully.
For sandwiches, ciabatta holds up well to fillings like roasted vegetables, grilled chicken, or fresh mozzarella and pesto.
Toast slices for a crunchy base to bruschetta topped with tomatoes and herbs.
You can also use leftover bread to make panzanella salad or homemade croutons, turning your ciabatta into a star ingredient in various meals.
Storage Tips to Keep Bread Fresh
To enjoy your ciabatta bread at its best, allow it to cool completely before storing.
Keep it loosely wrapped in a clean kitchen towel or paper bag at room temperature to maintain the crust’s crunch while preventing it from drying out.
Avoid plastic bags for fresh bread, as they trap moisture and soften the crust. If you won’t consume the bread within a couple of days, slice and freeze it in an airtight bag.
Toast slices directly from the freezer for convenient, fresh-tasting bread anytime.
If your bread starts to stale, reviving it with a few minutes in a hot oven can restore crispness.
Frequently Asked Questions About Ciabatta
1. Can I use all-purpose flour instead of bread flour?
Yes, you can substitute all-purpose flour in a 1:1 ratio, but expect a slightly less chewy texture and a softer crumb because all-purpose flour has less protein.
2. How important is the biga (preferment) in this recipe?
The biga is crucial for developing flavor and improving dough structure. It’s what gives ciabatta its distinct taste and open crumb. Skipping it will affect the bread’s quality.
3. What’s the best way to handle the sticky dough?
Use plenty of flour on your hands, bench scraper, and work surface. Lightly oiling your hands also helps prevent sticking without adding extra flour that can toughen the dough.
4. Can I bake ciabatta without steam?
While you can bake without steam, adding steam during the first few minutes of baking helps develop the crisp crust that ciabatta is known for. Use ice cubes or mist water in the oven to create steam.
5. How do I know when the bread is fully baked?
Tap the bottom of the bread; it should sound hollow. For the most accurate check, use an instant-read thermometer and ensure the internal temperature is between 205°F and 210°F (96–99°C).
This recipe is inspired by sallysbakingaddiction and has been carefully refined to enhance clarity, streamline preparation steps, and ensure accurate results. We’ve also included health benefits, nutritional highlights, and Must-Have Tools to help you get the best results every time you cook.
