All products are selected by our editorial team for quality. If you buy through our links, we may earn a small commission at no extra cost to you.
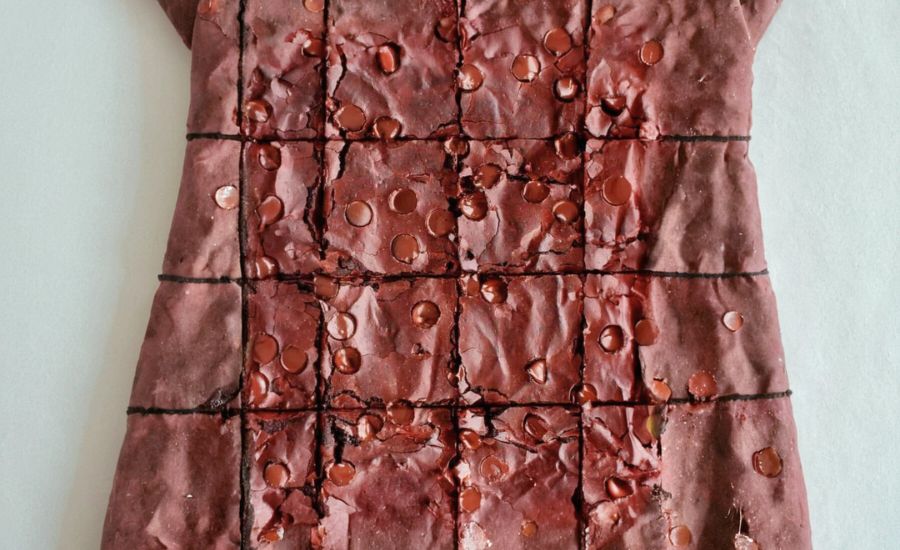
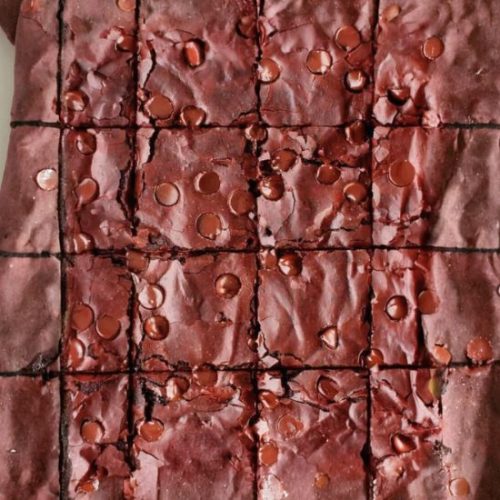
These homemade brownies strike the perfect balance between indulgence and simplicity.
Rich, fudgy, and intensely chocolaty, they offer a gooey center with delightfully crisp edges—thanks to a carefully calibrated mix of cocoa powder, dark chocolate chips, and just the right baking technique.
With only 5 minutes of prep time, this recipe is ideal for busy bakers or weeknight cravings.
The inclusion of olive oil or canola oil provides healthier fats compared to butter, making these brownies slightly lighter on saturated fat.
Each bite offers plant-based fats and a touch of fiber from cocoa powder. With a small tweak in sugar, they can also fit into a lower-sugar lifestyle.
Whether you’re baking for a gathering or preparing freezer-friendly treats for the week, these brownies are a fast, reliable, and deeply satisfying option that’s just as good the next day.
Must-Have Tools for Perfect Results
USA Pan Bakeware 8×8 Baking Dish
This nonstick, heavy-duty pan ensures even baking without overcooking the edges. The smaller size is essential to get that rich, fudgy center. A quality 8×8 dish is a must-have for brownies, bars, and small casseroles.
Chosen Foods Avocado Oil Cooking Spray
Perfect for greasing your pan and parchment paper without adding artificial flavors. This spray helps prevent sticking and adds heart-healthy monounsaturated fats to your recipe.
Reynolds Kitchens Parchment Paper Sheets
Makes brownie removal a breeze and keeps cleanup minimal. Parchment paper is a versatile staple for baking cookies, roasting veggies, and lining cake pans.
OXO Good Grips 3-Piece Mixing Bowl Set
These grippy, durable bowls are great for separating wet and dry ingredients. Their non-slip base and nesting design make them practical for everyday use.
Wilton Silicone Spatula Set
Perfect for folding thick brownie batter and smoothing the top before baking. These flexible spatulas are also great for scraping bowls clean and stirring hot foods.
Irresistible Brownies
Equipment
- (1) 8×8 Baking Dish
- (1) Cooking Spray (Avocado Oil recommended)
- (1) Sheet of Parchment Paper
- 2 Mixing bowls (medium and large)
- 1 Spatula
Ingredients
- 1½ cups granulated sugar
- ¾ cup all-purpose flour
- ⅔ cup unsweetened cocoa powder sift if lumpy
- ½ cup powdered sugar sift if lumpy
- ½ cup dark chocolate chips
- ¾ teaspoon fine sea salt
- 2 large eggs
- ½ cup canola oil or extra virgin olive oil
- 2 tablespoons water
- ½ teaspoon pure vanilla extract
Instructions
- Prepare the Baking Pan: Preheat your oven to 325°F (165°C). Lightly coat an 8×8-inch square baking dish with nonstick cooking spray. Line the dish with parchment paper so it overhangs on the sides, then lightly spray the parchment as well. This setup will prevent sticking and help lift the brownies out easily after baking.
- Mix the Dry Ingredients: In a medium mixing bowl, whisk together the granulated sugar, all-purpose flour, cocoa powder, powdered sugar, dark chocolate chips, and salt. Stir until well combined, ensuring no lumps remain in the mixture. The chocolate chips will melt slightly during baking, adding pockets of richness to the brownies.
- Blend the Wet Ingredients: In a separate large bowl, whisk the eggs, oil, water, and vanilla extract until fully blended. The mixture should be smooth and slightly glossy.
- Combine Wet and Dry Mixtures: Gradually add the dry ingredients to the bowl with the wet mixture. Use a spatula or wooden spoon to stir gently until the batter just comes together. It will be thick and dense, which is key for that fudgy texture. Avoid overmixing to prevent a cakey result.
- Spread and Bake: Pour the thick brownie batter into your prepared pan and use a spatula to spread it evenly across the surface. Place the pan in the preheated oven and bake for 40 to 48 minutes. The brownies are done when a toothpick inserted near the center comes out with only a few moist crumbs attached (not wet batter).
- Cool and Slice: Remove the pan from the oven and place it on a wire rack. Let the brownies cool completely in the pan—this will take about 2 hours. Once cooled, lift them out using the parchment paper and slice into 16 squares.
Notes
- Sugar Reduction Option: You can reduce the granulated sugar to 1 cup if you prefer a less sweet brownie. The texture will remain rich and fudgy.
- Oil Choices: Olive oil adds a slightly fruity note that pairs well with chocolate. If you want a more neutral flavor, go with canola oil.
- Baking Time Tip: It’s better to slightly underbake than overbake. The center should be gooey when they come out of the oven; they’ll firm up as they cool.
- Storage Advice: Store the cooled brownies in an airtight container at room temperature for up to 3 days. For longer storage, wrap tightly and freeze for up to 1 month.
- Serving Texture Preference: For extra-firm brownies, refrigerate them after cooling. This gives a chewier, more compact texture.
Chef’s Secrets for Ultimate Brownies
Achieving the perfect brownie texture lies in balancing moistness with a slight crisp on the edges.
Using an 8×8-inch pan rather than a larger dish concentrates the heat and ensures fudgy centers without drying out.
Sifting the cocoa powder and powdered sugar helps avoid lumps, contributing to a smooth batter.
Incorporating both granulated and powdered sugar creates depth in sweetness and texture. Choosing olive oil introduces a subtle fruity richness, but canola oil is an excellent neutral option if preferred.
Resist overmixing once the dry and wet ingredients combine—overworking can develop gluten and make brownies cakey rather than fudgy.
Finally, be patient with cooling; letting the brownies fully set at room temperature or chilling them helps them slice cleanly and improves their fudgy consistency.
Serving Suggestions to Impress Everyone
Serve these brownies slightly warmed with a scoop of vanilla ice cream or a drizzle of salted caramel for an indulgent dessert experience.
For a more decadent touch, sprinkle chopped toasted nuts, like walnuts or pecans, on top before baking.
These brownies also pair wonderfully with fresh berries or a dollop of whipped cream for balance.
For a simpler snack, cut into bite-sized squares and enjoy with a cup of coffee or milk.
They’re also excellent for lunchbox treats or casual get-togethers, as their rich texture and balanced sweetness satisfy without overwhelming.
Storage Tips to Keep Fresh
Brownies are best stored in an airtight container at room temperature where they remain moist for up to three days.
If you prefer firmer brownies, refrigeration will prolong freshness and give a chewier texture, but bring them back to room temperature before serving to enjoy the full flavor.
For longer storage, wrap brownies tightly in plastic wrap and foil, then freeze for up to one month.
Thaw frozen brownies overnight in the fridge or on the counter.
Avoid storing brownies in the baking pan with plastic wrap, as condensation can lead to sogginess.
Proper storage maintains their fudgy texture and rich chocolate flavor.
Frequently Asked Questions About Brownies
1. Can I substitute oil with butter?
Yes, melted butter can replace oil for a richer, more buttery flavor. Keep the same quantity but note the texture might be slightly denser.
2. Why are my brownies cakey instead of fudgy?
Overmixing the batter or using a larger pan can cause cakey brownies. Stick to the recipe’s mixing instructions and pan size for fudgy results.
3. Can I use Dutch-processed cocoa instead of natural cocoa?
You can substitute, but Dutch-processed cocoa is less acidic and may affect the leavening slightly. Expect a milder chocolate flavor.
4. How do I know when brownies are done baking?
Insert a toothpick near the center—it should come out with a few moist crumbs, not wet batter. Removing them early prevents overbaking and dryness.
5. Are these brownies freezer-friendly?
Absolutely! Wrap tightly and freeze for up to a month. Thaw overnight for best texture, and enjoy as if freshly baked.
This recipe is inspired by loveandlemons and has been carefully refined to enhance clarity, streamline preparation steps, and ensure accurate results. We’ve also included health benefits, nutritional highlights, and Must-Have Tools to help you get the best results every time you cook.