All products are selected by our editorial team for quality. If you buy through our links, we may earn a small commission at no extra cost to you.
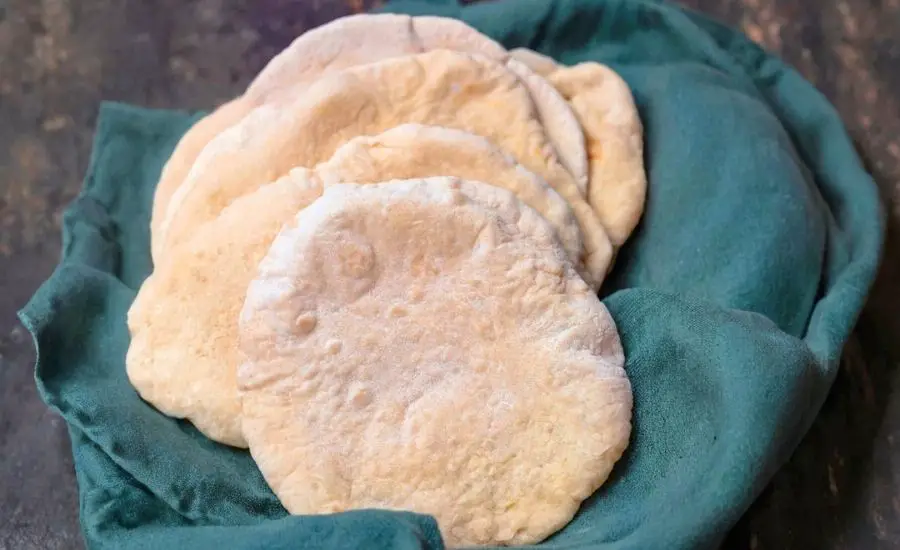
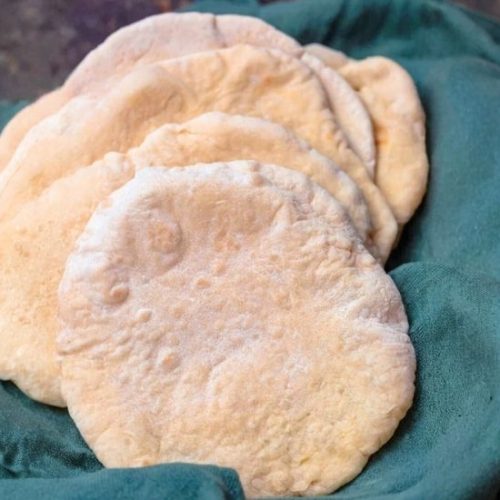
This homemade pita bread recipe stands out for its simplicity, versatility, and satisfying flavor.
Using just a handful of pantry staples, you can craft soft, puffy pitas that rival your favorite bakery’s version.
The option to use a mix of all-purpose and whole wheat flour boosts the fiber content, while olive oil contributes heart-healthy monounsaturated fats and enhances the dough’s elasticity.
Unlike store-bought versions, this pita contains no preservatives, and you can control the sodium content.
With plant-based ingredients and minimal fat, it’s a nourishing option for anyone seeking a low-saturated-fat, dairy-free bread.
The recipe is also adaptable—make it fully whole wheat or gluten-free with reliable results.
Whether baked in the oven or cooked on the stovetop, each pita puffs into a pocket ideal for stuffing or dipping.
Plus, the dough stores well in the fridge, making this recipe incredibly meal-prep friendly.
Quick to reheat, easy to freeze, and endlessly versatile, this pita is perfect for everyday sandwiches, wraps, or alongside dips like hummus or tzatziki.
Must-Have Tools for Perfect Results
Lodge Cast Iron Skillet
A heavyweight champion for stovetop cooking, this skillet delivers the high, consistent heat needed for beautifully puffed, toasted pita. It’s also ideal for searing meats, sautéing veggies, or baking cornbread.
USA Pan Baking Sheet
This commercial-grade baking sheet can handle the high 475°F oven temperature without warping. It ensures even heat distribution and is perfect for roasting veggies or cookies, too.
OXO Stainless Steel Dough Scraper
Essential for dividing the dough into equal portions and cleaning your work surface. Its sturdy edge glides through dough cleanly and is also handy for pastry or bread making.
Joseph Joseph Rolling Pin with Adjustable Rings
This rolling pin helps you roll the dough evenly to the perfect ¼-inch thickness. Adjustable rings ensure uniformity for consistent puffing—great for other baking projects too.
KitchenAid Mixing Bowl with Cover
Ideal for proofing your dough, this large, deep mixing bowl keeps your sponge and dough protected while rising. The included lid makes storage easy and airtight.
Pita Bread
Equipment
- 1 Large Mixing Bowl – For creating sponge and kneading dough
- 1 Plastic Wrap & Kitchen Towel – For covering dough during rising
- 1 Cast Iron Skillet or Heavy Baking Sheet – For cooking or baking pitas
- 1 Rolling Pin – For flattening dough to uniform thickness
- 1 Dough Scraper – To divide and shape dough pieces
- 1 Measuring Cups and Spoons Set – For accurate ingredient portions
- 1 Spatula or Tongs – For flipping pitas on the stovetop
Ingredients
- 1 cup lukewarm water
- 2 teaspoons active dry yeast
- ½ teaspoon granulated sugar
- 3 cups all-purpose flour divided
- Optionally: use 1½ cups all-purpose flour + 1½ cups whole wheat flour for a heartier texture
- 1 to 2 teaspoons kosher salt such as Diamond Crystal
- 2 tablespoons extra virgin olive oil plus extra for greasing
Instructions
- Activate the Yeast: In a large bowl, combine the lukewarm water, yeast, and sugar. Stir gently until dissolved. Add ½ cup of the flour and whisk to create a smooth, thin batter. Let this mixture sit uncovered in a warm spot for 15 minutes. You should see bubbles forming—this is your starter “sponge” coming to life.
- Form a Soft Dough: Add the salt, olive oil, and most of the remaining flour (reserve about ½ cup for kneading and dusting). Stir with a wooden spoon until the dough comes together into a sticky, shaggy mass. Lightly sprinkle with flour and knead it in the bowl for about 1 minute to gather any loose pieces.
- Knead Until Smooth: Transfer the dough to a floured work surface. Knead for 2–3 minutes until it feels smoother. Cover loosely and let it rest for 10 minutes. Then knead again for another 2–3 minutes. The dough should be slightly tacky but manageable—dust with a little flour if needed, but avoid over-flouring.
- Allow to Rise: Wipe the mixing bowl clean and coat the inside lightly with olive oil. Place the dough back in, turning it to coat all sides in oil. Cover tightly with plastic wrap and then drape a towel over the bowl. Let it rise in a warm place until doubled in size, about 1 hour.
- Divide and Rest: Gently deflate the dough and transfer it to a clean surface. Divide into 7 or 8 equal portions and shape into balls. Cover with a clean kitchen towel and let rest for about 10 minutes to relax the gluten.
- Roll into Flat Discs: Using a lightly floured rolling pin, roll each dough ball into a circle roughly 8–9 inches in diameter and ¼-inch thick. Rotate the dough as you roll to prevent sticking. If the dough resists and springs back, let it rest a few minutes before continuing.
- Bake or Cook the Pitas: Option A – Oven Method: Preheat the oven to 475°F. Place a heavy baking sheet or cast iron pan inside to heat as well. When hot, place 1–2 pitas at a time directly onto the surface. Bake for 2 minutes, flip, then bake for 1 more minute until puffed and golden. Remove and cover with a clean towel.
- Option B – Stovetop Method: Preheat a cast iron skillet over medium-high heat. Lightly brush with olive oil and wipe away the excess. Place one pita at a time into the pan. Cook for 30 seconds until bubbles form, then flip. Cook for 1–2 minutes per side until puffed and lightly browned. Keep cooked pitas wrapped in a towel to stay warm and soft.
Notes
- Make-Ahead Tip: You can prepare the dough in advance. After the initial rise, store it in the fridge, covered, for up to 1 week. Use as needed—bake one or two pitas at a time if desired.
- Whole Wheat Variation: For a nuttier, fiber-rich version, replace half the flour with whole wheat flour (1½ cups of each).
- Gluten-Free Adaptation: Substitute with a 1-to-1 gluten-free flour blend, such as Bob’s Red Mill Gluten-Free All-Purpose or 1:1 Baking Flour. Results may vary slightly, but it works well with proper heat.
- Storage & Freezing: Fresh pita is best warm, but leftovers can be stored in a sealed bag for up to 3 days. Reheat in a toaster, oven, or over an open flame. Freeze baked pitas for up to 3 months—reheat straight from frozen.
- Why Pitas Don’t Puff: Occasionally, a pita may not form a pocket. This is normal and still delicious! Ensuring high heat and evenly rolled dough helps maximize puffing success.
Chef’s Secrets for Perfect Puff
The key to perfectly puffed pita lies in three important factors: dough hydration, proper kneading, and high heat.
Using lukewarm water activates the yeast effectively, while giving the dough two short kneading sessions with a rest in between develops just enough gluten for elasticity without making the dough tough.
Another tip is letting the dough fully double during its first rise—this ensures that the yeast has time to work its magic.
When rolling the dough into discs, even thickness is essential; a too-thin or uneven disc won’t puff properly.
Finally, whether using the oven or stovetop, the surface must be hot enough to create a rapid burst of steam inside the dough, which forms the signature pocket.
Preheating your cast iron skillet or baking sheet is not optional—it’s a crucial step for success.
Creative Serving Suggestions to Try
Homemade pita is incredibly versatile and can be enjoyed warm or toasted, stuffed or sliced.
For a classic pairing, serve it alongside creamy hummus, baba ganoush, or tzatziki.
Use it as the base for Mediterranean sandwiches like chicken shawarma, grilled lamb, or falafel wraps.
Turn them into crispy pita chips by slicing and baking with olive oil and spices—perfect for dipping or topping salads.
You can even use pita as a pizza base: spread with sauce, sprinkle with cheese and toppings, and bake until bubbly.
Pitas also make great vehicles for breakfast sandwiches or mini quesadillas, proving just how useful they can be across meals.
Best Storage Tips and Freezing Advice
Fresh pita is best enjoyed warm from the skillet or oven, but it stores well for later use.
Allow pitas to cool completely, then store in an airtight plastic bag or container at room temperature for up to 3 days.
To reheat, warm in a toaster, oven, or even over a direct flame for a slightly charred effect.
For longer storage, wrap baked pitas individually in plastic wrap, then place in a freezer-safe bag and freeze for up to 3 months.
Reheat directly from frozen in a 350°F oven for 5–7 minutes or until warmed through.
If storing unbaked dough, keep it in the fridge for up to a week—just let it come to room temperature before rolling and baking.
Frequently Asked Questions (FAQs)
1. Why didn’t my pita puff up?
There are a few common reasons: the dough may not have been evenly rolled, the pan or oven might not have been hot enough, or the dough wasn’t rested enough before baking.
Try rolling the dough to a consistent ¼-inch thickness and ensuring your cooking surface is fully preheated.
2. Can I make pita without a cast iron skillet?
Yes! A heavy-duty baking sheet or pizza stone works well in the oven.
Just make sure it’s preheated thoroughly before placing the pita on it—this mimics the effect of traditional stone baking.
3. How do I make the dough ahead of time?
After the first rise, the dough can be covered tightly and stored in the refrigerator for up to 7 days.
When ready to use, allow it to come to room temperature before dividing and rolling.
4. Can I use only whole wheat flour?
Using 100% whole wheat flour is possible but may result in slightly denser pitas.
For a softer texture and better puff, a 50/50 mix of whole wheat and all-purpose flour is recommended.
5. What’s the best way to reheat pita bread?
The best methods are to use a toaster oven or warm the pita in a skillet over medium heat.
For added flexibility, you can also place it directly over a gas flame for a few seconds to lightly char and refresh its texture.
This recipe is inspired by themediterraneandish and has been carefully refined to enhance clarity, streamline preparation steps, and ensure accurate results. We’ve also included health benefits, nutritional highlights, and Must-Have Tools to help you get the best results every time you cook.
