All products are selected by our editorial team for quality. If you buy through our links, we may earn a small commission at no extra cost to you.
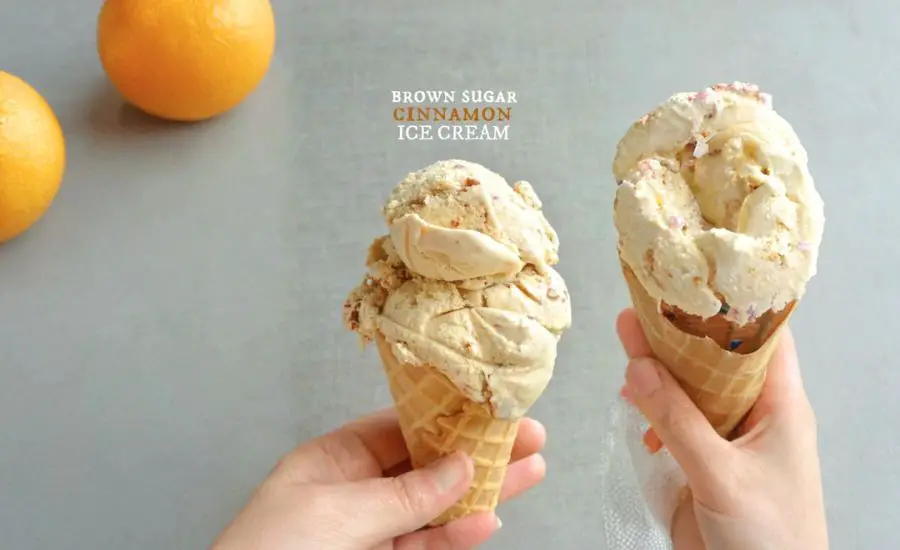
This Brown Sugar Cinnamon Ice Cream is a deliciously comforting twist on classic vanilla, infused with warm, aromatic cinnamon and rich brown sugar.
Its creamy texture and inviting spice make it the perfect companion for fruit pies, crisps, or enjoyed solo as a satisfying treat.
Nutritionally, this ice cream offers a good source of protein and healthy fats from the heavy cream and egg yolks, providing energy and satiety.
While indulgent, the recipe balances sweetness with a hint of spice, creating a flavorful dessert that’s both cozy and refreshing.
This recipe is ideal for home cooks because it uses simple, pantry-friendly ingredients and requires only basic technique, such as tempering eggs for custard.
Its make-ahead nature and freezer storage make it a great option for meal prep or entertaining, allowing you to whip up homemade ice cream anytime with impressive results.
Must-Have Tools for Perfect Results
Ice Cream Maker (Countertop Churner)
Essential for transforming your chilled custard base into smooth, creamy ice cream. This tool ensures consistent texture and aeration, making it perfect for all homemade frozen desserts.
Heavy-Bottomed Saucepan
Provides even heat distribution to gently cook and thicken the custard without scorching. A reliable saucepan is key for perfect custard bases and sauces in any kitchen.
Whisk
Vital for smoothly combining ingredients and tempering egg yolks to avoid scrambling. A good whisk ensures an even texture and is indispensable for baking and cooking alike.
Plastic Storage Container (e.g., Gladware or Tupperware)
Ideal for chilling your custard base safely without spills. Airtight containers help maintain freshness and are multipurpose for leftovers and meal prep.
Measuring Cups and Spoons
Precise measuring tools guarantee consistent ingredient ratios and reliable results, crucial for baking and ice cream making.

Brown Sugar Cinnamon Ice Cream
Equipment
- 1 medium heavy-bottomed saucepan
- 1 medium mixing bowl
- 1 Whisk
- 1 ice cream maker with freezer canister
- 1 plastic storage container (about 2-quart size)
Ingredients
- 2 cups heavy cream
- 1 cup whole milk
- ⅔ cup packed brown sugar
- 1 teaspoon ground cinnamon
- Pinch of kosher salt
- 1 teaspoon pure vanilla extract
- 5 large egg yolks
- ½ cup chopped cinnamon-flavored chips
Instructions
- Prepare the Cream Base: In a medium saucepan, combine the heavy cream, whole milk, brown sugar, ground cinnamon, and a pinch of kosher salt. Place the pan over medium heat and gently warm the mixture, stirring frequently. Heat until it just starts to simmer — small bubbles should appear at the edges — then remove from the heat and stir in the vanilla extract. Set aside to cool slightly.
- Temper the Egg Yolks: In a separate medium bowl, whisk the egg yolks until smooth and slightly pale. Slowly pour about half a cup of the warm cream mixture into the yolks in a thin, steady stream, whisking constantly. This gradual warming prevents the eggs from curdling. Repeat this process two more times, adding half a cup each time, until the yolks are fully tempered.
- Thicken the Custard: Return the tempered egg yolk mixture to the saucepan. Place the pan over medium-low heat and cook the custard, stirring constantly with a wooden spoon or heat-safe spatula. Continue cooking until the mixture thickens enough to coat the back of the spoon — this usually takes about 5 to 7 minutes. Do not let the mixture boil to avoid scrambling the eggs.
- Chill the Custard Base: Once thickened, transfer the custard into a clean container with a lid. Cover tightly and refrigerate for at least 4 hours or overnight. Chilling helps develop flavor and ensures the mixture is cold for churning.
- Churn the Ice Cream: Remove your ice cream maker’s canister from the freezer and pour the chilled custard base inside. Add the chopped cinnamon chips. Turn on the ice cream maker and churn according to the manufacturer’s instructions — typically 20 to 30 minutes — until it reaches a soft-serve consistency.
- Freeze to Firm Up: For a firmer texture, transfer the churned ice cream to a freezer-safe container. Cover it tightly and freeze for an additional 2 to 3 hours before serving. This step is optional but recommended if you prefer scoopable, hard-dipped ice cream.
Notes
- Chilling the base is crucial: Make sure the custard base is fully chilled before churning to achieve the best texture and prevent the ice cream from melting too quickly during the process.
- Tempering eggs slowly: Pour the hot liquid into the yolks gradually to avoid scrambling. Whisking constantly helps keep the mixture smooth.
- Cinnamon chips: These add delightful bursts of flavor and texture. If you can’t find cinnamon chips, substitute with finely chopped cinnamon candies or omit for a smoother ice cream.
- Ice cream maker options: Any style works—whether a countertop electric churner or a manual freezer bowl model—just be sure the bowl is thoroughly frozen if using the latter.
- Storage: Store leftover ice cream in an airtight container to prevent ice crystals and maintain creaminess for up to one week.
Chef’s Secrets for Creamy Perfection
Achieving the perfect creamy texture starts with carefully tempering the egg yolks, a step that gently brings up their temperature to avoid scrambling.
This technique ensures a smooth, rich custard base essential for luscious ice cream.
Use a heavy-bottomed saucepan to distribute heat evenly and prevent scorching while cooking the custard.
Don’t rush the chilling process—letting the base cool overnight enhances the flavors and improves the final consistency.
Adding chopped cinnamon chips near the end of churning gives delightful bursts of texture and flavor, but feel free to adjust the amount to suit your taste.
Lastly, patience during the freezing phase transforms soft-serve ice cream into a scoopable delight with a perfect balance of sweetness and spice.
Serving Suggestions to Impress Guests
This Brown Sugar Cinnamon Ice Cream shines as a companion to warm desserts like apple pie, peach cobbler, or blackberry crisp, adding a creamy, spicy contrast that elevates every bite.
For a creative twist, serve it alongside grilled fruit or roasted pears drizzled with honey and toasted nuts.
It also pairs beautifully with spiced coffee or a drizzle of caramel sauce for a decadent treat.
Whether you’re hosting a casual family dinner or a festive gathering, this ice cream’s rich flavors and inviting aroma will impress guests and satisfy sweet cravings effortlessly.
Storage Tips for Maximum Freshness
To maintain the creamy texture and rich flavor of your homemade ice cream, store it in an airtight container to prevent freezer burn and ice crystal formation.
Press a piece of parchment paper or plastic wrap directly onto the surface before sealing to minimize air exposure.
Keep the ice cream in the coldest part of your freezer, away from frequently opened doors, to avoid temperature fluctuations that can degrade texture.
Homemade ice cream is best enjoyed within one week for peak freshness, but can be stored up to two weeks if tightly sealed.
When ready to serve, allow the ice cream to sit at room temperature for 5–10 minutes to soften slightly for easier scooping.
Frequently Asked Questions About This Recipe
1. Can I make this ice cream without an ice cream maker?
Yes! You can pour the custard base into a shallow, freezer-safe dish and freeze it, stirring vigorously every 30 minutes for a few hours to break up ice crystals until smooth and creamy.
2. What if I don’t have cinnamon chips?
No problem—finely chopped cinnamon candies or even a sprinkle of extra ground cinnamon can add that warm spice note. You can also skip the chips for a smoother ice cream.
3. How do I know when the custard is thick enough?
The custard is ready when it coats the back of a spoon and holds a clear line when you run your finger through it. It should be thick but still pourable.
4. Can I use a different type of milk?
Whole milk is recommended for creaminess, but you can substitute with 2% milk or even a plant-based milk like coconut milk for a dairy-free twist, though the texture and flavor will vary.
5. How long can I store homemade ice cream?
For best quality, enjoy your ice cream within one week. Proper storage in an airtight container and freezing at a consistent temperature will help maintain its freshness.
This recipe is inspired by sugardishme and has been carefully refined to enhance clarity, streamline preparation steps, and ensure accurate results. We’ve also included health benefits, nutritional highlights, and Must-Have Tools to help you get the best results every time you cook.
