All products are selected by our editorial team for quality. If you buy through our links, we may earn a small commission at no extra cost to you.
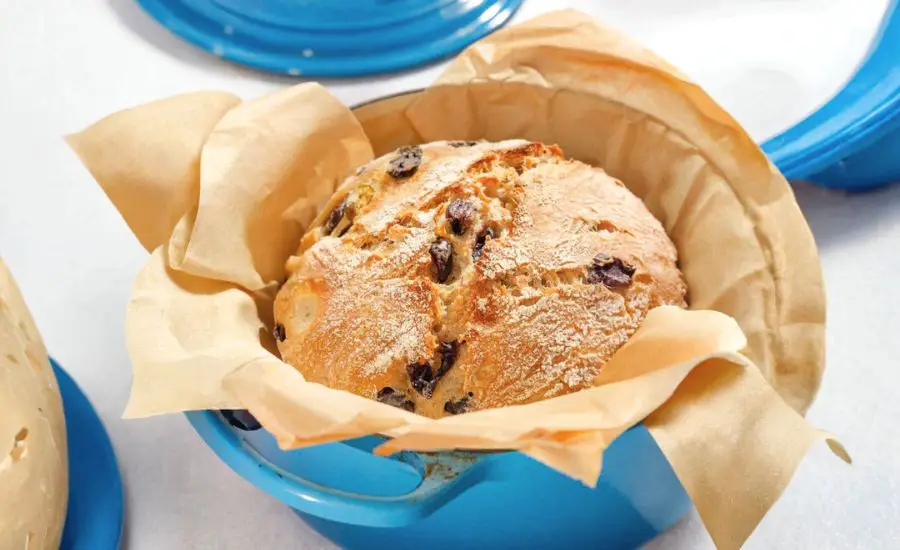
This olive bread recipe stands out for its rustic charm and simple, wholesome ingredients, delivering a crunchy crust and a tender, chewy interior packed with flavorful olives.
It’s an excellent source of plant-based protein and healthy fats from olives and olive oil, with moderate carbohydrates and low saturated fat—making it a heart-smart choice.
The bread is fiber-rich thanks to the flour, supporting digestion and sustained energy release.
What makes it truly special is its approachable technique despite the sticky dough, encouraging beginner bakers to experiment with artisan-style bread at home.
The long, slow fermentation (overnight rise) enhances flavor complexity and digestibility.
This bread is incredibly versatile and satisfying—perfect for sandwiches, dipping in olive oil, or accompanying Mediterranean meals.
It’s also ideal for meal prepping since it stores well at room temperature and freezes beautifully.
Must-Have Tools for Perfect Results
Dutch Oven
Essential for baking this bread with steam, the Dutch oven creates a crispy crust and tender crumb by trapping heat and moisture. Beyond bread, it’s a versatile pot for soups, stews, and braises, a kitchen staple for slow-cooked dishes.
Dough Scraper
This handy tool helps you handle sticky, high-hydration dough easily without adding extra flour. It also keeps your work surface clean and assists in folding and shaping dough. It’s indispensable for bakers of all levels.
Kitchen Scale
Precise measurement of flour and water is key to perfect bread consistency. A scale ensures accuracy, making your baking results reliable every time. It’s a worthwhile investment for any home cook.
Parchment Paper
Used to transfer the dough into the Dutch oven safely without sticking, parchment paper simplifies cleanup and prevents dough from tearing. It’s great for baking cookies, roasting vegetables, and more.
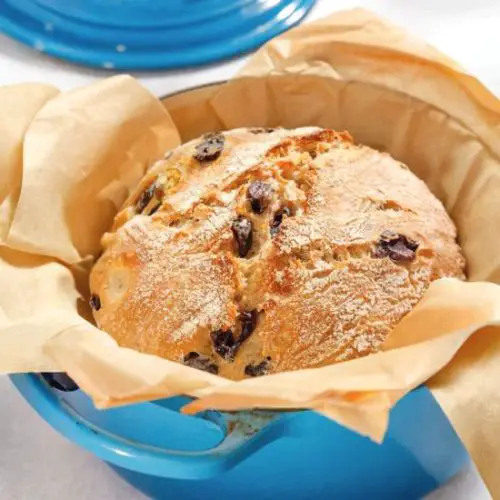
Olive Bread
Equipment
- 1 large mixing bowl
- 1 Dutch oven (6 to 8-quart)
- 1 dough scraper or rubber spatula
- Kitchen scale (optional but recommended)
- Parchment paper
- Tea towel (for second rise)
Ingredients
- 3 ½ cups 420g bread flour, plus extra for dusting
- 1 teaspoon kosher salt
- ¾ teaspoon instant yeast
- 1 ⅓ cups 320ml water, room temperature
- 1 packed cup 150g pitted olives, roughly chopped (mix Kalamata and green for best flavor)
- 1 tablespoon extra virgin olive oil
Instructions
- Combine Dry Ingredients and Olives: In a large bowl, whisk together the bread flour, kosher salt, and instant yeast until well blended. Stir in the chopped olives to distribute them evenly throughout the flour mixture.
- Add Liquids and Form Dough: Pour in the water and olive oil. Using a wooden spoon or sturdy spatula, mix until the dough forms and all the flour is hydrated. The dough will be sticky and somewhat loose—this is normal for a high-hydration bread.
- First Bulk Fermentation (Overnight Rise): Cover the bowl with plastic wrap or a clean kitchen towel and set it aside in a warm spot. Let the dough rest and rise slowly for 12 to 18 hours, until it has more than doubled in volume and is bubbly on the surface.
- Shape the Dough into a Round: Lightly flour your work surface and gently scrape the dough out of the bowl with a dough scraper or spatula. Without kneading, fold the dough onto itself a few times to create surface tension, then shape it into a loose ball.
- Second Proofing on Floured Towel: Generously dust a clean tea towel with flour. Place the dough seam-side down onto the towel. Loosely fold the towel over the dough and put it inside a large bowl or proofing basket. Let it rise for about 2 hours, until it nearly doubles in size.
- Preheat Oven and Dutch Oven: About 30 minutes before baking, place a clean Dutch oven (6 to 8-quart) on the lower oven rack and preheat your oven to 475°F (245°C). Heating the pot creates the ideal environment for a crusty loaf.
- Transfer Dough and Bake Covered: Carefully remove the hot Dutch oven from the oven using oven mitts. Use the floured towel or parchment paper to invert the dough into the pot. Cover with the lid and place it back in the oven. Bake for 30 minutes, allowing steam to develop inside.
- Bake Uncovered for Crust: Remove the lid and continue baking the bread for another 20 minutes or until the crust is deep golden brown and crisp.
- Cool Before Slicing: Lift the loaf out carefully with the parchment paper and place it on a wire rack. Let it cool completely before slicing to preserve the crumb’s texture.
Notes
- Handling Sticky Dough: This dough will feel wet and sticky. Avoid adding too much extra flour, which can dry out the bread. Instead, dust your hands and work surface lightly and use a dough scraper to manage the dough easily.
- Olive Variations: Use your favorite pitted olives. Combining Kalamata and green olives provides a nice balance of flavor and texture. Chop olives roughly to distribute flavor throughout the bread.
- Flour Alternatives: Bread flour is preferred for its gluten content and chewiness, but all-purpose flour can substitute without drastically changing the result. Up to half of the flour can be replaced with whole wheat for a denser, nuttier loaf.
- Yeast Options: Instant yeast works without needing to bloom. If you prefer using active dry yeast, dissolve it in about 1/3 cup warm water (100-115°F) for 5 minutes before adding to the dough, reducing total water by the same amount.
- Storage: Store leftover bread loosely covered at room temperature for up to 3 days. For longer storage, wrap cooled bread tightly in plastic and foil, then freeze for up to 3 months. Thaw at room temperature or overnight in the fridge.
Chef’s Secrets for Artisan Olive Bread
Mastering this olive bread starts with embracing the sticky, high-hydration dough.
Instead of adding extra flour, which can make the bread dense, lightly flour your hands or use a dough scraper to handle the dough gently.
This approach preserves the dough’s moisture, resulting in a tender crumb and crisp crust.
The long, slow fermentation is another key — allowing the yeast to develop complex flavors and improve digestibility.
Using a mix of olives adds depth: Kalamata olives bring a rich, fruity tang, while green olives offer a bright, slightly bitter contrast.
Finally, baking the bread inside a preheated Dutch oven traps steam, crucial for that perfect crust.
Don’t rush the cooling stage; allowing the loaf to rest fully ensures the crumb sets properly and slices beautifully.
Serving Suggestions to Enhance Your Bread
Olive bread’s savory flavor and hearty texture make it a perfect companion to Mediterranean dishes like hummus, baba ganoush, or tzatziki.
Serve it warm with a drizzle of good-quality extra virgin olive oil and a sprinkle of sea salt for a simple yet irresistible snack.
It also pairs wonderfully with sharp cheeses such as feta or aged cheddar, alongside fresh tomatoes and olives for a rustic platter.
For breakfast or brunch, toast slices and top with avocado or soft-boiled eggs for a nourishing start.
Leftover bread is excellent for making croutons or dipping into soups, stews, and hearty sauces.
Storage Tips for Maintaining Freshness
To keep your olive bread fresh and flavorful, store it loosely covered at room temperature for up to three days.
Avoid sealing it tightly while still warm, as this traps moisture and softens the crust.
If you want to preserve it longer, wrap the fully cooled loaf tightly in plastic wrap followed by aluminum foil, then freeze.
When ready to enjoy, thaw the bread overnight in the refrigerator or for a few hours at room temperature.
Reheating briefly in a warm oven can help restore its crisp crust and fresh-baked aroma, making it taste almost like new.
Frequently Asked Questions About Olive Bread
1. Can I use all-purpose flour instead of bread flour?
Yes! While bread flour gives a chewier texture due to higher gluten content, all-purpose flour can be used with minimal difference. The bread might be slightly less elastic but still delicious.
2. How sticky should the dough be?
This dough is meant to be quite wet and sticky. Resist the urge to add extra flour, which can make the bread dense. Use flour on your hands and work surface to manage it.
3. Can I substitute active dry yeast?
Absolutely. If using active dry yeast, dissolve it in a small amount of warm water (about 100-115°F) before mixing. This “blooming” ensures the yeast is active and will give the best rise.
4. What’s the best way to store leftover bread?
Store the bread loosely wrapped at room temperature for up to 3 days. For longer storage, freeze the cooled loaf wrapped tightly in plastic and foil for up to 3 months.
5. Can I add herbs or other flavors?
Yes, fresh or dried herbs like rosemary, thyme, or oregano complement the olives beautifully. Add about 1 to 2 tablespoons to the dry ingredients to enhance the flavor.
This recipe is inspired by themediterraneandish and has been carefully refined to enhance clarity, streamline preparation steps, and ensure accurate results. We’ve also included health benefits, nutritional highlights, and Must-Have Tools to help you get the best results every time you cook.
