All products are selected by our editorial team for quality. If you buy through our links, we may earn a small commission at no extra cost to you.
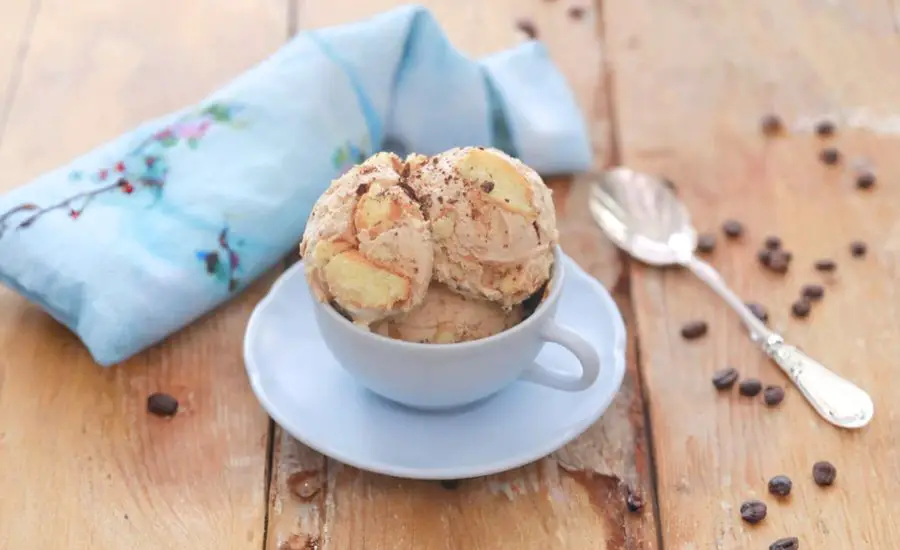
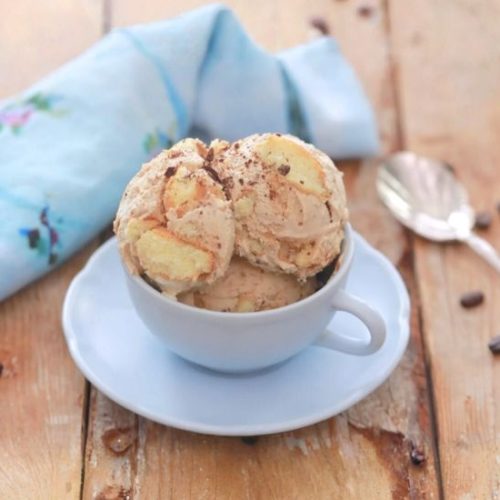
This no-machine Tiramisu Ice Cream recipe brings the beloved Italian dessert into a creamy, frozen treat that’s both indulgent and effortless to make at home.
What makes it special is its simple preparation method—whipping cold cream and sweetened condensed milk into a luscious base without any need for an ice cream maker.
It combines classic tiramisu flavors—espresso, ladyfingers, and chocolate—in a smooth, rich dessert perfect for any occasion.
Nutritionally, this recipe is high in protein from the whipping cream and contains good fats that provide satisfying richness without overly processed ingredients.
Using sweetened condensed milk as a sweetener streamlines the recipe, cutting down on added sugars and carbs compared to traditional ice creams.
It’s an ideal choice for everyday cooking because it’s quick to prepare, requires minimal equipment, and can be made ahead for convenient dessert options.
Plus, it offers a delightful twist to traditional tiramisu by delivering it in a refreshing, ice cream format that everyone will love.
Must-Have Tools for Perfect Results
Stand Mixer with Whisk Attachment
Essential for whipping the cold cream to stiff peaks quickly and effortlessly, ensuring a light, airy ice cream base. This versatile appliance is a kitchen powerhouse, perfect for everything from cakes to meringues.
Mixing Bowls (Various Sizes)
Sturdy, easy-to-clean mixing bowls are crucial for dissolving espresso and folding in ingredients gently, helping maintain the cream’s fluffiness. High-quality bowls serve multiple purposes beyond this recipe.
Measuring Cups and Spoons
Precision matters for balancing sweetness and coffee intensity. Durable, clear measuring tools ensure consistent results and are indispensable for any recipe.
Spatula
A flexible, soft spatula is key for folding in ladyfingers and chocolate without deflating the mixture, preserving texture. Its gentle scraping abilities make it a must-have for all mixing tasks.
Freezer-Safe Container
A well-sealed container allows your tiramisu ice cream to freeze evenly and stay fresh longer. Choose BPA-free, durable containers to store homemade ice cream and other frozen treats safely.
Tiramisu Ice Cream
Equipment
- 1 Stand mixer with whisk attachment
- 2 Mixing bowls (small and medium)
- Measuring cups and spoons set
- 1 Flexible spatula
- 1 Freezer-safe container (2-quart capacity)
Ingredients
- 1 can 14 oz / 400 ml sweetened condensed milk, chilled (choose fat-free or regular)
- 2 cups 450 ml heavy whipping cream, well chilled
- 1 teaspoon pure vanilla extract
- 2 tablespoons warm water
- 1 tablespoon instant espresso powder
- ½ cup 45 g ladyfinger cookies, crushed into small pieces
- ¼ cup 45 g chocolate, roughly chopped
Instructions
- Prepare the Coffee Base: Begin by combining the instant espresso powder with the warm water in a small bowl. Stir thoroughly until the espresso powder is fully dissolved, creating a rich coffee concentrate. Set this aside to cool slightly while you prepare the ice cream base.
- Whip the Cream: Using a stand mixer fitted with a whisk attachment (or a handheld mixer), beat the chilled heavy cream on medium speed. Continue whipping until the cream forms stiff peaks—this means when you lift the whisk, the cream holds firm peaks without collapsing. This whipped cream provides the light, airy texture that is key to the ice cream.
- Incorporate Sweetened Condensed Milk: Lower the mixer speed and gradually add the cold sweetened condensed milk to the whipped cream. Pour in the vanilla extract at this stage for added flavor. Increase the speed again and beat the mixture until it becomes thick and glossy, holding firm peaks once more.
- Blend in the Coffee Flavor: Pour the cooled espresso mixture into the whipped cream and condensed milk blend. Mix gently on medium speed until the coffee flavor is evenly distributed throughout the mixture, giving it a subtle mocha tint.
- Fold in Cookies and Chocolate: Using a spatula, gently fold the crushed ladyfinger cookies and chopped chocolate into the ice cream mixture. Be careful to combine them evenly without deflating the fluffy cream base. These mix-ins provide delightful texture and bursts of flavor in every bite.
- Freeze to Set: Transfer the finished mixture into a freezer-safe container with a tight lid. Smooth the top with a spatula and cover securely. Place the container in the freezer for at least 4 hours or overnight, allowing the ice cream to firm up properly. Before serving, let it sit at room temperature for a few minutes to soften slightly for easier scooping.
Notes
- Chill Ingredients: For the best whipping results, ensure the heavy cream and sweetened condensed milk are well chilled before starting. Cold ingredients whip more easily and hold their structure better.
- Espresso Strength: Adjust the amount of instant espresso powder according to your preferred coffee intensity. More espresso will create a stronger tiramisu flavor.
- Cookie Variations: Ladyfinger cookies are traditional, but you can substitute with sponge cake pieces or biscotti for different textures.
- Chocolate Choices: Use dark, milk, or semi-sweet chocolate depending on your taste preference. For a more indulgent treat, consider adding mini chocolate chips instead.
- Storage Tips: Store the ice cream in an airtight container to prevent ice crystals from forming. Consume within one week for optimal freshness and flavor.
Chef’s Secrets to Creamy Perfection
Achieving a smooth, creamy texture without an ice cream machine starts with properly whipping your cream.
Make sure your heavy cream and sweetened condensed milk are cold before you begin; this helps the mixture whip to stiff peaks, creating the ideal airy base.
When folding in the crushed ladyfingers and chocolate, do so gently with a spatula to maintain the light texture—vigorous mixing can deflate the whipped cream and result in a denser dessert.
Using instant espresso powder dissolved in warm water ensures the coffee flavor blends evenly without adding excess liquid.
Finally, allow the ice cream to freeze for at least 4 hours, preferably overnight, so the flavors fully develop and the texture firms up nicely.
These simple tips will guarantee a tiramisu ice cream that is rich, smooth, and bursting with authentic flavor.
Serving Suggestions to Impress Guests
Tiramisu Ice Cream is a versatile dessert that can be served on its own or as part of an elegant dessert plate.
Scoop it into bowls or waffle cones for a casual treat, or serve alongside fresh berries and a dusting of cocoa powder for a more refined presentation.
For a party, consider layering the ice cream with espresso-soaked ladyfinger pieces in small glasses to create individual tiramisu parfaits.
Pairing this dessert with a glass of sweet dessert wine or a robust espresso can enhance its classic Italian charm.
For an added touch, sprinkle some shaved chocolate or a few coffee beans on top to elevate both taste and presentation.
Storage Tips for Best Freshness
To maintain the ice cream’s creamy texture and prevent freezer burn, store it in an airtight, freezer-safe container.
Press a piece of parchment paper or plastic wrap directly onto the surface of the ice cream before sealing the container to minimize ice crystal formation.
Keep the ice cream at the back of the freezer, where the temperature is most stable, rather than the door.
Homemade ice cream is best consumed within one week to enjoy optimal flavor and texture.
When ready to serve, remove the container from the freezer about 5–10 minutes beforehand to soften slightly for easy scooping.
Frequently Asked Questions (FAQs) Answered
1. Can I make this ice cream without a mixer?
While a mixer makes whipping cream easier and faster, you can whisk the cream by hand using a balloon whisk. It will take more time and effort, but it’s definitely possible with patience.
2. Is sweetened condensed milk necessary for this recipe?
Yes, sweetened condensed milk acts as the primary sweetener and stabilizer, giving the ice cream its creamy texture without needing an ice cream machine.
3. Can I substitute the ladyfinger cookies?
Absolutely! You can use sponge cake, biscotti, or even crushed vanilla wafers if ladyfingers aren’t available. Just be mindful of texture differences.
4. How strong will the coffee flavor be?
The recipe uses instant espresso powder dissolved in water to provide a balanced coffee taste. You can adjust the amount to suit your preference for a milder or bolder flavor.
5. Can I prepare this ice cream in advance?
Yes! This recipe is perfect for make-ahead dessert. Freeze it overnight or up to a week ahead, and just let it soften slightly before serving.
This recipe is inspired by biggerbolderbaking and has been carefully refined to enhance clarity, streamline preparation steps, and ensure accurate results. We’ve also included health benefits, nutritional highlights, and Must-Have Tools to help you get the best results every time you cook.
