All products are selected by our editorial team for quality. If you buy through our links, we may earn a small commission at no extra cost to you.
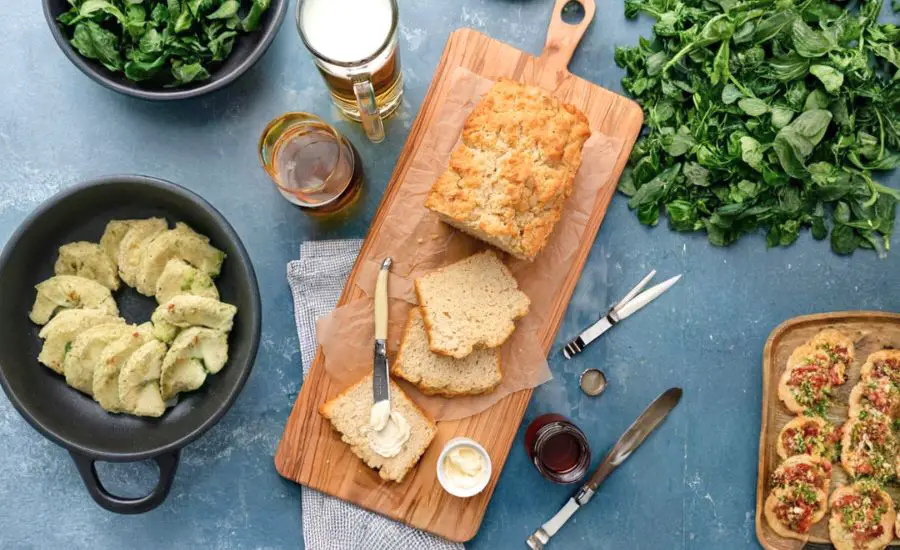
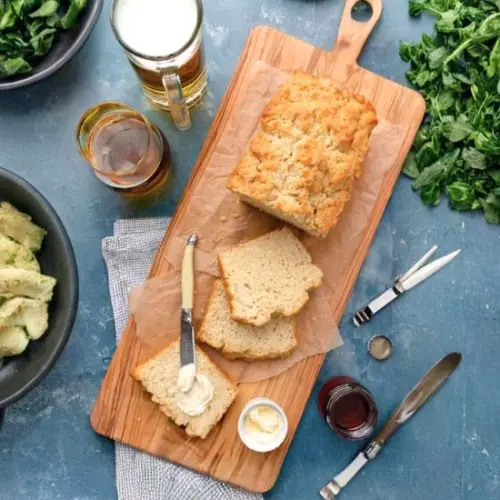
This classic beer bread recipe is the epitome of effortless comfort baking.
With no yeast or rising time required, it’s a quick, satisfying bread that delivers a tender crumb, subtly sweet flavor, and a golden crust with rich, buttery notes.
Perfect for busy weeknights or casual get-togethers, it comes together with minimal ingredients and zero kneading.
Each slice delivers 5g of protein and only 3g of fat, making it a better-for-you indulgence when enjoyed in moderation.
The low saturated fat content and presence of plant-based ingredients (depending on the beer used) make this a smart option for those looking to reduce processed foods without compromising taste.
It’s ideal for meal prep—great fresh or toasted with butter, soup, or sandwiches—and can be easily refreshed in the oven the next day.
Whether you’re pairing it with chili, using it for toast, or serving as a side dish, this bread earns a place in your regular rotation.
Must-Have Tools for Perfect Results
USA Pan 9×5-Inch Loaf Pan
This high-quality, non-stick loaf pan ensures even baking and easy release, giving your beer bread the perfect crust and shape. Its corrugated surface helps prevent over-browning, making it a must-have for all quick bread, meatloaf, and pound cake recipes.
OXO Good Grips Balloon Whisk
Ideal for combining dry ingredients and gently mixing the batter without overworking it. The soft handle offers a secure grip, and it’s a versatile tool for whisking eggs, sauces, and dressings in everyday cooking.
Pyrex 4-Cup Glass Measuring Cup
Accurately measure and pour your beer and melted butter with ease. Microwave-safe and durable, this measuring cup is essential for both wet and dry ingredients across all baking and cooking needs.
Silicone Spatula Set by Di Oro
Great for folding ingredients and scraping down bowls without waste. Heat-resistant and dishwasher-safe, these spatulas are essential for batters, sauces, and even stovetop use.
Cuisinart Electric Knife
If you love serving clean, professional-looking slices, this tool cuts through bread crusts effortlessly. It’s perfect for bread, roasts, or even large fruits like melons—saving time and effort.
Beer Bread
Equipment
- 1 9×5-Inch Loaf Pan
- 1 large mixing bowl
- 1 Whisk
- 1 – Measuring Cup (liquid, 2–4 cup capacity)
- 1 Silicone Spatula
- 1 – Cooling Rack (optional, for airflow)
Ingredients
- 3 cups all-purpose flour
- 1 tablespoon baking powder
- 1 teaspoon fine sea salt
- 3 tablespoons granulated sugar
- 12 ounces beer room temperature, any variety you prefer
- 2 tablespoons unsalted butter melted (plus more for brushing the top, optional)
Instructions
- Preheat and Prepare the Pan: Begin by preheating your oven to 350°F (175°C). Lightly grease a 9×5-inch loaf pan or line it with parchment paper to ensure the bread lifts out easily once baked.
- Mix Dry Ingredients Together: In a large mixing bowl, whisk together the flour, baking powder, salt, and sugar. Stir until everything is well combined and evenly distributed—this helps prevent uneven baking and clumps in the finished loaf.
- Add Beer and Stir Until Combined: Pour the beer into the dry mixture and stir gently using a silicone spatula or wooden spoon. Mix just until a thick, shaggy batter forms—avoid overmixing, which can make the bread dense.
- Transfer Batter and Add Melted Butter: Scoop the batter into the prepared loaf pan and smooth out the top slightly. Drizzle the melted butter over the top to create a deliciously crisp, golden crust during baking.
- Bake Until Golden and Cooked Through: Place the pan on the center rack of your preheated oven. Bake for 50–55 minutes, or until the top is golden brown and a toothpick inserted into the center comes out clean.
- Cool Before Slicing: Remove the pan from the oven and let the bread cool in the pan for about 10 minutes. Then transfer the loaf to a wire rack to cool completely before slicing and serving.
Notes
- Best Enjoyed Fresh: This beer bread tastes best the day it’s baked, when the crust is crisp and the inside is tender.
- Storage Tip: To store, wrap tightly in plastic wrap or place in an airtight container at room temperature for up to 1 day.
- How to Reheat: To refresh the loaf, wrap it in foil and place in a 350°F (175°C) oven for 8–10 minutes until warm.
- Choose Your Beer Wisely: The flavor of the bread subtly changes depending on the beer you use. Lighter beers create a milder, slightly sweet bread, while darker ales or stouts offer deeper, richer tones.
- Customization Options: Stir in herbs, shredded cheese, or chopped jalapeños for a flavorful twist.
Chef’s Secrets for Perfect Beer Bread
The key to achieving bakery-style beer bread at home lies in the balance between simplicity and technique.
First, always measure your dry ingredients accurately—scoop and level your flour for best results.
Use room-temperature beer to ensure the batter comes together evenly and rises properly during baking.
Stir the batter just until combined; overmixing will lead to a dense texture. The melted butter poured over the top before baking isn’t just for flavor—it helps form a beautifully crisp crust that contrasts with the soft interior.
Lastly, choose your beer based on the flavor you want: a light lager yields a subtle, almost sweet flavor, while a darker ale or stout will add rich, malty notes to the loaf.
Don’t be afraid to experiment with different styles to suit your personal taste.
Serving Suggestions for Every Occasion
This bread’s versatile flavor makes it a fantastic companion to countless meals.
Slice and serve warm with a smear of salted butter or a drizzle of honey for a simple snack.
It pairs wonderfully with soups and stews, especially chili, tomato bisque, or creamy potato soup.
Toast slices and top with avocado, soft cheese, or a poached egg for a satisfying brunch bite.
You can also use it as a rustic sandwich base—especially good with deli meats, sharp cheeses, or roasted vegetables.
For entertaining, cube it into chunks and serve it alongside a warm cheese dip or a hearty spinach-artichoke spread.
Storage Tips to Keep It Fresh
While beer bread is best the day it’s baked, you can still enjoy leftovers if stored properly.
Once fully cooled, wrap the loaf tightly in plastic wrap or place it in an airtight container.
It will stay fresh at room temperature for about 24 hours. Avoid refrigeration, as this can dry out the bread.
If you need to store it longer, freeze individual slices or the whole loaf wrapped in foil and stored in a freezer-safe bag.
To reheat, thaw at room temperature and warm in a 350°F oven, wrapped in foil, for 8–10 minutes to bring back that fresh-from-the-oven texture.
Frequently Asked Questions (with Answers)
1. Can I make this recipe without beer?
Yes, you can substitute the beer with club soda or sparkling water if you prefer a non-alcoholic version. However, keep in mind that the unique flavor and rise that beer contributes may be less pronounced.
2. What’s the best type of beer to use?
It depends on your flavor preference. A light lager creates a mild, classic flavor, while a dark beer like stout or porter gives the bread a richer, deeper taste. IPA lovers can try one for a bold, hoppy twist.
3. Can I add ingredients like cheese or herbs?
Absolutely! Add 1 cup of shredded cheddar, Parmesan, or herbs like rosemary or thyme for extra flavor. Fold them gently into the batter right before transferring it to the loaf pan.
4. Why is my beer bread dense or heavy?
Overmixing the batter is the most common cause of dense beer bread. Mix just until the ingredients are incorporated. Also, make sure your baking powder is fresh and active—it’s the only leavening in the recipe.
5. How can I tell when it’s fully baked?
Insert a toothpick into the center of the loaf—if it comes out clean or with a few dry crumbs, it’s done. The top should also be golden brown and firm to the touch. Avoid opening the oven too early, as it can cause sinking.
This recipe is inspired by stripedspatula and has been carefully refined to enhance clarity, streamline preparation steps, and ensure accurate results. We’ve also included health benefits, nutritional highlights, and Must-Have Tools to help you get the best results every time you cook.
