This crispy BBQ roasted chickpeas recipe stands out as a deliciously wholesome snack that combines irresistible crunch with bold, smoky flavors.
Chickpeas are naturally rich in plant-based protein and dietary fiber, making them an excellent choice for supporting digestive health and sustained energy levels.
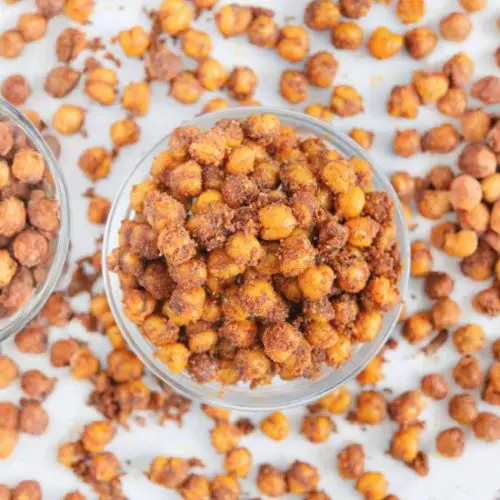
Crispy BBQ Roasted Chickpeas
Equipment
- 1 12-inch Cast Iron Skillet
- 1 Fine Mesh Strainer
- 1 Kitchen Towel
- 1 Mixing Bowl
- 1 Oven Thermometer (optional)
Ingredients
- 1 15.5 oz can low-sodium chickpeas (or 1.5 cups cooked chickpeas)
- 3 tablespoons avocado oil or neutral oil, avoid olive or coconut
- 1 tablespoon maple sugar or coconut sugar alternative
- 2 teaspoons smoked paprika
- 1 teaspoon garlic powder
- 1 teaspoon chili powder
- ½ teaspoon onion powder
- 1 teaspoon fine salt
Instructions
- Preparing the Oven for Roasting: Begin by preheating your oven to a precise 375 degrees Fahrenheit (190 degrees Celsius). This temperature is crucial to ensure that the chickpeas roast evenly, developing a crispy exterior without burning. While the oven is warming, gather your baking equipment to streamline the process.
- Rinsing and Draining the Chickpeas: Open your can of low-sodium chickpeas and pour them into a fine mesh strainer placed over the sink. Rinse thoroughly under cold running water to remove the canning liquid and reduce any residual sodium. Shake the strainer gently to drain excess water, preparing the chickpeas for the next step where dryness is essential for crispiness.
- Removing Chickpea Skins for Enhanced Crispiness: Place the rinsed chickpeas back into the strainer and lay a clean, dry kitchen towel over them. Use your hands to gently rub the chickpeas through the towel. This friction helps loosen the outer skins, which can trap moisture and reduce crispness during roasting. Continue this process until most skins come off. For any stubborn skins that remain, remove them individually by pinching the chickpeas between your fingers. Removing these skins ensures a crunchier finished snack.
- Preparing the Chickpeas for Roasting: Transfer the peeled chickpeas to a 12-inch cast iron skillet. It’s important to use a skillet large enough so the chickpeas spread out in a single layer without touching or overlapping. Overcrowding causes steaming instead of roasting, which will make the chickpeas soggy. If you are doubling the recipe, consider using a second skillet or baking sheet to maintain adequate space.
- Coating Chickpeas with Oil: Drizzle 3 tablespoons of avocado oil evenly over the chickpeas. Use two spoons or your hands to toss and turn the chickpeas gently but thoroughly. This step ensures that every chickpea is lightly coated with oil, which is vital for achieving that golden-brown crunch. Avoid using oils with strong flavors like olive or coconut, as they can overpower the smoky BBQ seasoning.
- Roasting the Chickpeas to Perfection: Place the skillet into the preheated oven. Roast the chickpeas for a total of 35 minutes, but at the halfway mark (around 17 minutes), remove the skillet carefully. Shake the pan or use a spatula to turn and redistribute the chickpeas so they roast evenly on all sides.This turning step prevents burning and promotes a uniform crispy texture.
- Mixing the BBQ Spice Blend: While the chickpeas are roasting, combine the dry ingredients for the BBQ seasoning in a small mixing bowl.Add 1 tablespoon maple sugar, 2 teaspoons smoked paprika, 1 teaspoon garlic powder, 1 teaspoon chili powder, ½ teaspoon onion powder, and 1 teaspoon fine salt. Whisk these ingredients together thoroughly to ensure an even distribution of flavor in every bite.
- Seasoning Chickpeas Immediately After Roasting: Once the chickpeas have finished roasting, carefully remove the skillet from the oven using oven mitts. While the chickpeas are still hot, sprinkle the prepared BBQ spice blend evenly over them. Use two spoons or toss gently with your hands to coat each chickpea thoroughly with the smoky seasoning, allowing the spices to cling to the warm oil-coated surface.
- Cooling for Maximum Crispiness: Spread the seasoned chickpeas out evenly again in the skillet or transfer to a baking sheet to cool.Allow them to rest at room temperature for 5 to 10 minutes. This cooling period helps evaporate any residual moisture, firming up the crispiness. Avoid stacking or piling the chickpeas during this time to prevent sogginess.
- Serving and Storing Your Snack: Your crispy BBQ roasted chickpeas are now ready to enjoy! Serve them warm for the best texture and flavor. If you want to store leftovers, keep them at room temperature in an open container rather than airtight to preserve the crunch. Avoid refrigerating as this can introduce moisture and soften the chickpeas.
Notes
- Removing chickpea skins is essential for maximum crispiness.
- Use a 12-inch cast iron skillet or a large baking sheet to avoid overcrowding.
- Spread chickpeas in a single layer with space between to prevent steaming.
- Avocado oil is recommended for its high smoke point and neutral flavor.
- Maple sugar adds a subtle sweetness and balances smoky spices; coconut sugar is a good substitute.
- Toss chickpeas with the spice blend immediately after roasting while still hot for best flavor adhesion.
- Roasting at 375°F ensures even cooking without burning.
- Shake or toss chickpeas halfway through roasting to promote uniform crispiness.
- Store roasted chickpeas at room temperature in a container that allows airflow to maintain crunch.
- Avoid airtight containers and refrigeration to prevent sogginess.
With minimal oil and no added preservatives, this recipe offers healthy fats while remaining low in saturated fat and carbohydrates, fitting perfectly into vegan, gluten-free, and clean eating lifestyles.
Its straightforward method requires just a handful of pantry staples and simple roasting, making it an ideal go-to for quick, satisfying snacks or easy meal prep.
Whether you need a protein-packed bite between meals or a crunchy salad topping, these BBQ chickpeas deliver on flavor and nutrition without compromising convenience.
Must-Have Tools for Perfect Results
Cast Iron Skillet
Essential for even heat distribution and excellent roasting, this skillet crisps the chickpeas beautifully without overcrowding. Beyond this recipe, it’s a versatile tool for searing, baking, and frying in any kitchen.
Fine Mesh Strainer
Perfect for rinsing and draining chickpeas efficiently, the strainer ensures excess water is removed, which is key to achieving that crisp texture. It’s also great for washing grains, herbs, and other small ingredients.
Kitchen Towel
Used here to gently rub and remove chickpea skins, this simple tool enhances texture by ensuring a crunchier final product. A quality kitchen towel is indispensable for drying produce, handling hot pans, and cleanup.
Mixing Bowl
Ideal for whisking together the BBQ spice blend and tossing the chickpeas evenly, a sturdy mixing bowl helps combine ingredients thoroughly. It’s a staple for countless recipes, from salads to batters.
Oven Thermometer (optional)
Ensures your oven maintains the perfect roasting temperature of 375°F for consistent crispness every time, improving baking results for all oven-cooked dishes.
Chef’s Secrets To Crispy Chickpeas
To get that unbeatable crunch, drying the chickpeas thoroughly after rinsing and removing skins is crucial.
Moisture is the enemy of crispiness, so the gentler you are with the drying process, the better the outcome.
Roasting at 375°F ensures the chickpeas cook through evenly without burning. Don’t rush flipping; a simple shake of the skillet midway is enough to keep them crisp on all sides.
Using a cast iron skillet is a game changer as it retains and radiates heat consistently.
Lastly, applying the spice blend right after roasting while the chickpeas are still hot helps the seasoning stick beautifully and infuses the snack with maximum flavor.
Serving Suggestions For Snack Perfection
These BBQ roasted chickpeas are fantastic on their own as a crunchy snack, but they also make a great addition to salads, grain bowls, or soups for added texture and protein.
Try sprinkling them over avocado toast or mixing them into homemade trail mix for a smoky twist.
They pair well with creamy dips like guacamole or vegan ranch for dipping.
For a party snack, serve them alongside sliced veggies and hummus for a colorful, nutritious spread everyone will love.
Warm or room temperature, these chickpeas maintain their crispness and bold flavor.
Storage Tips To Maintain Crunchiness
To preserve the irresistible crunch, store roasted chickpeas at room temperature in a container that allows airflow, such as a bowl covered loosely with a clean kitchen towel or a container with ventilation holes.
Avoid airtight containers or refrigeration, as trapped moisture will cause the chickpeas to soften.
If you plan to keep them longer than a day or two, consider re-crisping in a 350°F oven for 5–10 minutes before serving.
For best taste and texture, enjoy these snacks within 2–3 days of roasting.
Frequently Asked Questions (FAQs) About Recipe
1. Can I use dried chickpeas instead of canned?
Yes! If using dried chickpeas, soak them overnight and cook until tender before roasting. Make sure they are completely dry before oiling and roasting to achieve crispiness.
2. Why is it important to remove chickpea skins?
The skins hold moisture, which can create steam during roasting, resulting in soggy chickpeas. Removing them helps the chickpeas crisp up nicely.
3. Can I make this recipe oil-free?
While oil helps with roasting and flavor adhesion, you can try using a light mist of water and toss with spices, but the texture may be less crispy.
4. How spicy is the BBQ seasoning?
The seasoning has a mild smoky heat from chili powder balanced with sweetness from maple sugar. Adjust chili powder quantity to suit your heat preference.
5. Can I prepare these chickpeas in advance?
You can roast them ahead of time and store properly at room temperature, but they’re best enjoyed fresh or re-crisped before serving.
