This Almond Flour Bread is a wholesome, low-carb alternative to traditional bread that’s both nourishing and satisfying.
Made with protein-rich almond flour and healthy fats from olive oil, it’s naturally gluten-free and full of flavor.
Each slice delivers plant-based protein, fiber, and minimal carbs, making it a smart choice for everyday meals.
Quick to prepare, it’s perfect for sandwiches, avocado toast, or meal prep.
Almond Flour Bread
Equipment
- 1 8×4 inch loaf pan
- 1 large mixing bowl
- 1 Whisk
Ingredients
- 5 large eggs
- 5 tbsp olive oil or melted butter/coconut oil
- 1 tbsp maple syrup
- 1 tsp apple cider vinegar or white wine vinegar
- 1 ¾ cups super-fine almond flour
- ½ tsp baking soda
- ¼ tsp salt
Instructions
- Preheat & Prepare the Pan: Set the oven to 350°F (175°C). Line an 8×4-inch (20×10 cm) loaf pan with a sling of parchment paper so it overhangs the long sides; lightly grease the exposed ends of the pan. This prevents sticking and makes lifting the loaf out seamless.
- Gather & Temperature-Check Ingredients: Bring the eggs and oil to room temperature if possible (10–15 minutes on the counter). Room-temp ingredients blend more evenly and help the loaf rise uniformly.
- Beat the Eggs Lightly: Crack 5 eggs into a large mixing bowl. Whisk just until the whites and yolks are fully combined and slightly frothy—about 20–30 seconds. You’re aiming for a uniform mixture, not volume.
- Whisk in the Liquids for Emulsion: Add 5 tbsp olive oil (or melted butter/coconut oil), 1 tbsp maple syrup, and 1 tsp apple cider vinegar to the eggs.Whisk until the mixture looks smooth and glossy. The vinegar is essential—it reacts with the baking soda to create lift, so don’t skip it.
- Combine Dry Ingredients Separately: In a medium bowl, whisk together 1¾ cups super-fine almond flour, ½ tsp baking soda, and ¼ tsp salt. Breaking up any almond-flour clumps now prevents pockets of dry mix later.
- Incorporate Dry into Wet Slowly: Sprinkle the dry mixture over the wet base in two to three additions. After each addition, whisk or stir with a spatula until no streaks remain. The batter should be thick, scoopable, and cohesive.
- Final Batter Check & Rest (Optional): Scrape the bowl’s sides and bottom to catch hidden pockets of flour. If your almond flour was very cold, let the batter sit 2–3 minutes; this brief rest helps hydrate the flour and evens the texture.
- Pan the Batter Cleanly: Transfer the batter to the prepared loaf pan. Use a spatula to spread it into the corners and level the top. Smooth, even thickness supports consistent rise.
- Level, Tap & Vent: Gently tap the pan on the counter 2–3 times to release large air bubbles. Use the spatula to create a very shallow trench down the center—this encourages an attractive, controlled split as it bakes.
- Bake to Golden: Place the pan on the middle rack and bake 30–35 minutes. The top should turn evenly golden and spring back lightly when touched.
- Check for Doneness: Insert a toothpick or thin skewer into the center; it should come out clean or with a few moist crumbs (no wet batter). If you use a thermometer, the center should read about 200°F (93°C). If the top browns too fast, tent loosely with foil for the last few minutes.
- Cool Briefly in the Pan: Set the pan on a rack and cool for 10 minutes. This short rest allows the structure to set so the loaf unmolds without tearing.
- Lift, Unmold & Finish Cooling: Use the parchment overhang to lift the loaf onto the rack. Peel back the parchment and cool an additional 20 minutes before slicing; cutting too soon can compress the crumb.
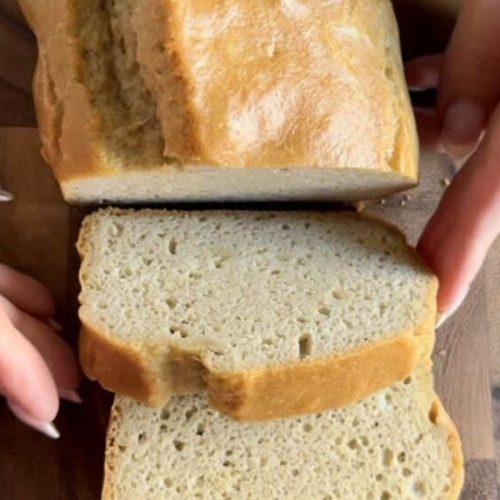
- Slice for Best Texture: Use a sharp, serrated knife to slice to your preferred thickness. For clean slices, saw gently rather than pressing straight down.
- Serve Creatively: Enjoy as sandwich bread, topped with avocado, or simply warm with a swipe of butter and a drizzle of honey. Light toasting brings out a lovely nutty aroma.
- Store & Reheat Like a Pro: Keep leftovers in an airtight container in the fridge for several days. For longer storage, slice the loaf, wrap well, and freeze; toast slices straight from frozen or thaw briefly, then toast to revive the just-baked texture. You may substitute white wine vinegar for apple cider vinegar if needed.
Notes
- Use super-fine almond flour for the best texture—coarser flour makes the bread grainy.
- The apple cider vinegar is crucial—it activates the baking soda for lift.
- Don’t overmix the batter; stir just until combined to keep the bread soft.
- A parchment sling makes removing the loaf much easier.
- For extra flavor, try adding herbs, garlic powder, or seeds into the batter.
- Light toasting enhances the bread’s nutty flavor and aroma.
- Slice with a serrated bread knife for clean cuts.
- Store the bread properly to maintain freshness and prevent dryness.
Chef’s Secrets for Perfect Bread
The secret to almond flour bread lies in balance.
Since almond flour is naturally heavy and moist, pairing it with eggs provides structure while vinegar and baking soda create lift.
Always use room-temperature eggs for maximum rise, and sift or whisk your almond flour before mixing to avoid lumps.
If you want extra softness, don’t skip the resting step—it allows the almond flour to absorb liquid evenly.
Lastly, monitor baking closely; every oven is different, so check for doneness with a toothpick at the 30-minute mark.
Serving Suggestions for Every Occasion
This versatile bread shines in many ways. Slice it thin for a protein-packed sandwich base or toast it lightly for breakfast topped with avocado, nut butter, or even scrambled eggs.
For something sweet, drizzle warm slices with honey or spread with fruit preserves.
It also pairs beautifully with soups and salads, offering a low-carb alternative to crusty bread.
If you’re meal-prepping, slice it in advance and store portions for quick, satisfying snacks throughout the week.
Storage Tips to Keep Freshness
Almond flour bread is best enjoyed fresh but stores very well.
Once cooled, wrap the loaf or individual slices in parchment or foil and place in an airtight container.
Keep in the refrigerator for up to 5 days for maximum freshness.
For long-term storage, freeze slices between layers of parchment, then store them in a freezer-safe bag.
When you’re ready to eat, simply toast slices straight from frozen or thaw briefly at room temperature before reheating.
Frequently Asked Questions
1. Can I use coconut flour instead of almond flour?
No, coconut flour is much more absorbent and will not work in this recipe. If you substitute, the texture and moisture balance will be off. Stick to almond flour for the intended result.
2. Why is my bread dense or flat?
This usually happens if the baking soda or vinegar is skipped, expired, or not measured correctly. Ensure your baking soda is fresh and don’t omit the vinegar—it’s what helps the bread rise.
3. Can I make this bread dairy-free?
Yes! Simply use olive oil or coconut oil instead of butter. The recipe naturally avoids dairy when made this way, making it suitable for paleo and dairy-free diets.
4. How do I get clean slices?
Allow the bread to cool completely before cutting, and always use a serrated bread knife. If slicing from frozen, let it sit for a minute or two at room temperature before cutting.
5. Is this bread good for keto or low-carb diets?
Absolutely. With just about 5g carbs per slice and plenty of healthy fats and protein, it fits perfectly into a keto or low-carb lifestyle. It’s a great option for anyone cutting back on traditional grains.
