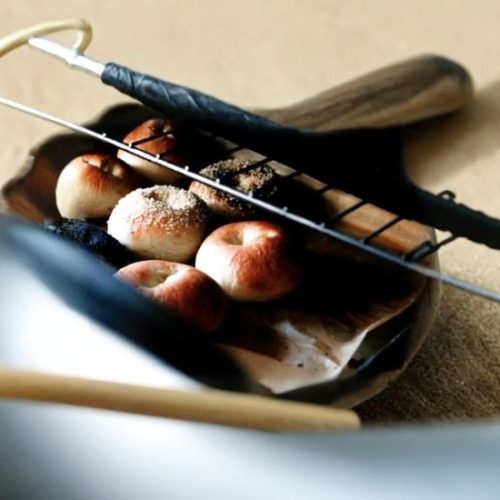
This New York-Style Bagel recipe captures the essence of authentic bagels with a perfectly chewy interior and a golden, shiny crust.
The key to its unique texture lies in the classic boiling step before baking, which sets it apart from ordinary bread.
Traditional New York-Style Bagels
Equipment
- Large bowl (1)
- Measuring cups and spoons
- Stand mixer with dough hook (optional but recommended)
- Large heavy-bottomed pot (1)
- Slotted spoon or skimmer (1)
- Baking sheet (1)
- Parchment paper or oil for baking sheet
- Wire cooling rack (1)
- Kitchen towel for covering dough
Ingredients
- 2 teaspoons active dry yeast
- 4 ½ teaspoons granulated sugar
- 1 ¼ cups warm water approximately 105°F / 40°C; may need up to ¼ cup more
- 3 ½ cups bread flour or high-gluten flour about 440 g; extra flour for kneading
- 1 ½ teaspoons fine salt
- Optional toppings: caraway seeds coarse salt, poppy seeds, sesame seeds, minced fresh garlic, minced onion, cinnamon sugar, or everything bagel seasoning
- Oil for coating the bowl and baking sheet
Instructions
- Activate the Yeast: In a small bowl or measuring cup, combine ½ cup of the warm water with the sugar and yeast. Let the mixture rest untouched for 5 minutes until it becomes foamy. Then gently stir to fully dissolve the sugar and yeast.
- Combine Dry Ingredients: In a large mixing bowl, whisk together the bread flour and salt until evenly distributed. Create a well in the center of the flour mixture to hold the liquid ingredients.
- Form the Dough: Pour the activated yeast mixture into the well. Add about one-third of the remaining warm water to the flour. Gradually stir, incorporating the flour from the edges into the liquid. Continue adding the rest of the water slowly, adjusting as needed to create a moist but firm dough. The dough should feel slightly tacky but not sticky.
- Knead the Dough: Transfer the dough onto a lightly floured surface. Knead for 8 to 10 minutes, working in extra flour as necessary, until the dough becomes smooth, elastic, and slightly stiff. This development is key for a chewy bagel texture.
- First Rise: Lightly grease a large bowl with oil and place the dough inside, turning it to coat all sides. Cover the bowl with a damp kitchen towel or plastic wrap. Set it in a warm, draft-free spot to rise until the dough doubles in volume, about 1 hour.
- Shape the Bagels: After rising, gently deflate the dough and let it rest for 10 minutes. Divide the dough into eight equal pieces. Roll each piece into a smooth ball by cupping your hand over it and moving it in a circular motion on the work surface. To form bagels, press a floured finger through the center of each ball to create a hole, then gently stretch the hole to about one-third the bagel’s diameter. Place the shaped bagels on a greased or parchment-lined baking sheet.
- Rest Before Boiling: Cover the bagels loosely with a damp cloth and let them rest for 10 minutes while you preheat the oven to 425°F (220°C).
- Boil the Bagels: Bring a large pot of water to a rolling boil, then reduce to a simmer. Using a slotted spoon, carefully lower a few bagels at a time into the water. Boil for 1 minute on one side, then flip and boil for an additional minute. For a chewier bagel closer to authentic New York style, boil for 2 minutes per side.
- Add Toppings: If desired, immediately after boiling, brush the bagels with an egg wash or water and sprinkle your choice of toppings to adhere.
- Bake to Perfection: Transfer the boiled and topped bagels back to the prepared baking sheet. Bake in the preheated oven for 20–25 minutes, or until they develop a deep golden brown color and a glossy crust.
- Cool and Enjoy: Remove bagels from the oven and transfer to a wire rack to cool slightly before slicing and serving. Enjoy with cream cheese, butter, or your favorite spreads.
Notes
- Water Quantity Flexibility: Depending on your local humidity and flour type, you may need to adjust the water slightly to achieve the right dough consistency. The dough should be moist and firm, not dry or crumbly.
- Flour Type: Bread flour or high-gluten flour is recommended for that signature chewy texture. All-purpose flour may yield softer bagels but can be used if needed.
- Boiling Time: Extending the boil to 2 minutes per side enhances chewiness and gives the bagels a more authentic crust, though 1 minute per side works well for softer results.
- Toppings: Feel free to experiment with classic or creative toppings. Use an egg wash (beaten egg with a tablespoon of water) to help seeds and spices stick better if desired.
- Storage: Store bagels in an airtight container at room temperature for up to 2 days or freeze for longer storage. Reheat by toasting or warming in the oven for best texture.
This process creates a dense, satisfying bite that true bagel lovers crave. Nutritionally, these bagels offer a moderate source of protein (6g per serving) and contain fiber, helping to support digestion.
While the recipe uses bread or high-gluten flour for the ideal texture, it remains relatively low in saturated fat and cholesterol, making it a healthier choice compared to many store-bought alternatives packed with preservatives and additives.
Its simplicity and versatility make it perfect for everyday cooking — whether for quick breakfasts, meal prep, or snacks — and it invites creative topping combinations from savory seeds to sweet cinnamon sugar.
This recipe brings a taste of classic New York to your home kitchen with ease and authenticity.
Must-Have Tools for Perfect Results
Stand Mixer with Dough Hook Attachment
This tool simplifies the kneading process, ensuring your dough is mixed evenly and develops the necessary gluten for that signature chewiness.
Beyond bagels, it’s invaluable for breads, pizza dough, and other yeast-based recipes.
Large Heavy-Bottomed Pot
Essential for boiling the bagels before baking, a sturdy pot maintains even heat and prevents scorching.
It’s versatile for soups, stews, and pasta cooking as well.
Slotted Spoon or Skimmer
Perfect for safely lowering bagels into boiling water and lifting them out without excess water, helping to preserve their shape and texture.
A must-have for any frying or boiling task.
Baking Sheet with Parchment Paper or Nonstick Surface
Provides an ideal, easy-release surface for baking the bagels to golden perfection, while simplifying cleanup. Useful for cookies, roasting vegetables, and more.
Wire Cooling Rack
Allows air circulation around baked bagels to prevent sogginess and cool them evenly. An indispensable tool for all baked goods.
Chef’s Secrets to Perfect Bagels
Creating authentic New York-style bagels requires mastering a few key techniques that elevate this humble dough to bakery-quality brilliance.
First, boiling the bagels before baking is essential—it gelatinizes the starches on the surface, producing that iconic shiny, chewy crust.
Timing here is important; a shorter boil yields softer bagels, while a longer boil develops a denser chew.
When shaping, take care to create a smooth, tight dough ball before poking the hole; this ensures even baking and prevents tearing.
Using high-gluten or bread flour is another secret to get that signature chew, as it provides the necessary protein structure.
Lastly, resting the shaped bagels before boiling allows the gluten to relax, making the boiling and baking processes more effective.
These little tips will help you recreate the true New York bagel experience right in your kitchen.
Delicious Serving Suggestions and Pairings
New York-style bagels are incredibly versatile and can be enjoyed in numerous ways.
Classic cream cheese spreads—plain or flavored with chives, smoked salmon, or herbs—are timeless favorites that highlight the bagel’s texture.
For a hearty breakfast, try layering with eggs, crispy bacon, or avocado slices for a satisfying start to your day.
Sweet options, such as butter and jam or cinnamon sugar toppings, offer a delightful contrast to the bagel’s mild flavor.
For lunch or snacks, consider using your bagels as sandwich buns, filled with deli meats, cheese, and fresh vegetables.
Don’t forget the power of simple toppings like sesame or poppy seeds, which add extra crunch and flavor.
Pair your bagels with a robust cup of coffee or tea to complete the authentic New York experience.
Storage Tips for Freshness and Flavor
To maintain the freshness and chewiness of your homemade bagels, proper storage is key.
If you plan to consume them within two days, store bagels in a paper bag inside a loosely closed plastic bag or bread box at room temperature.
This helps preserve the crust without making it soggy.
For longer storage, slice the bagels in half and freeze them in airtight freezer bags.
When ready to eat, toast or warm them directly from the freezer for best texture and flavor.
Avoid refrigerating bagels, as cold temperatures tend to dry out the bread quickly.
If you want to refresh slightly stale bagels, spritz them lightly with water and warm in a preheated oven for a few minutes to revive softness and crust.
Common Questions About Bagel Making
1. Can I use all-purpose flour instead of bread flour?
While all-purpose flour can be used, bread or high-gluten flour is preferred because it has more protein, resulting in a chewier, more authentic bagel texture.
2. Why do bagels need to be boiled before baking?
Boiling sets the crust quickly, creating a shiny, chewy exterior. It also helps the bagels retain moisture and gives them the dense structure characteristic of classic bagels.
3. How long can I store homemade bagels?
Fresh bagels are best eaten within 2 days when stored at room temperature. For longer storage, freezing is recommended, and bagels should be toasted or reheated before serving.
4. Can I add different toppings?
Absolutely! Popular choices include sesame seeds, poppy seeds, everything bagel seasoning, and even sweet options like cinnamon sugar. Applying toppings after boiling while the bagel surface is still wet helps them stick better.
5. What causes bagels to be too dense or hard?
Overworking the dough or boiling for too long can make bagels tough. Also, insufficient resting or underproofing can result in dense bagels. Following the resting and rising times carefully is crucial for optimal texture.
