All products are selected by our editorial team for quality. If you buy through our links, we may earn a small commission at no extra cost to you.
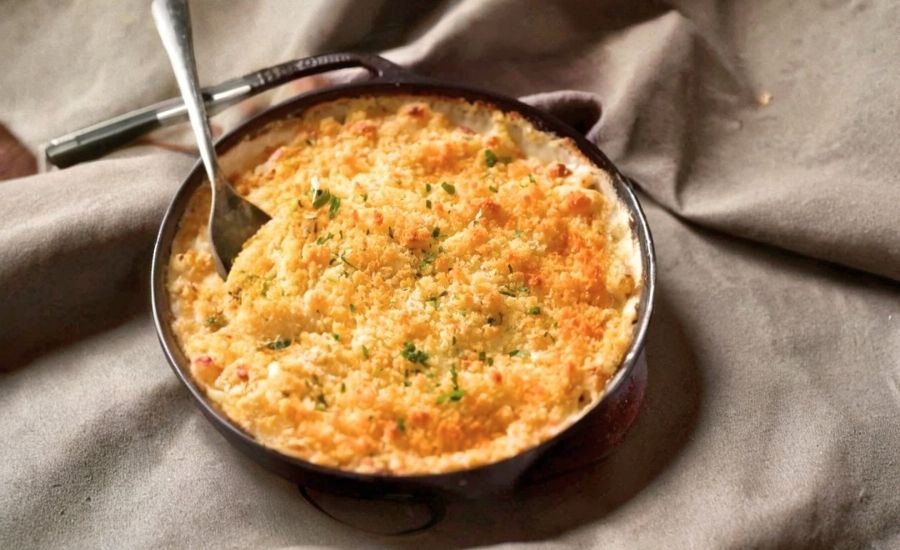
This Baked Mac and Cheese recipe stands out for its perfect balance of ultra creamy cheese sauce and a satisfyingly crunchy, buttery topping.
The key technique of tossing the cooked macaroni in butter prevents the pasta from becoming soggy during baking, ensuring a rich and smooth texture every time.
Using freshly grated Gruyere and mozzarella cheeses elevates the flavor complexity while avoiding the grainy texture often caused by pre-shredded cheese.
Nutritionally, this dish is a solid source of protein (23g per serving) and calcium, thanks to its cheese content, making it more nourishing than typical mac and cheese recipes.
Though indulgent in fat and saturated fat, it delivers comfort food with familiar, satisfying appeal.
This recipe is also incredibly versatile—easy to prepare, perfect for meal prep, and guaranteed to please at gatherings because it stays creamy and doesn’t dry out like many baked pasta dishes.
Its straightforward technique and pantry-friendly ingredients make it a great everyday option for home cooks craving cozy comfort food.
Must-Have Tools for Perfect Results
Large Pot
Essential for boiling macaroni evenly and efficiently. A sturdy pot with ample capacity ensures pasta cooks properly without sticking, which is crucial for maintaining the right texture in your mac and cheese.
Whisk
A whisk is indispensable for making the roux and smooth cheese sauce. It helps dissolve flour into butter and milk without lumps, creating that signature creamy sauce consistency.
Ovenproof Skillet (e.g., Lodge Cast Iron Skillet)
Perfect for making the sauce and baking in the same dish. Cast iron retains heat well, ensuring even cooking and browning of the breadcrumb topping, plus versatile use for countless other recipes.
Grater
Freshly grating your own cheese is key to a silky sauce. A sturdy box grater or rotary grater produces fine, fluffy cheese shreds that melt smoothly, unlike pre-shredded cheese with anti-caking agents.
Measuring Cups and Spoons
Accuracy in measuring butter, flour, milk, and seasonings ensures consistent sauce thickness and flavor balance, especially important for perfecting homemade cheese sauces.

Baked Macaroni and Cheese
Equipment
- 1 Large Pot – for boiling pasta
- 1 whisk (for sauce preparation)
- 1 ovenproof skillet or baking dish (approximately 2.5L / 2.5qt capacity)
- 1 box or rotary cheese grater
- Measuring cups and spoons
Ingredients
Pasta:
- 250 g 8 oz elbow macaroni
- 1 tablespoon unsalted butter or 2 teaspoons neutral oil
Crunchy Topping:
- ⅔ cup panko breadcrumbs
- 2 tablespoons unsalted butter melted
- ¼ teaspoon salt
Cheese Sauce:
- 4 tablespoons unsalted butter
- ⅓ cup all-purpose flour
- 3 cups warm milk whole or low-fat
- 2 cups freshly grated Gruyere cheese or your preferred flavorful melting cheese
- 1 cup freshly grated mozzarella cheese
- ¾ teaspoon salt
Optional Seasonings:
- 1 teaspoon garlic powder
- ½ teaspoon onion powder
- ½ teaspoon mustard powder
Instructions
- Cook the Pasta: Fill a large pot with water and bring it to a rolling boil. Add the elbow macaroni and cook according to the package instructions, but reduce the cooking time by one minute to keep the pasta slightly firm. Drain the pasta well.
- Butter Toss for Texture: Return the drained macaroni to the pot and add the tablespoon of butter. Toss the pasta gently until the butter melts and evenly coats every piece. This step helps keep the pasta from swelling or becoming mushy when baked later. Set aside and allow to cool slightly.
- Prepare the Topping Mixture: In a small bowl, combine the panko breadcrumbs, melted butter, and salt. Mix thoroughly to ensure the breadcrumbs are evenly coated. Set this mixture aside for the topping.
- Make the Roux-Based Cheese Sauce: In a large saucepan or ovenproof skillet, melt the butter over medium heat. Once melted, sprinkle in the flour and whisk continuously for about one minute to cook off the raw flour taste and form a smooth paste (roux).
- Add Milk and Thicken: Gradually pour in about one cup of the warm milk, whisking constantly to blend the roux smoothly. Slowly add the remaining milk, continuing to whisk to avoid lumps. Bring the mixture to a gentle simmer and cook for 5 to 8 minutes, stirring frequently, until the sauce thickens enough to coat the back of a spoon.
- Season and Incorporate Cheese: Stir in the salt and optional garlic, onion, and mustard powders if using. Remove the sauce from heat and immediately fold in the freshly grated Gruyere and mozzarella cheeses until just combined. The cheese will melt gently in the warm sauce, creating a creamy texture.
- Combine Pasta and Sauce: Add the cooled macaroni to the cheese sauce and stir quickly to coat all the pasta evenly. Pour this mixture back into your ovenproof skillet or transfer to a baking dish, spreading it out evenly.
- Add Breadcrumb Topping: Evenly sprinkle the prepared breadcrumb mixture over the mac and cheese. This will create a crisp, golden crust during baking.
- Bake to Perfection: Place the dish in a preheated oven at 180°C (350°F). Bake uncovered for approximately 25 minutes, or until the topping is lightly golden and crunchy. Avoid overbaking to preserve the creamy interior.
- Serve Immediately: Remove from oven and let rest for a few minutes before serving. Optionally, garnish with fresh parsley for a pop of color and freshness.
Notes
- Breadcrumb choice: Panko breadcrumbs offer a lighter, crunchier texture compared to regular breadcrumbs, but if unavailable, standard breadcrumbs work fine.
- Cheese options: Gruyere is ideal for its melting quality and flavor, but cheddar, Monterey Jack, Colby, or provolone can be excellent alternatives. Mozzarella adds stretch and creaminess while reducing oiliness. Always grate cheese fresh for the best melting and texture.
- Pasta butter toss: This step prevents the pasta from absorbing too much sauce and becoming mushy during baking. Cooling the pasta slightly before mixing it into the sauce also helps maintain the perfect texture.
- Baking dish size: Use a dish around 2.5 liters (2.5 quarts) capacity. A larger dish spreads the mac and cheese too thin, leading to less creamy results.
- Make-ahead tip: You can prepare the mac and cheese up to the point of baking, then refrigerate or freeze it covered. When ready, bake covered with foil at 180°C (350°F) for 15 minutes, then uncover and bake for an additional 25 minutes to crisp the topping.
- Reheating leftovers: Warm leftovers in the microwave, then refresh the crunchy topping under a broiler or grill with a light spray of oil or butter.
Chef’s Secrets for Creamy Perfection
Achieving the perfect baked mac and cheese is all about balancing creaminess with a crisp topping and ensuring the pasta maintains its ideal texture.
One secret is tossing the hot, drained pasta in butter before mixing with the cheese sauce.
This light coating prevents the macaroni from swelling or absorbing too much sauce during baking, which keeps the dish luscious rather than stodgy.
Using freshly grated cheese—especially a combination of flavorful Gruyere and stretchy mozzarella—makes a huge difference in flavor and texture compared to pre-shredded varieties that contain anti-caking agents.
When making the sauce, take your time whisking the roux and gradually adding warm milk to avoid lumps, then cook until it thickly coats the spoon.
Avoid overbaking the dish to maintain an ultra-creamy interior while achieving a golden, crunchy breadcrumb topping that adds delightful contrast in every bite.
Serving Suggestions for Maximum Enjoyment
Baked mac and cheese is wonderfully versatile and pairs well with a variety of sides and main dishes.
For a comforting meal, serve it alongside roasted or steamed vegetables such as green beans, broccoli, or sautéed spinach to add freshness and balance the richness.
It also complements roasted or grilled chicken, pork chops, or barbecue dishes, making it a crowd-pleaser for family dinners or gatherings.
To add color and flavor, garnish the mac and cheese with freshly chopped parsley or chives just before serving.
For a more decadent option, add crispy bacon bits or a sprinkle of smoked paprika on top.
This dish shines as a hearty side or satisfying vegetarian main, especially when served with a crisp green salad and a tangy vinaigrette.
Storage Tips for Freshness and Flavor
To keep your baked mac and cheese tasting fresh, store leftovers in an airtight container in the refrigerator for up to 3–4 days.
Before reheating, let the dish come to room temperature for even warming.
The best reheating method is microwaving until warmed through, followed by a brief crisping under the broiler or grill with a light drizzle or spray of butter or oil to revive the crunchy topping.
If you want to freeze the dish, do so before baking: assemble, cover tightly with foil or plastic wrap, and freeze for up to 2 months.
When ready to enjoy, thaw fully in the fridge overnight and bake covered, then uncovered to finish, ensuring it’s heated through and golden on top without drying out.
Frequently Asked Questions Answered Clearly
Q1: Can I use different pasta shapes?
Yes! While elbow macaroni is traditional, small pasta shapes like shells, cavatappi, or penne also work well. Just ensure the pasta is cooked al dente to avoid mushiness after baking.
Q2: Can I make this recipe dairy-free or vegan?
To adapt for dairy-free or vegan diets, substitute the butter and cheeses with plant-based alternatives like vegan butter and shredded dairy-free cheese. Use a plant-based milk like almond or oat milk. Keep in mind texture and flavor may vary.
Q3: Why is tossing pasta with butter important?
Coating the pasta with butter prevents it from absorbing too much sauce and swelling during baking. This keeps the mac and cheese creamy rather than gummy or dry.
Q4: How can I make the topping extra crunchy?
Using panko breadcrumbs instead of regular crumbs provides a lighter, crispier topping. Mixing the panko with melted butter before sprinkling helps it brown beautifully and adds buttery richness.
Q5: Can I prepare this dish ahead of time?
Absolutely! Prepare everything except baking, then cover and refrigerate or freeze. When ready, bake covered to warm through, then uncover to crisp the topping. This makes it great for meal prep or entertaining.
This recipe is inspired by recipetineats and has been carefully refined to enhance clarity, streamline preparation steps, and ensure accurate results. We’ve also included health benefits, nutritional highlights, and Must-Have Tools to help you get the best results every time you cook.
