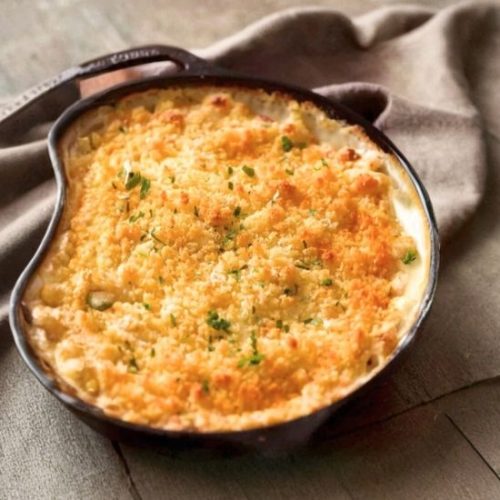
This Baked Mac and Cheese stands out thanks to its ultra creamy, silky cheese sauce and a perfectly crunchy, buttery breadcrumb topping that adds delightful texture contrast.
The secret lies in tossing the cooked macaroni with butter before mixing it with the luscious cheese sauce—this step prevents the pasta from becoming mushy or bloated during baking, ensuring a satisfyingly rich but not stodgy dish.
Creamy Baked Macaroni and Cheese
Equipment
- 1 Large Heavy-Bottomed Pot
- 1 Whisk
- 1 Ovenproof skillet or 2.5L baking dish
- 1 Box Grater
- Measuring cups and spoons set
Ingredients
Pasta:
- 250 g 8 oz elbow macaroni
- 1 tbsp 15g unsalted butter or 2 tsp neutral oil
Breadcrumb Topping:
- ⅔ cup panko breadcrumbs
- 2 tbsp 30g unsalted butter, melted
- ¼ tsp salt
Cheese Sauce:
- 4 tbsp 60g unsalted butter
- ⅓ cup all-purpose flour
- 3 cups warm milk any fat content
- 2 cups freshly shredded Gruyere cheese or substitute cheddar/Colby
- 1 cup freshly shredded mozzarella cheese
- ¾ tsp salt
Optional Seasonings:
- 1 tsp garlic powder
- ½ tsp onion powder
- ½ tsp mustard powder
Instructions
- Cook Pasta: Bring a large pot of salted water to a rolling boil. Add the macaroni and cook it according to the package instructions, but reduce the cooking time by one minute to keep it slightly firm. Drain thoroughly.
- Coat Pasta with Butter: Return the drained macaroni to the pot. Immediately add the butter or oil and toss gently until all pasta is lightly coated. This helps prevent the noodles from sticking together or swelling during baking. Set aside to cool slightly.
- Prepare Breadcrumb Topping: In a small bowl, mix the panko breadcrumbs with melted butter and salt until evenly combined.Set this mixture aside; it will add a crunchy, flavorful crust after baking.
- Make the Cheese Sauce: In a large saucepan or ovenproof skillet, melt the butter over medium heat. Whisk in the flour to create a roux and cook for about one minute to eliminate the raw flour taste. Slowly pour in about one cup of warm milk while whisking constantly to form a smooth paste. Gradually add the remaining milk, stirring continuously to prevent lumps.
- Thicken the Sauce: Continue cooking the mixture over medium heat, whisking regularly, for 5 to 8 minutes until the sauce thickens to a creamy consistency that coats the back of a spoon.
- Add Seasonings and Cheese: Remove the pan from heat. Stir in salt and any optional spices like garlic, onion, or mustard powder if desired. Add the shredded Gruyere and mozzarella cheeses, stirring gently until just combined—the cheese will melt into a silky sauce.
- Combine Pasta and Sauce: Pour the cheese sauce over the butter-coated macaroni in the pot. Stir quickly to evenly coat the pasta. Transfer everything to an ovenproof skillet or baking dish, spreading it out evenly.
- Add Topping and Bake: Sprinkle the buttered breadcrumb mixture evenly over the top. Bake in a preheated oven at 180°C (350°F) for 25 minutes, or until the crust turns a light golden brown and the sauce bubbles at the edges. Avoid overbaking to keep the sauce luscious.
- Serve Immediately: Remove from the oven and serve hot. Garnish with fresh parsley if you like for a pop of color and freshness.
Notes
- Breadcrumb Choice: Panko breadcrumbs create a delightful crispy topping due to their large, airy texture. If unavailable, regular breadcrumbs can be used, though the crunch may be less pronounced.
- Cheese Varieties: Gruyere is preferred for its creamy melt and complex flavor. Cheddar or Colby are great alternatives, while mozzarella adds stretchiness and mildness. Always grate cheese fresh for the best melting quality—pre-shredded cheese may contain anti-caking agents that affect sauce texture.
- Pasta Butter Toss: Coating pasta with butter before mixing in the sauce prevents it from swelling and turning mushy during baking. Cooling the pasta slightly before adding sauce helps maintain texture.
- Baking Dish Size: A 2.5L (2.5-quart) baking dish works perfectly for this quantity. A larger dish spreads the mixture too thinly, reducing creaminess.
- Make-Ahead Tips: You can prepare the dish ahead by cooking pasta, tossing with butter, mixing with cheese sauce, and topping with breadcrumbs. Refrigerate or freeze. When ready, bake covered with foil for 15 minutes at 180°C (350°F), then remove foil and bake uncovered for another 25 minutes.
- Reheating Leftovers: Warm gently in the microwave, then crisp the topping under the broiler or grill by brushing lightly with butter or oil.
Using freshly grated cheeses like Gruyere and mozzarella not only enhances flavor complexity but also delivers a smooth, velvety sauce free from the graininess of pre-shredded cheeses.
Nutritionally, it offers a solid protein boost (23g per serving) and calcium thanks to generous cheese content, though it is indulgent in fats and calories, making it a perfect occasional comfort food.
This recipe is straightforward and approachable, ideal for home cooks wanting a classic crowd-pleaser that can be made ahead and reheated without losing quality—perfect for weeknight dinners or special gatherings.
Must-Have Tools for Perfect Results
Large Heavy-Bottomed Pot
Essential for boiling macaroni evenly. A sturdy pot retains heat well, ensuring pasta cooks uniformly without sticking or overcooking.
Whisk
Vital for creating the roux and smoothly incorporating milk into the butter-flour mixture, preventing lumps and guaranteeing a silky cheese sauce.
Ovenproof Skillet (e.g., Cast Iron Skillet)
Perfect for making the sauce and assembling the dish, allowing you to transfer it straight into the oven. Cast iron distributes heat evenly and can go from stovetop to oven effortlessly.
Box Grater
Freshly grating cheese is key for melting quality and flavor. A durable box grater makes quick work of shredding large blocks of cheese, far superior to pre-shredded options.
Measuring Cups and Spoons
Accurate measurements ensure the roux and sauce thicken properly and the seasoning balances perfectly, critical for this precise baked dish.
Chef’s Secrets to Creamy Perfection
Achieving a luxuriously creamy baked mac and cheese starts with a few simple but crucial techniques.
First, freshly grating your cheese ensures a smooth, melt-in-your-mouth sauce, free from the gritty texture often caused by pre-shredded varieties with anti-caking agents.
Tossing the drained pasta in butter before mixing it with the sauce is another insider tip that keeps the noodles from swelling and becoming mushy during baking.
This light coating also helps the sauce cling perfectly to each macaroni piece.
When making the roux, patience is key: cook the butter and flour mixture long enough to eliminate the raw flour taste, but don’t rush adding the milk gradually while whisking vigorously to avoid lumps.
Lastly, baking just until the breadcrumb topping turns golden will give you that irresistible crunch without drying out the creamy interior.
Serving Suggestions That Delight Everyone
This classic baked mac and cheese pairs beautifully with a variety of dishes, making it a versatile star at any meal.
For a comforting weeknight dinner, serve it alongside a crisp green salad tossed with a tangy vinaigrette to balance the richness.
It’s also perfect next to roasted vegetables or grilled chicken breasts, adding a creamy, indulgent element to your plate.
At gatherings, this dish shines as a hearty side to barbecue ribs or baked ham.
Don’t hesitate to sprinkle some fresh herbs like parsley or chives on top before serving for a burst of color and subtle freshness.
Leftovers can be complemented with a simple steamed vegetable or even turned into individual skillet portions topped with extra cheese and broiled briefly for a personalized crust.
Storage Tips for Freshness and Flavor
Storing baked mac and cheese properly ensures you can enjoy its creamy goodness beyond the first meal.
Once cooled to room temperature, transfer leftovers into an airtight container and refrigerate for up to three days.
When reheating, avoid drying out the sauce by microwaving gently, then crisping the topping under a broiler or in a toaster oven after brushing with a little melted butter or oil.
For longer storage, you can freeze the prepared but unbaked mac and cheese: assemble it fully, cover tightly with foil or plastic wrap, and freeze for up to two months.
Thaw completely in the fridge before baking as directed, adding extra time to cook through.
Avoid reheating multiple times, as repeated heat cycles can cause the sauce to separate and the pasta to become mushy.
Frequently Asked Questions About This Recipe
1. Can I use other types of pasta?
Yes! While elbow macaroni is traditional, small pasta shapes like shells, penne, or cavatappi also work well, as they hold cheese sauce beautifully.
2. Is it okay to use pre-shredded cheese?
Pre-shredded cheese contains additives that prevent clumping but can make your sauce grainy. Freshly grating your cheese will give you a smoother, creamier sauce.
3. Can I make this recipe gluten-free?
Absolutely. Use gluten-free pasta and substitute the all-purpose flour in the roux with a gluten-free flour blend or cornstarch for thickening.
4. How can I make this dish less rich?
Try using low-fat milk or half-and-half instead of full-fat milk and reduce the cheese amount slightly. Adding steamed vegetables like cauliflower or broccoli can bulk it up while lightening the dish.
5. What is the best way to reheat leftovers?
Reheat gently in the microwave until warm, then place under the broiler for a few minutes to crisp the breadcrumb topping. This restores the freshly baked texture and flavor.
