This traditional challah recipe stands out for its irresistibly soft, fluffy texture and rich, golden crust—a perfect centerpiece for Shabbat or any special occasion.
Beyond its comforting flavor, challah offers nutritional benefits that make it a wholesome choice.
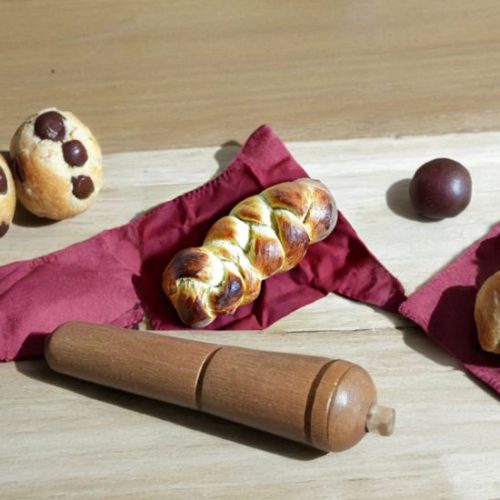
Ultimate Homemade Challah
Equipment
- 1 Very Large Mixing Bowl
- 1 Stand Mixer with Dough Hook (optional)
- 1 Pastry Brush
- 2 Baking Sheets (lightly greased)
- 2 Baking Sheets (lightly greased)
Ingredients
For the Dough:
- 4 tbsp active dry yeast
- 2 tbsp granulated sugar
- 5 cups warm water divided
- 5 large eggs
- 1¼ cups honey
- 1 cup vegetable oil canola or light olive oil
- 2 tbsp salt
- About 18 cups all-purpose flour add gradually
For the Egg Wash:
- 1 large egg
- 2 tbsp honey
- 1 tbsp vanilla extract
Instructions
- Activate the Yeast: In a very large mixing bowl, combine the yeast and sugar with 2 cups of the warm water. Let this mixture sit for 15 to 20 minutes until it becomes frothy and bubbly—this indicates the yeast is active and ready to work.
- Combine Wet Ingredients: Add the eggs, honey, oil, salt, and the remaining 3 cups of warm water into the yeast mixture. Stir gently to combine all the wet ingredients.
- Begin Mixing the Dough: Gradually add half of the flour to the wet mixture, stirring continuously. The dough will start to come together into a thick batter-like consistency.
- Incorporate Remaining Flour and Knead: Add the rest of the flour in small increments, mixing well after each addition. Continue adding flour until the dough feels soft but is no longer sticky to the touch. Once the dough reaches the right consistency, knead it for several minutes directly in the bowl or on a lightly floured surface, either by hand or with a stand mixer fitted with a dough hook.
- First Rise: Cover the bowl with a damp cloth or plastic wrap and place it in a warm, draft-free spot. Allow the dough to rise until it has doubled in size, about 1½ hours.
- Prepare for Braiding: Gently punch down the risen dough to release excess air. Let it rest for 10 minutes to relax the gluten, making it easier to shape.
- Divide and Shape Dough: Cut the dough into six equal portions. For each portion, roll the dough into three strands and braid tightly, pinching the ends to seal. Alternatively, create challah rolls by dividing each piece into four smaller strands and rolling them into tight spirals.
- Second Rise: Place the braided loaves or rolls on greased baking sheets, cover lightly, and let them rise for another 40 minutes until puffed.
- Apply Egg Wash: Whisk together the egg, honey, and vanilla extract. Using a pastry brush, carefully coat the surface of each loaf or roll to achieve a shiny, golden crust after baking.
- Bake to Perfection: Preheat your oven to 375°F (190°C). Bake the challah for about 45 minutes, or until the loaves are deep golden on top and sound hollow when tapped underneath.
Notes
- Flour Amount: Depending on humidity and flour brand, you may need to adjust the flour quantity slightly. Add it slowly and watch for a soft, non-sticky dough.
- Warm Environment for Rising: To encourage optimal rising, place the dough in a warm spot like near a preheated oven or a sunny window.
- Freezing: Challah freezes beautifully. After baking and cooling completely, wrap tightly in foil and store in freezer bags. Thaw at room temperature before serving.
- Small Batch Adaptation: For fewer loaves, scale down the ingredients accordingly, keeping the same proportions.
- Mitzvah Tradition: Remember to separate a small piece of dough before baking, as per tradition.
Rich in protein thanks to the inclusion of eggs, it provides sustained energy, while the moderate use of oil supplies healthy fats that promote heart health without excess saturated fat.
The honey adds natural sweetness, balancing flavor while delivering antioxidants.
This recipe’s generous batch size lends itself perfectly to meal prep or freezing, allowing you to enjoy fresh bread for weeks.
Its step-by-step braiding technique offers both a satisfying hands-on experience and an impressive, elegant presentation.
Challah’s versatility as both a ceremonial bread and everyday treat makes it a rewarding addition to any kitchen—simple enough for home baking enthusiasts, yet impressive enough to share with guests.
Must-Have Tools for Perfect Challah Results
Large Mixing Bowl
Essential for combining ingredients and allowing the dough ample space to rise.
A generously sized bowl prevents overflow during fermentation and can double as a proving vessel for many bread recipes.
Stand Mixer with Dough Hook Attachment
Speeds up kneading and ensures consistent dough texture, saving your hands from fatigue.
Ideal for both beginner and experienced bakers seeking efficiency and perfect gluten development.
Pastry Brush
Enables even application of the egg wash, giving challah its signature glossy, golden finish.
This versatile tool also helps with glazing, buttering, and basting across many recipes.
Baking Sheet or Loaf Pan (Lightly Greased)
Provides a stable surface for shaping and baking the braided loaves, ensuring even heat distribution and preventing sticking. Great for bread, cookies, and roasting vegetables.
Kitchen Scale (Optional but Recommended)
Ensures precise measurement of flour and other ingredients for consistent results every bake.
Crucial for baking accuracy and adjusting recipe sizes.
Chef’s Insider Tips For Challah
Making perfect challah is both an art and a science, and a few insider tips can make your baking truly shine.
Start by ensuring your yeast is fresh and activated properly; the frothy, bubbly stage after mixing with warm water and sugar is crucial for a good rise.
When kneading, aim for a dough that’s soft and elastic, but not sticky—this balance is key to achieving that signature fluffy crumb.
Don’t rush the rising process; giving the dough ample time in a warm spot allows the gluten to develop fully and results in a lighter loaf.
When braiding, keep the strands even in thickness to ensure uniform baking and an attractive appearance.
For a glossy, rich crust, the honey-vanilla egg wash applied just before baking is essential.
Finally, if you find braiding intimidating, try making round rolls or spirals—both are delicious alternatives that save time without sacrificing flavor or texture.
Delicious Serving Ideas To Try
Challah is incredibly versatile and can be enjoyed in many delightful ways.
Serve it fresh and warm, sliced thick and spread with butter or honey for a simple treat.
For brunch, transform challah into French toast by soaking slices in a cinnamon-vanilla custard and pan-frying until golden.
Its slightly sweet flavor also pairs beautifully with savory dishes like roasted chicken or hearty stews.
Use leftover challah for sandwiches—the soft texture holds fillings well, especially creamy or rich spreads.
For a festive touch, toast cubes of challah to make crunchy croutons for salads or soups.
Whether enjoyed plain or dressed up, challah enhances any meal with its comforting flavor and soft texture.
Best Storage Practices For Freshness
To keep your challah fresh, allow it to cool completely before storing to avoid condensation, which can make the crust soggy.
Store loaves wrapped tightly in plastic wrap or in an airtight container at room temperature, where it will stay soft for about 2-3 days.
For longer storage, freezing is your best bet. Wrap the challah first in foil, then place it inside a zip-top freezer bag with as much air removed as possible.
When ready to use, thaw at room temperature and, if desired, warm it briefly in the oven to revive that fresh-baked aroma and texture.
Avoid refrigeration, as it tends to dry out the bread and accelerate staleness.
Frequently Asked Questions About Challah
1. Can I use whole wheat flour instead of white flour?
Yes, you can substitute part or all of the all-purpose flour with whole wheat flour for a nuttier flavor and added fiber, but the texture will be denser and less fluffy.
2. Is it necessary to braid the dough?
Braiding is traditional and gives challah its iconic look, but you can shape the dough into round loaves or rolls if you prefer a simpler presentation.
3. How do I know when the challah is fully baked?
The loaves should be golden brown on top and sound hollow when tapped on the bottom. An internal temperature of around 190°F (88°C) confirms doneness.
4. Can I make challah without eggs?
Eggs contribute to the texture and richness. For an egg-free version, consider vegan egg substitutes, but the final texture may differ from traditional challah.
5. How do I keep challah soft for longer?
Storing challah in an airtight container or tightly wrapped and freezing extra loaves helps maintain softness. Avoid refrigerating as it dries out the bread.
