
All products are selected by our editorial team for quality. If you buy through our links, we may earn a small commission at no extra cost to you.
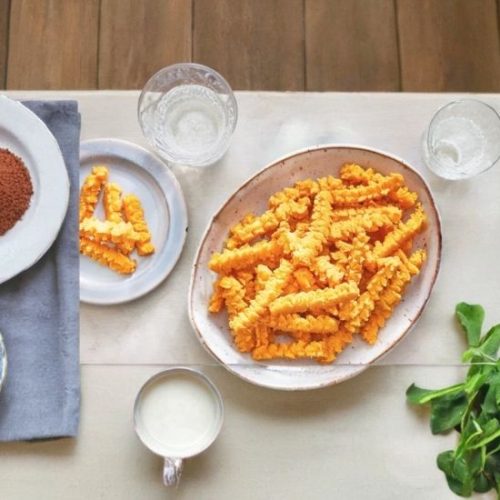
Cheddar Cheese Straws are a timeless Southern snack that combines rich, savory Cheddar cheese with a subtle peppery kick, making them incredibly satisfying and flavorful.
What makes this recipe special is its simplicity — with just six common ingredients, you get a buttery, cheesy treat that’s perfect for parties, casual snacking, or even lunchboxes.
Beyond their delicious taste, these cheese straws offer moderate protein from the cheese and a good dose of calcium, making them a better-for-you alternative to many processed snack crackers.
They’re also free from complicated ingredients or additives, giving you control over quality and freshness.
Their crunchy texture and cheesy aroma appeal to both kids and adults alike, making them an ideal snack for any occasion.
Plus, these cheese straws are quick to prepare, travel well, and can be made in large batches for easy meal prep or entertaining.
A perfect blend of convenience, comfort, and classic Southern charm!
Must-Have Tools for Perfect Results
Pastry Blender
This essential tool makes combining cold butter with flour effortless, ensuring a flaky, tender dough that’s the foundation of perfect cheese straws. It’s a must-have for any baking enthusiast aiming for that ideal texture.
Rolling Pin
Critical for evenly flattening the dough to the right thickness, a sturdy rolling pin guarantees uniform baking and consistent crunch. A versatile kitchen staple for all your baking needs.
Baking Sheet
A heavy-duty, rimmed baking sheet allows for even heat distribution, helping your cheese straws bake to a golden perfection without burning. Ideal for cookies, pastries, and sheet-pan dinners too.
Sharp Knife or Pizza Cutter
Precision cutting tools like a pizza cutter make slicing dough into neat, uniform straws quick and clean, enhancing both presentation and cooking consistency. Multipurpose for pizzas, doughs, and pastry strips.
Cooling Rack
After baking, transferring the cheese straws to a cooling rack prevents sogginess by allowing air to circulate, preserving their crisp texture. An indispensable accessory for all baked goods.
Cheddar Cheese Straws
Equipment
- 1 Pastry Blender
- 1 Rolling Pin
- 2 Rimmed Baking Sheets
- 1 Sharp Knife or Pizza Cutter
- (1) Cooling rack
Ingredients
- 2 cups all-purpose flour
- 1 teaspoon salt
- 1 teaspoon freshly ground black pepper
- 1 cup 2 sticks cold unsalted butter, cut into small cubes
- 2 cups sharp Cheddar cheese shredded
- 2 –3 tablespoons cold water
Instructions
- Prepare the Dry Ingredients: In a large mixing bowl, whisk together the flour, salt, and freshly ground black pepper until evenly combined. This dry base will season the dough and give it that signature peppery bite.
- Incorporate the Butter: Add the cold, cubed butter to the flour mixture. Using a pastry blender or your fingertips, cut and rub the butter into the flour until the mixture resembles coarse crumbs with some pea-sized pieces of butter still visible. This ensures a flaky texture in the final cheese straws.
- Add Cheese and Bind: Stir in the shredded sharp Cheddar cheese, distributing it evenly throughout the mixture. Gradually drizzle in cold water, one tablespoon at a time, stirring gently after each addition. Stop once the dough starts to come together but isn’t sticky— it should hold when pressed but still be slightly crumbly.
- Chill the Dough: Form the dough into a flat disk, wrap it tightly in plastic wrap, and refrigerate for at least 30 minutes. Chilling firms up the butter and makes the dough easier to roll out.
- Roll Out and Cut Straws: On a lightly floured surface, roll the dough out into a rectangle approximately 1/4 inch thick. Using a sharp knife or pizza cutter, slice the dough into narrow strips about 1/2 inch wide and 3–4 inches long to create the classic cheese straw shape.
- Bake to Golden Perfection: Preheat your oven to 375°F (190°C). Place the cut strips onto a rimmed baking sheet lined with parchment paper or a silicone mat, spacing them about 1 inch apart. Bake for 10–12 minutes or until the straws turn a beautiful golden brown and the edges crisp up.
- Cool and Serve: Transfer the baked cheese straws to a wire cooling rack and let them cool completely. This helps maintain their crisp texture. Once cooled, serve immediately or store in an airtight container for up to one week.
Notes
- Cheese Choice: For the most flavorful cheese straws, use a sharp or extra-sharp Cheddar. You can also experiment with smoked Cheddar for a subtle smoky twist.
- Butter Temperature: Keeping the butter cold until just before mixing is key to a flaky texture. Avoid letting the butter soften too much.
- Water Amount: Add water sparingly to avoid a sticky dough. If it feels too dry, add water in small increments.
- Storage Tips: Store completely cooled cheese straws in an airtight container at room temperature. For longer freshness, freeze in a sealed bag and reheat briefly in the oven before serving.
- Make-Ahead: Dough can be prepared and refrigerated overnight. Bring it back to the fridge before rolling out.
Chef’s Secrets to Perfect Cheese Straws
Achieving the ideal Cheddar Cheese Straws comes down to a few key techniques.
First, keeping the butter cold until just before mixing is essential. Cold butter creates tiny pockets of steam during baking, resulting in flaky, tender layers rather than a dense, heavy dough.
Using a pastry blender or food processor helps incorporate the butter evenly without overworking the dough.
Don’t skip chilling the dough — it not only firms up the butter but also allows the flavors to meld, enhancing the final taste.
When rolling out the dough, aim for uniform thickness to ensure even baking and a consistent crunch.
Lastly, slicing the straws into neat, equal widths helps them bake evenly and look visually appealing on your serving platter.
Serving Suggestions for Cheese Straws
Cheddar Cheese Straws make a versatile snack that pairs beautifully with a variety of dishes.
Serve them alongside soups such as tomato bisque or creamy broccoli cheddar for a satisfying appetizer combo.
They also shine as finger foods at parties or casual gatherings, especially when paired with dips like ranch, spicy mustard, or a tangy tomato chutney.
For a sophisticated touch, try serving them with a charcuterie board featuring cured meats, olives, and pickles.
These cheese straws are also excellent as a crunchy addition to lunchboxes or picnic baskets, providing a flavorful alternative to chips or crackers.
Storage Tips to Maintain Freshness
To keep your cheese straws crisp and fresh, store them in an airtight container at room temperature once fully cooled.
Avoid sealing them while still warm to prevent condensation, which can cause sogginess.
If you plan to keep them longer than a week, freezing is an excellent option.
Place the straws in a single layer on a baking sheet and freeze until firm before transferring to a freezer-safe bag to avoid sticking.
Reheat frozen straws in a preheated oven at 350°F (175°C) for 3–5 minutes to restore their crispness.
Proper storage ensures you can enjoy these tasty snacks well beyond the initial baking day.
Frequently Asked Questions About Cheese Straws
1. Can I make cheese straws gluten-free?
Absolutely! Substitute the all-purpose flour with a gluten-free flour blend that includes xanthan gum for structure. Be mindful that texture might vary slightly, but the flavor remains delicious.
2. What cheese works best for cheese straws?
Sharp Cheddar is classic and offers a rich, bold flavor. However, you can experiment with aged Gouda, Parmesan, or smoked Cheddar for unique twists. Just ensure the cheese is well-shredded for even mixing.
3. Can I prepare the dough ahead of time?
Yes, the dough can be wrapped tightly and refrigerated for up to 48 hours. Let it chill well before rolling out. This resting time helps develop flavor and makes handling easier.
4. How do I avoid soggy cheese straws?
Make sure to cool them completely on a wire rack before storing. Storing warm straws or sealing them in a container while hot traps moisture and softens the texture.
5. Can I freeze the cheese straws after baking?
Yes, freezing baked cheese straws is a great way to preserve freshness. Freeze them in a single layer and reheat in the oven to regain their crispness before serving.
This recipe is inspired by southernliving and has been carefully refined to enhance clarity, streamline preparation steps, and ensure accurate results. We’ve also included health benefits, nutritional highlights, and Must-Have Tools to help you get the best results every time you cook.
