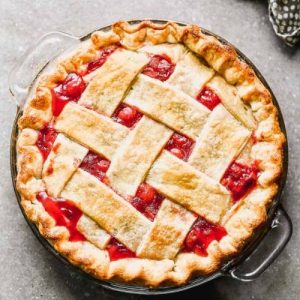
This homemade cherry pie is a wholesome twist on a timeless favorite, bringing together sweet-tart cherries in a golden, flaky crust.
Naturally rich in antioxidants and vitamin C, cherries also provide fiber for better digestion and a light boost of plant-based nutrition.
With its simple prep, balanced sweetness, and low saturated fat, this pie makes for an easy, satisfying dessert that feels indulgent yet is suitable for everyday baking.
Cherry Pie
Equipment
- 1 × 9-inch pie pan
- 1 × pie server
- 1 × medium saucepan
- 1 × slotted spoon
- 1 × Rolling pin
- 1 × pastry wheel or knife
- 1 × Mixing Bowl
- 1 × fork (for egg wash)
- Aluminum foil (to cover crust if browning too quickly)
Ingredients
- 1.5 lbs fresh sour cherries or three 14.5 oz cans, drained
- ¾ cup granulated sugar
- 2 tbsp lemon juice
- ⅓ cup cornstarch
- 2 tbsp butter
- ½ tsp ground cinnamon
- 1 homemade pie crust recipe makes 2 crusts: bottom + top
- 1 large egg white beaten
- 1 tbsp granulated sugar for sprinkling on crust
Instructions
- Gather Ingredients and Equipment: Before you begin, organize everything you need. Place the cherries, sugar, lemon juice, cornstarch, butter, cinnamon, pie crust dough, egg white, and extra sugar on your counter. Have your equipment ready too: a saucepan, slotted spoon, rolling pin, pastry wheel or knife, 9-inch pie pan, mixing bowls, fork, and aluminum foil. Keep the pie dough refrigerated until it’s time to roll it out so it stays cold and bakes into a flaky crust. Preheat your oven to 400°F (204°C).
- Prepare Fresh Cherries: Wash the cherries well, then remove the stems. Pit each cherry using a cherry pitter, chopstick, or small knife, and cut them in half.Transfer the pitted cherries to a medium saucepan. Add ¾ cup sugar and 2 tablespoons lemon juice, stirring to coat the fruit. Cook over medium heat for 3–5 minutes, just until the cherries release their juices. Once liquid forms in the pan, lift the cherries out with a slotted spoon and place them in a bowl, leaving the juices behind.
- Thicken the Cherry Sauce: Scoop about ⅓ cup of the warm cherry juices into a small bowl and whisk in ⅓ cup cornstarch until smooth. Return this mixture to the saucepan with the rest of the juices. Cook over medium heat, stirring constantly, until the mixture thickens into a shiny glaze, about 2–3 minutes. Remove from heat, stir in 2 tablespoons butter and ½ teaspoon cinnamon, and pour the sauce over the reserved cherries. Gently fold together, then set aside to cool to room temperature.
- Prepare Canned Cherries: Drain the canned cherries into a saucepan, reserving ⅓ cup of juice in a small bowl. Set the cherries aside. To the juice in the saucepan, add ¾ cup sugar and warm over medium heat, stirring until dissolved. Whisk the cornstarch into the reserved ⅓ cup juice until smooth, then stir this slurry into the hot juice. Cook until thickened, about 2–3 minutes, then remove from heat. Stir in 2 tablespoons butter, 2 tablespoons lemon juice, and ½ teaspoon cinnamon. Fold in the drained cherries and allow the filling to cool before assembling the pie.
- Roll Out the Bottom Crust: Lightly flour your countertop. Take one disk of chilled pie dough from the refrigerator and roll it into a 12-inch circle, about ⅛ inch thick. Transfer it carefully into a 9-inch pie pan, easing the dough into the bottom and sides without stretching. Leave about ½ inch of dough overhanging the edge for sealing later.
- Fill the Pie: Spoon the cooled cherry filling into the prepared crust, spreading it evenly.If you used fresh cherries, dot the filling with small pieces of butter to add richness. Sprinkle a light pinch of cinnamon over the top if desired.
- Roll and Cut the Top Crust: Remove the second disk of pie dough from the fridge and roll it out the same way as the first. For a lattice design, cut the dough into long strips about ½ inch wide with a knife, pastry wheel, or pizza cutter. If you prefer a solid top crust, leave the circle whole and cut small steam vents in the center once it’s placed on the pie.
- Create the Lattice: For a lattice, lay half the strips across the pie parallel to each other. Fold back every other strip, place one strip crosswise over the center, then unfold the folded strips. Continue weaving strips over and under until the pie is covered. For a full top crust, simply lay it over the filling, trim the excess, and cut vents for steam.
- Seal and Crimp the Edges: Trim the extra dough hanging over the pan, leaving just enough to fold. Tuck the top crust edges under the bottom crust and pinch them together firmly. Crimp with your fingers or press with a fork for a decorative finish.This step locks in the filling and prevents leaks while baking.
- Add Shine and Sweetness: Beat the egg white with a fork until frothy, then brush it lightly over the top crust or lattice. Sprinkle evenly with granulated sugar to create a crisp, golden finish.
- Bake the Pie: Place the pie on the center oven rack and bake at 400°F (204°C) for 40–45 minutes. About 25 minutes into baking, check the crust. If it looks too brown, tent loosely with foil and continue baking. The pie is ready when the crust is golden and the filling bubbles through the lattice or vents.
- Cool the Pie Completely: Transfer the pie to a wire rack and allow it to cool for at least 2–4 hours. This step is crucial because it lets the filling thicken and set. Cutting too early will cause the filling to spill out.
- Slice and Serve: Use a sharp knife and a pie server for clean slices.Serve at room temperature or slightly warmed, paired with vanilla ice cream or whipped cream. A sprinkle of cinnamon just before serving enhances the aroma.
- Store or Freeze: Cover leftovers loosely and refrigerate for up to 5 days. To freeze, let the pie cool completely, wrap tightly in plastic wrap and foil, and freeze for up to 3 months. Thaw overnight in the fridge before serving, or reheat slices in the oven to revive the crust.
Notes
- Both fresh and canned cherries work perfectly; fresh cherries give a brighter flavor, while canned are convenient year-round.
- Chill the pie dough until ready to roll; cold dough creates a flakier crust.
- Allow the cherry filling to cool before adding to the crust to prevent a soggy bottom.
- Use a slotted spoon when handling fresh cherries to keep excess liquid separate from the filling.
- Tent the pie with foil halfway through baking if the crust begins to brown too quickly.
- For a deeper red color, add a few drops of red food coloring to the filling.
- This pie can be made ahead: bake fully or freeze the components separately for later assembly.
Chef’s Secrets for Perfect Pie
The secret to a consistently perfect cherry pie starts with temperature control and patience.
Always use cold butter or shortening in your dough to ensure a light, flaky crust.
When rolling out the dough, avoid stretching it; stretching can lead to shrinking during baking.
Cooling the cherry filling before assembly is essential—it prevents the crust from becoming soggy and helps the filling set beautifully.
For extra flavor, add a small pinch of almond extract or a splash of vanilla to the filling.
Finally, for a visually stunning pie, create an evenly spaced lattice or neatly cut vents to allow steam to escape during baking.
Small details make a huge difference in presentation and texture.
Serving Suggestions to Impress Guests
Cherry pie pairs beautifully with a variety of accompaniments.
Serve it warm with a scoop of vanilla or almond ice cream for a classic combination.
Whipped cream or lightly sweetened crème fraîche also adds a creamy, airy contrast to the tartness of the cherries.
For a more decadent twist, drizzle a little chocolate or caramel sauce on top.
This pie works wonderfully for brunch, dessert after dinner, or even as a sweet treat with afternoon tea.
Slice carefully with a sharp knife to maintain clean, attractive pieces, and consider garnishing each slice with a fresh mint leaf for a pop of color.
Storage Tips for Longevity
Proper storage ensures your cherry pie stays fresh and delicious.
At room temperature, cover the pie loosely for a few hours if you plan to serve it immediately.
For longer storage, refrigerate it in a sealed container or wrap tightly in plastic wrap or foil; it will last up to 5 days.
If you want to store it for months, wrap tightly and freeze the baked pie for 2–3 months.
To enjoy frozen pie, thaw it overnight in the refrigerator and reheat briefly in the oven to restore the crispiness of the crust.
You can also freeze the cherry filling and dough separately, thawing them before baking for a freshly baked taste whenever desired.
Frequently Asked Questions
1. Can I use sweet cherries instead of sour?
Yes, sweet cherries can be used, but you may need to reduce the sugar slightly to avoid an overly sweet filling. Combining sweet and tart cherries can create a perfectly balanced flavor.
2. How can I prevent a soggy bottom crust?
Cool the cherry filling completely before adding it to the crust. You can also bake the bottom crust partially (blind bake) for 10–12 minutes before adding the filling. Using a baking sheet underneath catches spills and promotes even baking.
3. Is it possible to make this pie gluten-free?
Absolutely! Substitute your regular pie crust with a gluten-free crust mix or make one using almond or oat flour. Follow the same baking instructions, but check frequently as gluten-free dough may bake slightly faster.
4. Can I prepare the pie ahead of time?
Yes! You can prepare the filling and crust separately a few days in advance. Refrigerate both components until ready to assemble, or freeze for longer storage. Assembling right before baking ensures the freshest texture.
5. Why does my cherry pie filling sometimes runny?
Runny filling usually happens if the cherries were too juicy or the cornstarch wasn’t fully dissolved.
Make sure to cook the filling until thickened, and allow it to cool completely before placing it in the crust. A short reheating on the stove with a bit more cornstarch can also fix consistency issues.
