All products are selected by our editorial team for quality. If you buy through our links, we may earn a small commission at no extra cost to you.
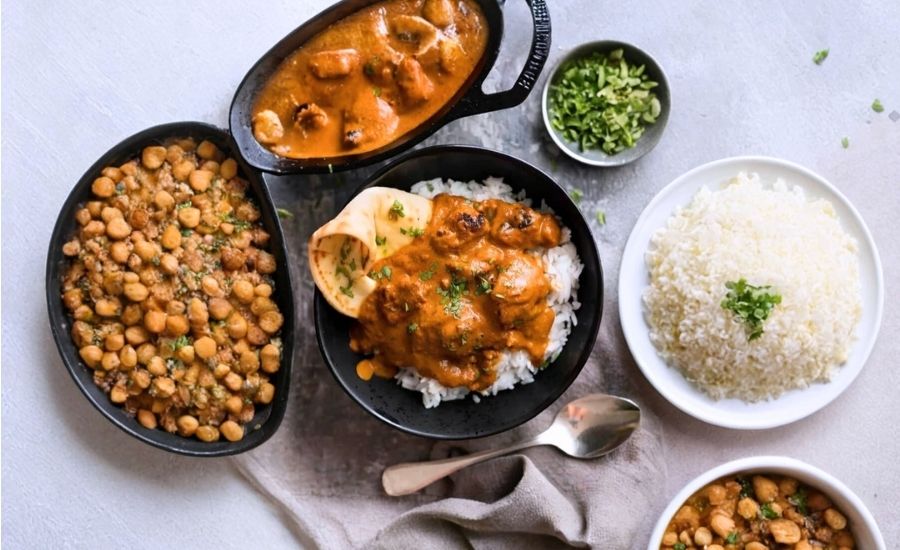
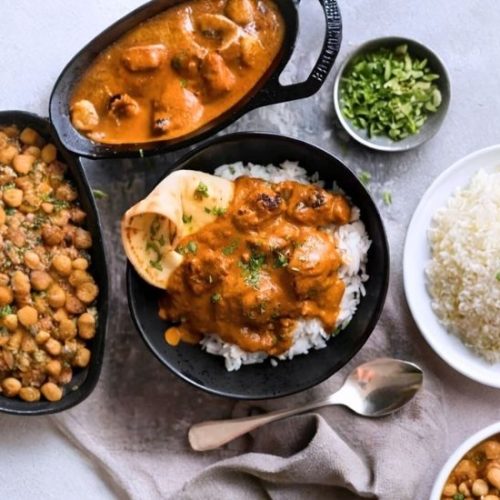
This Chicken Tikka Masala is a standout recipe that perfectly balances flavor, nutrition, and convenience.
What sets it apart is the deeply marinated chicken, charred for smoky richness, then simmered in a velvety tomato cream sauce infused with warm Indian spices.
The marinade not only enhances flavor but also tenderizes the chicken, ensuring every bite is succulent.
From a health perspective, this dish offers a solid serving of protein from chicken thighs, and by using full-fat yogurt and cream in moderation, it delivers satisfying richness without excessive saturated fat.
The use of garlic, ginger, and turmeric adds anti-inflammatory and digestive benefits, while spices like coriander and cumin offer antioxidant properties.
Despite its bold, restaurant-quality flavor, this recipe is surprisingly accessible and meal-prep friendly—make it ahead, freeze, and reheat with ease.
It’s an everyday favorite that feels indulgent but fits well into a balanced, homemade cooking routine.
Must-Have Tools for Perfect Results
1. Non-Stick Skillet or Frying Pan
Product Name: All-Clad Hard Anodized Nonstick Fry Pan
Essential for searing the marinated chicken at high heat to develop the iconic charred crust.
A quality non-stick surface minimizes sticking and makes cleanup a breeze—ideal for daily stovetop use.
2. Stick Blender (Immersion Blender)
Product Name: Mueller Ultra-Stick 500 Watt Hand Blender
Used to puree the curry sauce into a silky, restaurant-quality texture.
A stick blender saves time and reduces mess compared to transferring hot sauce to a countertop blender. Also great for soups and smoothies.
3. Stainless Steel Mixing Bowls
Product Name: FineDine Stainless Steel Mixing Bowl Set
Perfect for marinating the chicken evenly and safely.
Stainless steel doesn’t retain odors or stains and is ideal for prepping various ingredients, making it a kitchen staple.
4. Garlic Press
Product Name: OXO Good Grips Soft-Handled Garlic Press
Speeds up the prep process by easily crushing fresh garlic for both marinade and sauce.
Its sturdy build and ease of use make it a go-to tool for everyday cooking.
5. Chef’s Knife
Product Name: Victorinox Fibrox Pro Chef’s Knife
Used for finely chopping onions, ginger, and garlic with precision.
A good chef’s knife boosts prep efficiency and enhances safety, making it a must-have for any home cook.
Authentic Chicken Tikka Masala
Equipment
- 1 Large non-stick skillet or pan
- 1 Stick (immersion) blender
- 1 Set of mixing bowls (medium to large)
- 1 Garlic Press
- 1 Chef’s knife
- 1 Cutting board
- 1 Measuring cup and spoons
- 1 Wooden or silicone spatula
- 1 Cooking pot with lid (optional if not using the same skillet)
Ingredients
For the Chicken Marinade:
- 600 g 1.2 lb boneless, skinless chicken thighs, cut into 3 cm (1.2-inch) chunks
- ½ cup plain full-fat yogurt Greek yogurt works well
- 1 ½ tablespoons fresh garlic finely minced
- 1 tablespoon freshly grated ginger
- 1 teaspoon garam masala
- 1 teaspoon cumin powder
- 1 teaspoon ground coriander
- 1 teaspoon paprika sweet or smoked
- 1 teaspoon salt
- ⅛ teaspoon cayenne pepper optional, for heat
- 1 tablespoon vegetable oil
- 2 teaspoons lemon juice
- Pinch of freshly ground black pepper
For Cooking the Chicken:
- 1 –2 tablespoons neutral oil vegetable, canola, or grapeseed
Spices for the Curry Sauce:
- 2 teaspoons ground turmeric
- 1 tablespoon garam masala
- 2 teaspoons ground coriander
- 1 teaspoon ground cumin
- ⅛ teaspoon ground cardamom
- ⅛ teaspoon cayenne pepper
For the Curry Sauce:
- 3 tablespoons vegetable oil
- 2 tablespoons 30 g unsalted butter or ghee
- 1 medium onion finely diced
- 1 teaspoon salt
- 2 tablespoons freshly grated ginger
- 6 cloves garlic minced or grated
- 1 tablespoon paprika regular, not smoked
- 400 ml 1 2/3 cups tomato passata or tomato puree
- 400 ml 1 2/3 cups water
- 100 ml 1/3 cup + 1 tablespoon heavy cream or cooking cream
- 1 teaspoon sugar
- 3 tablespoons 50 g butter or ghee, to finish
To Serve:
- Steamed basmati rice
- Optional: Fresh cilantro coriander for garnish
Instructions
- Marinate the Chicken: In a large bowl, combine yogurt, garlic, ginger, spices, salt, lemon juice, oil, and black pepper. Mix well until fully blended. Add the chicken pieces and toss to coat evenly. Cover and refrigerate for at least 3 hours, ideally overnight, to allow the flavors to deeply penetrate.
- Sear the Chicken for Flavor: Heat 1 tablespoon of oil in a large non-stick skillet over high heat until very hot. Place half of the marinated chicken in a single layer and sear for about 2 minutes without stirring to develop a charred surface. Flip each piece and cook another 1–2 minutes until both sides are nicely browned (it doesn’t need to be fully cooked inside). Transfer to a bowl. Repeat with the remaining chicken, adding more oil as needed. Remove all chicken and discard any burnt bits from the pan.
- Start the Curry Base: Reduce heat to medium-high. In the same skillet or a large pot, add the oil and butter.Once melted, stir in the diced onion, ginger, and salt. Sauté for 5–7 minutes, stirring frequently, until onions are soft and lightly golden and the mixture smells fragrant.
- Build the Spice Layer: Lower the heat to medium. Stir in the garlic and paprika and cook for 2 minutes. Add the curry spices (turmeric, garam masala, coriander, cumin, cardamom, and cayenne) and stir continuously for another 2 minutes to toast the spices and deepen the flavor.
- Simmer the Curry Sauce: Pour in the tomato passata and water. Mix well and bring to a gentle simmer. Cover the skillet or pot with a lid, lower the heat to low, and let simmer for 15 minutes, stirring occasionally to prevent sticking.
- Blend for a Silky Finish: Carefully transfer the sauce to a bowl and use an immersion blender to purée until completely smooth. Return the puréed sauce to the pan.
- Finish the Curry: Stir in the cream, sugar, and additional butter. Let everything melt and blend together. Add the seared chicken pieces and gently simmer for another 5–7 minutes until the chicken is fully cooked and infused with the sauce. Optionally, sprinkle a pinch of garam masala before serving.
- Serve and Enjoy: Ladle the rich curry over steamed basmati rice. Garnish with fresh chopped cilantro if desired.Serve with naan or flatbread for a complete experience.
Notes
- Chicken Type Matters: Chicken thighs are highly recommended for this dish. They stay tender and juicy under high heat, unlike chicken breast, which can easily overcook and dry out.
- Spice Substitute: Garam masala is a widely available Indian spice blend. If you can’t find it, curry powder can be used as a last resort, though flavor will vary.
- Oil Tips: Use a high-smoke point neutral oil (like canola or grapeseed). Avoid olive oil, which burns easily at high temperatures.
- Charring Tips: Searing the chicken in batches ensures better caramelization. Don’t overcrowd the pan, and let the meat sit undisturbed to develop a crust.
- Blending Trick: Blending the sauce is key for achieving that velvety texture found in restaurant-style curries. If you don’t have a stick blender, allow the sauce to cool slightly before transferring to a regular blender. Never blend hot liquids tightly covered—they can cause pressure build-up.
- Storage and Make-Ahead: Marinated chicken can be stored in the fridge for up to 2 days or frozen directly in marinade for future use. Leftover curry keeps well in the fridge for 3 days or freezer for up to 3 months. Reheat gently and add a pinch of garam masala to refresh the flavor.
- Portioning: Recipe yields approximately 5 servings of 365 g each, excluding rice or flatbread.
Chef’s Secrets to Maximum Flavor
The key to unforgettable Chicken Tikka Masala lies in the depth of marination and bold layering of spices.
Don’t rush the marinade—letting the chicken rest in the yogurt-spice mixture overnight allows the flavors to fully infuse and tenderize the meat.
When cooking the chicken, high heat is essential. It’s what creates those irresistible charred edges that mimic the smoky flavor of traditional tandoor ovens.
Use a non-stick or well-seasoned cast iron skillet to achieve this without losing the crust to the pan.
Another professional trick is blending the curry sauce.
This step transforms the onion-spice base into a velvety, restaurant-style consistency, giving the final dish that luxurious mouthfeel.
Lastly, don’t shy away from the butter and cream—they add richness and carry the spice beautifully, though you can adjust amounts slightly if needed. It’s all about balance.
Serving Ideas to Elevate the Meal
Chicken Tikka Masala pairs best with simple, starchy sides that absorb the rich sauce.
Basmati rice is a classic choice—its fluffiness and nutty aroma perfectly complement the creamy curry.
If you want something heartier, serve it with warm naan or a quick skillet flatbread to scoop up every last drop.
A side of cucumber raita or yogurt with fresh mint adds a cooling contrast, especially if you included cayenne pepper for heat.
For a full Indian-inspired spread, add sautéed spinach or a simple lentil dal.
This dish also makes a great meal-prep lunch; just pack it with rice and a side salad or pickle for brightness.
For drinks, consider a mango lassi or a light beer to balance the richness.
Best Storage and Make-Ahead Tips
This curry stores exceptionally well, making it a smart choice for meal prep.
The marinated chicken can stay refrigerated for up to 48 hours or frozen directly in the marinade to thaw and cook later.
After cooking, the curry can be refrigerated in an airtight container for up to 3 days.
To freeze, portion into airtight containers and store for up to 3 months. Reheat gently on the stove or in the microwave, adding a splash of water or cream to loosen the sauce as needed.
While curries often taste better the next day, this particular dish is most aromatic when freshly made.
To refresh leftovers, sprinkle a little garam masala while reheating to revive its vibrant flavor.
Frequently Asked Questions About This Dish
1. Can I use chicken breast instead of thighs?
It’s possible, but not recommended. Chicken breast tends to dry out when seared at high heat, while thighs stay juicy and tender, making them ideal for this recipe’s charred texture and bold flavors.
2. Is this dish very spicy?
Not inherently. The base recipe is mildly spiced with warmth from garam masala and paprika. Cayenne is optional, so you can control the heat level to your preference or omit it entirely for a kid-friendly version.
3. Can I make this dairy-free?
Yes, with a few swaps. Use coconut yogurt in the marinade and replace cream with full-fat coconut milk. Ghee can be swapped with neutral oil. These substitutions give the dish a slightly different, but still delicious, depth of flavor.
4. What’s the difference between passata and canned tomatoes?
Tomato passata is smooth and uncooked, offering a pure, bright tomato flavor without the chunks. It gives this curry a silky base. If unavailable, you can blend canned tomatoes until smooth and use that instead.
5. Do I have to blend the sauce?
Blending isn’t mandatory, but it does make a big difference. It turns the onion and spice mixture into a smooth, luxurious curry sauce like what you’d find in restaurants. If you skip this step, the texture will be chunkier and less refined.
This recipe is inspired by recipetineats and has been carefully refined to enhance clarity, streamline preparation steps, and ensure accurate results. We’ve also included health benefits, nutritional highlights, and Must-Have Tools to help you get the best results every time you cook.
