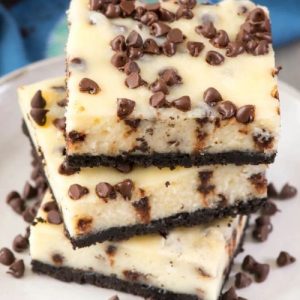
Indulge in these rich and creamy Chocolate Chip Cheesecake Bars that strike the perfect balance between dessert and a protein-packed treat.
With a buttery Oreo crust and a smooth cheesecake filling loaded with chocolate chips, they offer a satisfying bite every time.
High in protein, moderate in carbs, and easy to make, these bars are perfect for everyday enjoyment or meal prep.
Chocolate Chip Cheesecake Bars
Equipment
- 9×13-inch baking pan
- Aluminum foil (to line pan)
- Nonstick cooking spray
- Food processor or blender (for cookie crumbs)
- large mixing bowl
- Hand or stand mixer
- Rimmed Baking Sheet
- Measuring cups and spoons
- Rubber Spatula
Ingredients
For the Crust:
- 30 Oreo cookies
- 6 tablespoons unsalted butter melted
For the Cheesecake Filling:
- 3 8-ounce packages cream cheese, room temperature
- 1 ½ cups granulated sugar
- ¼ cup sour cream room temperature
- 2 teaspoons vanilla extract
- ¼ cup all-purpose flour
- 3 large eggs room temperature
- 1 ¼ cups mini chocolate chips divided
Instructions
- Preheat and Prepare the Pan: Begin by preheating your oven to 325°F (163°C). While the oven warms, line a 9×13-inch baking pan with aluminum foil, leaving an overhang on all sides for easy removal later. Lightly spray the foil with nonstick cooking spray to prevent sticking. This ensures the cheesecake bars lift out easily and maintain their shape after baking.
- Crush the Oreos for the Crust: Place all 30 Oreo cookies, including the creamy filling, into a food processor. Pulse until they become fine, uniform crumbs. If you don’t have a food processor, place the cookies in a sturdy zip-top bag and crush them using a rolling pin until smooth. The goal is a consistent crumb base that will hold together well when combined with butter.
- Mix the Crust Ingredients: Transfer the crushed cookies into a medium bowl and pour in 6 tablespoons of melted unsalted butter. Stir or knead with a spatula until all crumbs are coated and the mixture resembles wet sand. Proper mixing ensures that the crust will bind tightly, forming a stable foundation for the cheesecake.
- Press and Bake the Crust: Evenly press the crumb mixture into the bottom of the prepared pan using the back of a spoon or a flat-bottomed measuring cup. Press firmly to create a compact, level layer. Bake the crust in the preheated oven for 10 minutes. Remove and allow it to cool for 20 minutes while keeping the oven on. Cooling slightly prevents the cheesecake from sinking into the crust.
- Prepare the Water Bath: While the crust cools, prepare a water bath to ensure smooth, crack-free cheesecake. Place a large rimmed baking sheet on the lowest oven rack and fill it halfway with water. The steam from the water bath will help the cheesecake cook gently and evenly.
- Beat the Cream Cheese Base: Place the softened cream cheese into a large mixing bowl. Using a hand mixer or stand mixer, beat on medium speed until smooth and free of lumps. Cream cheese at room temperature is essential to achieve a silky, velvety cheesecake filling.
- Incorporate Sugar, Vanilla, and Sour Cream: Add 1 ½ cups granulated sugar, 2 teaspoons vanilla extract, and ¼ cup sour cream to the cream cheese. Mix on medium speed until the mixture is glossy, smooth, and fully combined. The sugar sweetens while giving structure, and the sour cream adds moisture and a subtle tang.
- Mix in the Flour: Sprinkle in ¼ cup all-purpose flour and blend on low speed until fully incorporated. The flour stabilizes the cheesecake, helping it hold its shape while maintaining a tender texture. Avoid overmixing to prevent adding excess air, which can cause cracks.
- Add the Eggs One at a Time: Add 3 large eggs individually, mixing on low speed after each addition. Ensure each egg is fully incorporated before adding the next.Eggs provide structure and creaminess, but overmixing can trap air and affect the final texture. The batter should remain smooth and thick.
- Fold in Most of the Chocolate Chips: Gently fold 1 cup of mini chocolate chips into the cheesecake batter using a spatula. This distributes the chocolate evenly without overworking the mixture. These chips melt slightly during baking, adding pockets of chocolate throughout each bar.
- Pour the Cheesecake Over the Crust: Carefully pour the prepared cheesecake batter over the cooled Oreo crust. Use a spatula to spread it evenly to the edges, ensuring a smooth, uniform layer. An even layer ensures consistent baking and neat, clean bars after slicing.
- Add the Remaining Chocolate Chips: Sprinkle the remaining ¼ cup of mini chocolate chips evenly on top of the batter. This creates a decorative, chocolate-studded top that adds texture and extra bursts of flavor in every bite.
- Bake in a Water Bath: Place the pan in the oven on the middle rack, directly above the prepared water bath. Bake for 40–45 minutes, or until the edges are lightly golden and the center appears just set. The water bath gently steams the cheesecake, keeping it creamy and preventing cracks.
- Cool at Room Temperature: Remove the pan from the oven and let it cool on a wire rack for 1 hour. Cooling gradually ensures the cheesecake sets properly and maintains a smooth surface. Avoid slicing while warm to prevent the bars from falling apart.
- Chill Before Serving: Transfer the cheesecake to the refrigerator and chill for at least 4 hours, or overnight if possible. Chilling enhances flavor, firms up the bars, and makes slicing clean and easy.
- Slice and Enjoy: Lift the chilled cheesecake from the pan using the foil overhang.Slice into 24 equal bars with a sharp knife, wiping the blade clean between cuts for neat edges. Serve as a decadent dessert, satisfying snack, or make-ahead treat. Store leftovers in an airtight container in the refrigerator for up to 5 days.
Notes
- Use room-temperature cream cheese and eggs to achieve a smooth, lump-free cheesecake batter.
- Press the Oreo crust firmly to ensure the base stays intact when slicing.
- A water bath is essential to prevent cracks and keep the cheesecake silky.
- Mini chocolate chips are preferred for even distribution and smaller pockets of chocolate.
- Allow the cheesecake to chill completely for at least 4 hours; overnight chilling gives the best texture.
- Clean the knife between cuts to achieve neat, professional-looking bars.
- Store in an airtight container to maintain freshness and prevent the cheesecake from absorbing other fridge odors.
- For extra flavor, consider adding a pinch of salt to the crust to enhance the chocolate flavor.
Chef’s Secrets For Perfect Texture:
Achieving the ideal texture for cheesecake bars requires attention to detail.
Start with room-temperature ingredients; cold cream cheese or eggs can cause lumps or uneven baking.
Use a gentle mixing technique when adding eggs—overmixing can trap air and cause cracks.
A water bath is a chef’s trick for smooth, crack-free cheesecake; it creates a humid oven environment, preventing the top from drying. Finally, don’t rush the cooling process.
Let the bars cool at room temperature before refrigeration; this ensures a creamy, firm, and velvety texture with every bite.
Serving Suggestions For Dessert Enjoyment:
These Chocolate Chip Cheesecake Bars are versatile and can be enjoyed on many occasions.
Serve them chilled for a refreshing dessert or slightly warmed for a gooey, indulgent treat.
Pair with fresh berries, a drizzle of chocolate or caramel sauce, or a dollop of lightly whipped cream to elevate the presentation.
They also work beautifully as a sweet snack for parties, brunches, or after-school treats.
Their rich flavor and smooth texture make them a crowd-pleaser for both casual and formal gatherings.
Storage Tips For Freshness:
To keep your cheesecake bars fresh and delicious, store them in an airtight container in the refrigerator.
They will remain perfectly soft and creamy for up to 5 days.
For longer storage, freeze the bars individually wrapped in plastic and then in a freezer-safe container for up to 2 months.
Thaw in the refrigerator overnight before serving.
Avoid storing them at room temperature for extended periods, as the cream cheese filling may soften too much or spoil.
Always slice chilled bars for clean edges and the best texture.
Frequently Asked Questions
1. Can I use regular chocolate chips instead of mini ones?
Yes! Regular-sized chocolate chips work, but mini chips are preferred because they distribute more evenly throughout the cheesecake.
If using larger chips, consider chopping them slightly to prevent sinking to the bottom during baking.
2. Do I have to use a water bath?
While optional, a water bath significantly improves the cheesecake’s texture. It prevents cracks and ensures the center sets gently without overbaking.
If you skip it, bake at a slightly lower temperature and monitor closely for doneness.
3. Can I make this recipe ahead of time?
Absolutely! Cheesecake bars actually benefit from being made ahead. Prepare the bars a day or two in advance and chill them overnight.
This allows the flavors to meld and the texture to firm up, making slicing easier and presentation more polished.
4. How do I get smooth, creamy cheesecake filling?
The key is room-temperature cream cheese and eggs. Beat the cream cheese thoroughly until fully smooth before adding other ingredients.
Fold ingredients gently and avoid overmixing after adding eggs to maintain a velvety texture.
5. Can I substitute the Oreo crust with another cookie?
Yes, you can experiment with graham crackers, digestive biscuits, or chocolate wafer cookies. Simply crush and mix with melted butter as instructed.
Keep in mind that different cookies will alter the sweetness and texture slightly, but the cheesecake filling remains the same.
