All products are selected by our editorial team for quality. If you buy through our links, we may earn a small commission at no extra cost to you.
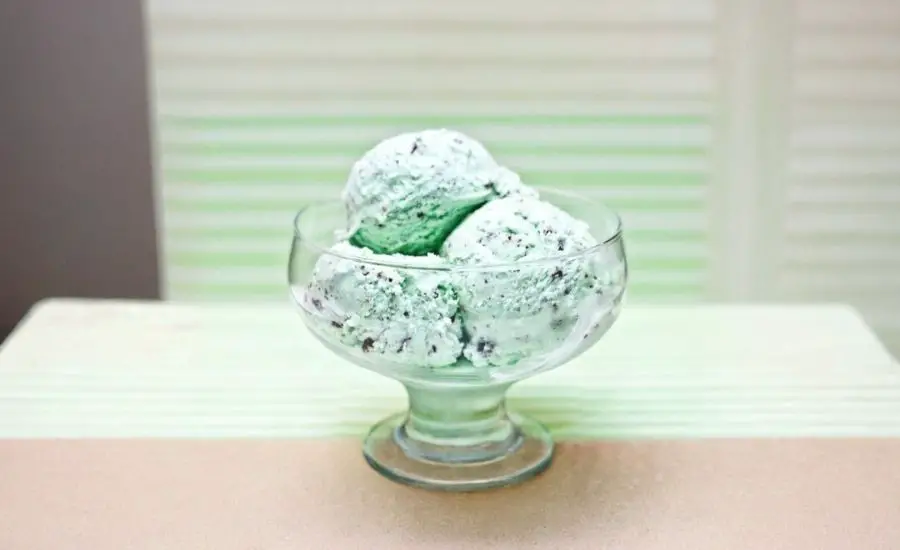
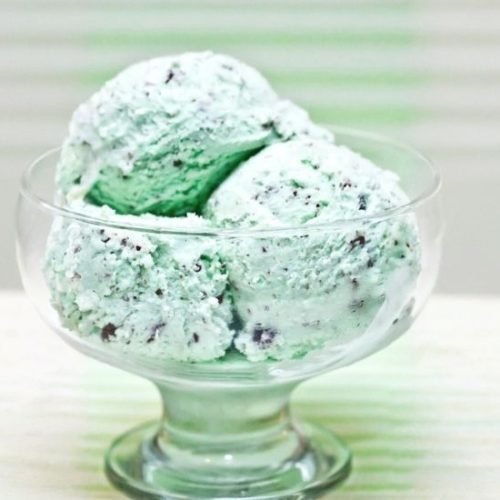
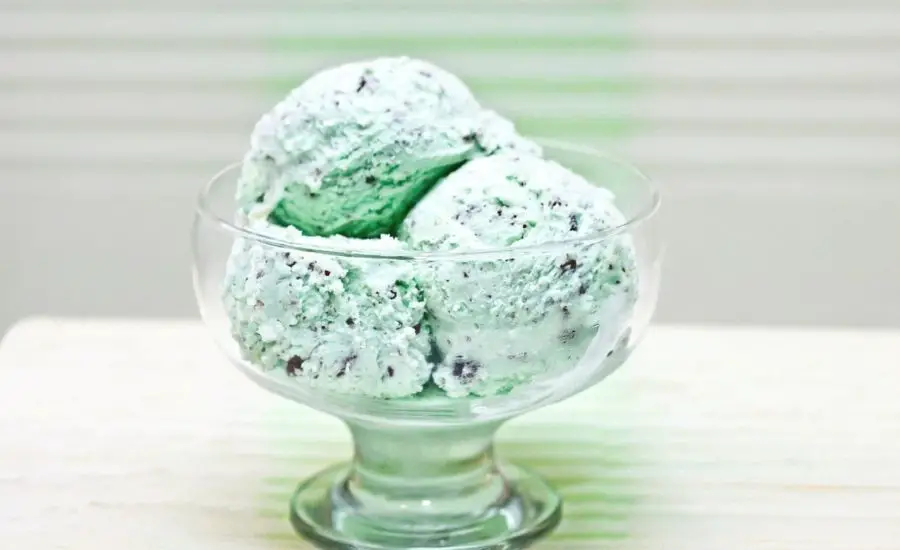
This homemade mint chocolate chip ice cream recipe stands out for its perfect balance of refreshing mint flavor and rich, creamy texture, all crafted from just five simple ingredients.
Unlike store-bought varieties, this recipe lets you control the quality of every component, ensuring a fresher, more natural taste.
With whole milk and heavy cream providing satisfying healthy fats, it delivers a luscious mouthfeel while peppermint extract offers a burst of coolness.
Though indulgent, it’s free from artificial preservatives and excessive additives.
This treat is not only delightfully creamy but also customizable—swap peppermint for vanilla for a classic chocolate chip experience.
The recipe is straightforward and quick to prepare, making it an ideal choice for anyone craving a homemade dessert without the hassle.

Whether for casual family gatherings or a special treat, this ice cream is a delightful crowd-pleaser that’s easy to make and even easier to enjoy.
Must-Have Tools for Perfect Results
Ice Cream Maker
This appliance is essential for churning the mixture to a creamy, smooth texture while incorporating air for lightness. It’s a versatile tool that can transform simple ingredients into a variety of frozen desserts at home, making it an excellent investment for any dessert lover.
Mixing Bowl
A sturdy bowl provides the perfect vessel for combining milk, sugar, and cream evenly. Beyond ice cream, it’s invaluable for mixing batters, salads, and marinades.
Whisk
Essential for dissolving sugar into milk thoroughly, a good whisk ensures a smooth base without graininess. It’s a kitchen staple that aids in beating eggs, whipping cream, and blending sauces with ease.
Airtight Container
To maintain freshness and prevent freezer burn, an airtight container is crucial for storing the ice cream. It’s also perfect for preserving leftovers, meal prep, and bulk storage.

Creamy Chocolate Mint Ice Cream You’ll Love
Equipment
- 1 Ice Cream Maker
- 1 large mixing bowl
- 1 Whisk
- 1 Airtight Freezer-Safe Container
Ingredients
- 1 cup whole milk chilled
- ¾ cup granulated sugar
- 2 cups heavy cream chilled
- 1.5 to 2 teaspoons peppermint extract adjust to taste
- 4 ounces semi-sweet chocolate finely chopped
Instructions
- Prepare Your Ingredients: Begin by gathering all your ingredients and ensuring your dairy products—the whole milk and heavy cream—are well chilled. This cold foundation helps the ice cream churn properly and achieve the perfect creamy texture. Also, finely chop the semi-sweet chocolate bar into tiny, even pieces. Smaller chocolate bits will distribute better throughout the ice cream and create delightful little bursts of chocolate in every bite. Measure out the sugar and peppermint extract as well, so everything is ready at hand before you start.
- Combine Milk and Sugar: In a large mixing bowl, pour in the chilled whole milk. Using a whisk, gradually add the granulated sugar to the milk, stirring continuously.This process helps dissolve the sugar completely, ensuring a smooth and sweet base without any gritty texture.Take your time to whisk thoroughly for about 2-3 minutes or until you no longer feel sugar granules when you rub a bit between your fingers. A fully dissolved sugar base is essential for the ice cream’s creamy consistency.
- Add Heavy Cream and Peppermint Extract: Once the sugar is fully dissolved in the milk, slowly pour in the chilled heavy cream while gently whisking the mixture to combine all the liquids evenly. The heavy cream enriches the base, lending the ice cream its characteristic creamy, luscious texture. Next, add the peppermint extract. Start with 1.5 teaspoons and whisk it in. Taste your mixture carefully and adjust by adding up to 2 teaspoons if you prefer a stronger mint flavor. Peppermint extract is potent, so adding it gradually helps achieve the perfect refreshing balance without overpowering the sweetness.
- Prepare the Ice Cream Maker: Turn on your ice cream maker according to the manufacturer’s instructions. Many models require you to freeze the bowl for at least 24 hours before use, so ensure yours is ready to go. The machine’s churning paddle should be spinning freely to incorporate air and prevent large ice crystals from forming, which creates a smooth, creamy texture.
- Pour Mixture Into Ice Cream Maker: With the ice cream maker running, slowly pour your chilled mint-cream mixture into the machine’s bowl. Pouring slowly helps prevent splashing and ensures the mixture integrates well with the spinning paddle from the start. Close the lid securely to keep the cold air in and maintain an even temperature during churning.
- Churn Until Soft Serve Consistency: Allow the mixture to churn for approximately 20 minutes. During this time, the ice cream maker will slowly freeze and aerate the mixture, transforming it into a smooth, creamy soft serve consistency. Avoid opening the lid during this phase, as temperature fluctuations can cause ice crystals and affect texture.Check occasionally through the lid if your machine has a viewing window to observe the thickening process.
- Add Chocolate Chips Gradually: When your ice cream reaches the soft-serve stage, typically after 20 minutes, begin adding the finely chopped semi-sweet chocolate.Slowly sprinkle the chocolate pieces into the churning ice cream over the last 5 minutes of mixing.This gradual addition ensures the chocolate disperses evenly throughout the ice cream, preventing clumping and allowing the chips to harden slightly, providing that classic mint chocolate chip texture with delightful crunch.
- Transfer to Airtight Container: Once the churning cycle is complete, carefully scoop the ice cream into a pre-chilled, airtight container. Using a spatula, scrape down the sides of the ice cream maker’s bowl to capture every bit of delicious ice cream.Press the ice cream down gently in the container to minimize air pockets and create a uniform texture.
- Freeze Until Firm: Seal the container tightly with its lid to prevent freezer burn and odors from seeping in. Place the container in your freezer and let the ice cream firm up for at least 2 to 3 hours.This final freezing step allows the ice cream to harden to the perfect scoopable consistency. Patience here pays off for the best texture and flavor.
- Serve and Enjoy!: When you’re ready to enjoy your homemade mint chocolate chip ice cream, remove the container from the freezer and let it sit at room temperature for 5-10 minutes. This brief resting period softens the ice cream slightly, making scooping easier and preserving the creamy texture. Serve in bowls or cones and savor your fresh, homemade treat!
Notes
- Use whole milk and heavy cream well chilled for the best creamy texture.
- Peppermint extract is strong—start with less and adjust to your taste.
- Finely chopping the chocolate ensures even distribution and better mouthfeel.
- Optional: Add a few drops of green food coloring for classic mint color.
- Ice cream maker bowl must be fully frozen before use to churn properly.
- Store ice cream in an airtight container to prevent freezer burn.
- For a dairy-free version, substitute with coconut milk and coconut cream.
- This recipe makes approximately 1.5 quarts, perfect for serving 8-10 people.
Chef’s Secrets for Creamy Texture
Achieving perfectly creamy mint chocolate chip ice cream comes down to temperature control and ingredient quality.
Always use well-chilled dairy to help the mixture freeze evenly and prevent large ice crystals.
When combining sugar and milk, whisk thoroughly to dissolve the sugar completely — undissolved sugar can cause graininess.
The slow churning process in an ice cream maker is essential, as it aerates the mixture, making it light and smooth.
Adding chopped chocolate late in the churning process prevents it from sinking and keeps pieces evenly distributed.
Lastly, be patient when freezing the finished ice cream; this resting time allows flavors to meld and texture to firm up beautifully.
Serving Suggestions to Impress Guests
Mint chocolate chip ice cream shines served simply in a classic waffle cone or a chilled bowl with a drizzle of hot fudge or chocolate syrup.
For a grown-up twist, pair it with a splash of coffee liqueur or a few fresh mint leaves for garnish.
It also complements rich desserts like brownies or chocolate lava cake perfectly, providing a refreshing contrast.
For an easy party treat, serve scoops alongside crushed cookies or sprinkle with chopped nuts for extra texture.
This versatile ice cream can be enjoyed as a standalone dessert or as part of an indulgent ice cream sundae bar.
Storage Tips for Best Freshness
Store your homemade ice cream in a tightly sealed, airtight container to avoid absorbing any odors from your freezer.
Press a layer of parchment paper or plastic wrap directly onto the surface of the ice cream before sealing to reduce ice crystal formation.
Keep it in the coldest part of your freezer, not the door, to maintain consistent temperature.
Homemade ice cream is best consumed within 1-2 weeks for optimal freshness, though it can last up to a month if well sealed.
When ready to serve, allow the ice cream to sit at room temperature for a few minutes to soften for easier scooping.
Frequently Asked Questions Answered
1. Can I make this recipe without an ice cream maker?
Yes! You can freeze the mixture in a shallow container, stirring every 30 minutes for about 3 hours to break up ice crystals. The texture won’t be as smooth but will still be delicious.
2. What if I don’t have peppermint extract?
You can substitute vanilla extract for a classic chocolate chip ice cream or use other flavors like almond or mint-flavored liqueur if desired.
3. How do I store leftover ice cream?
Keep it in an airtight container in the freezer and avoid frequent temperature changes. Use parchment paper to cover the surface for added protection.
4. Can I use different types of chocolate?
Absolutely! Dark chocolate, milk chocolate, or even chocolate chips work. Adjust sweetness accordingly if using sweeter or darker chocolates.
5. Is this recipe suitable for vegetarians?
Yes, this recipe is vegetarian-friendly as it contains no animal-derived gelatin or additives. It’s perfect for those who follow a vegetarian diet.
This recipe is inspired by chewoutloud and has been carefully refined to enhance clarity, streamline preparation steps, and ensure accurate results. We’ve also included health benefits, nutritional highlights, and Must-Have Tools to help you get the best results every time you cook.


