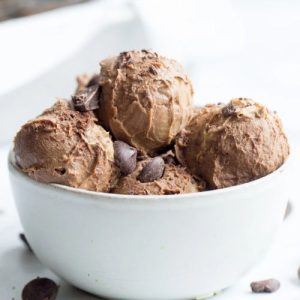
Indulge in this creamy Coffee Chip Ice Cream that’s both delicious and guilt-free!
Made with coconut milk, cashew butter, and naturally sweet dates, it’s a vegan, no-churn treat packed with plant-based protein, healthy fats, and fiber.
Quick to prepare and freezer-friendly, it’s perfect for satisfying your sweet tooth anytime, making it an effortless addition to your everyday dessert rotation.
Coffee Chip Ice Cream
Equipment
- 1 Medium saucepan
- 1 Blender
- 1 8×8 inch or loaf pan
- Parchment paper
- Ice-Cream Scoop
Ingredients
- 14 oz full-fat coconut cream
- 14 oz full-fat coconut milk
- 1 cup pitted dates
- 2 tbsp instant coffee
- 2 tsp vanilla extract
- ¼ tsp sea salt plus extra for topping
- ⅔ cup cashew butter
- 1 cup chocolate chips use dairy-free for vegan version
Instructions
- Prepare the Coffee-Date Base: Start by gathering your coconut milk, coconut cream, pitted dates, and instant coffee. Pour the coconut milk and coconut cream into a medium-sized saucepan over medium heat. Add the pitted dates and sprinkle the instant coffee on top. Stir gently to combine all ingredients. Bring the mixture to a gentle boil, allowing the dates to soften and the coffee to infuse its rich aroma. Once it reaches a boil, remove the pan from heat and let it sit for 10 minutes. This resting period softens the dates further and allows the flavors to meld, creating a naturally sweet, coffee-flavored base.
- Blend Into Creamy Perfection: Transfer the cooled coffee-date mixture into a high-speed blender. Add the vanilla extract, sea salt, and creamy cashew butter. Blend on high for 2–3 minutes, or until the mixture is ultra-smooth and creamy. Scrape down the sides of the blender as needed to ensure there are no chunks of dates remaining. This step is essential to achieve a velvety, ice cream-like texture without using an ice cream maker.
- Prepare the Freezing Pan: While blending, line an 8×8 inch square baking pan or a loaf pan with parchment paper. Make sure the paper extends slightly over the edges for easy lifting later. Pour the blended mixture evenly into the prepared pan, smoothing the top with a spatula. This step ensures your ice cream sets evenly and is easy to remove when fully frozen.
- Initial Freeze for Texture: Place the pan in the freezer for 20 minutes to allow the mixture to begin setting. After this initial freeze, check the texture by gently stirring. If you add chocolate chips at this stage, some may melt slightly, creating beautiful chocolate swirls throughout the mixture. For a more defined chocolate chip texture, wait to stir them in after the mixture has firmed a little more.
- Fold in Chocolate Chips: Once the mixture is slightly firm but still soft, gently fold in the chocolate chips. Be careful not to overmix; you want the chips evenly distributed without melting all of them unless you prefer a marbled chocolate effect. You can also reserve a few chips to sprinkle on top after freezing for added texture and visual appeal.
- Final Freeze for Firmness: Return the pan to the freezer and allow the ice cream to freeze completely, at least 2–3 hours. This ensures the ice cream reaches a scoopable consistency. If you have the patience, freezing overnight will yield the firmest, most indulgent texture.
- Serve and Enjoy: Before serving, let the ice cream sit at room temperature for 5–10 minutes to soften slightly for easier scooping. Run your ice cream scoop under hot water and gently carve out portions. Serve in bowls or cones and top with additional chocolate chips, chopped nuts, or a light sprinkle of sea salt to enhance the flavor. Enjoy this creamy, dairy-free, coffee-flavored delight any time you crave a refreshing, indulgent treat.
Notes
- Use full-fat coconut milk and coconut cream for the creamiest texture; light versions may result in a softer ice cream.
- Dates act as a natural sweetener—soaking them for 10 minutes in warm water can make blending easier.
- For a vegan or paleo version, use dairy-free chocolate chips like Lily’s or Enjoy Life.
- The initial 20-minute freeze before adding chocolate chips allows some swirls to form while preventing all chips from melting.
- Let ice cream sit at room temperature for a few minutes before scooping to make serving easier.
Chef’s Secrets To Creaminess
Achieving a silky, scoopable texture without an ice cream maker is all about balance.
Start with full-fat coconut milk and cream to provide healthy fats that give the ice cream a rich mouthfeel.
Blending the mixture thoroughly ensures the dates fully dissolve, creating a smooth base.
Adding cashew butter not only boosts protein but also contributes to the creamy consistency.
The short initial freeze allows partial setting, which helps maintain a soft, scoopable texture while preventing ice crystals.
For even more indulgence, gently fold chocolate chips at the right moment—too early and they’ll melt, too late and the chips won’t integrate as well.
Serving Suggestions For Maximum Enjoyment
This coffee chip ice cream is a versatile dessert that pairs beautifully with many flavors.
Serve it in bowls with a drizzle of melted dark chocolate, or sprinkle chopped nuts, cacao nibs, or shredded coconut on top for added texture.
It also pairs wonderfully with fresh berries for a refreshing contrast to the creamy base.
For a special treat, use it in vegan ice cream sandwiches, atop brownies, or layered in parfaits.
This ice cream works as a quick pick-me-up, an after-dinner dessert, or even a delightful snack on a warm day.
Storage Tips For Long-Term Freshness
Store your coffee chip ice cream in an airtight container to prevent freezer burn and preserve its creamy texture.
Line the top with parchment paper before sealing to further minimize ice crystals.
Ideally, consume within 1–2 weeks for the best flavor and texture, though it can last up to a month if properly stored.
If the ice cream hardens too much, allow it to sit at room temperature for 5–10 minutes before scooping, or use a warm ice cream scoop for smooth, effortless servings.
Frequently Asked Questions
1. Can I use regular milk instead of coconut?
Coconut milk and cream provide the fat necessary for creamy, scoopable texture. Using regular cow’s milk or low-fat milk may result in a softer, icier texture.
If you must substitute, consider adding a plant-based cream or a tablespoon of cashew butter to mimic richness.
2. Can I make this ice cream sugar-free?
Yes! The natural sweetness comes from dates. You can adjust the quantity to taste, or use a sugar substitute like monk fruit or erythritol if desired.
Keep in mind that altering sweetness too much may slightly affect texture.
3. Why did my ice cream become icy?
Icy texture often occurs when the mixture isn’t blended thoroughly or doesn’t contain enough fat.
Using full-fat coconut products and blending until perfectly smooth helps prevent ice crystals. Also, avoid over-freezing the ice cream in very cold freezers.
4. Can I add flavors or mix-ins?
Absolutely! You can fold in cacao nibs, caramel swirls, crushed cookies, or nuts. Just add them after the initial freeze to prevent melting or separation.
Spices like cinnamon or cardamom can also enhance the flavor.
5. How do I scoop the ice cream easily?
For smooth scoops, let the ice cream sit at room temperature for 5–10 minutes or run your ice cream scoop under hot water.
This softens the surface and makes scooping effortless without affecting the texture of the remaining ice cream.
