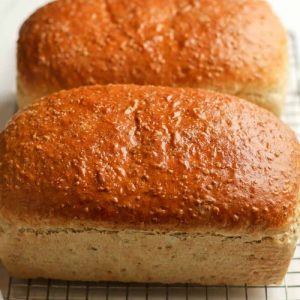
This Cracked Wheat Bread is a wholesome, hearty loaf packed with fiber-rich cracked wheat, oats, and a touch of honey for natural sweetness.
With plant-based protein, good fats from oil, and minimal saturated fat, it’s a nourishing choice for everyday meals.
Quick to prep and perfect for toast, sandwiches, or meal prep, it’s a versatile bread for any kitchen.
Flavorful Cracked Wheat Bread
Equipment
- Large mixing bowl (1)
- Measuring cups and spoons (1 set)
- Stand mixer with dough hook – 1
- Bread pans (loaf size) – 2
- Dish towel – 1
- Wire rack – 1
Ingredients
- 1 tablespoon yeast
- 1 teaspoon granulated sugar
- 2 ½ cups warm water ≈590 g
- ¼ cup honey
- ¼ cup canola oil
- 1 tablespoon kosher salt
- ½ cup quick oats
- 1 ½ cups cracked wheat
- 6 cups all-purpose flour ≈720 g
- Few pats of butter for brushing after baking
Instructions
- Activate the Yeast: Begin by preparing your yeast mixture. In a large mixing bowl, combine 1 tablespoon of active dry yeast with 1 teaspoon of granulated sugar and 2 ½ cups of warm water (between 100–110°F or 37–43°C). Stir gently to dissolve the yeast and sugar. Allow the mixture to rest for 15 minutes. You should notice bubbles forming on the surface—this is a sign the yeast is active and ready to work its magic.
- Mix in the Sweetener and Oil: Once the yeast is bubbly, add ¼ cup of honey and ¼ cup of canola oil. Use a spatula to stir these ingredients thoroughly into the yeast mixture. The honey will not only add a subtle natural sweetness but also help in browning the crust during baking, while the oil keeps the bread soft and tender.
- Combine Dry Ingredients: Attach a dough hook to your stand mixer. Add 1 tablespoon of kosher salt, ½ cup of quick oats, and 1 ½ cups of cracked wheat to the yeast mixture. Mix on low speed until the oats and cracked wheat are evenly distributed. If you prefer a softer texture, you can soak the cracked wheat in boiling water for 30–60 minutes prior to adding it to the dough. Drain any excess water before incorporation.
- Gradually Add Flour: Start adding the 6 cups of all-purpose flour, about 1 cup at a time. Mix on low speed initially to avoid flour flying out. After incorporating the first four cups, switch to medium speed and gradually add the remaining flour until the dough reaches a slightly sticky but manageable consistency. When pressed with your fingers, the dough should spring back gently. Allow the mixer to knead the dough for 5–7 minutes after achieving the right texture. This ensures proper gluten development for a soft and airy loaf.
- First Rise – Proofing the Dough: Grease a large bowl lightly with canola oil. Transfer the kneaded dough into the greased bowl and shape it into a smooth ball. Cover the bowl with a clean kitchen towel. Place it in a warm, draft-free area of your kitchen. Let the dough rise until it has doubled in size, about 40–60 minutes. During this time, the yeast ferments, producing gases that help the bread expand and become light.
- Shape the Loaves: Once the dough has risen, gently punch it down to release excess air. Divide the dough into two equal portions. Form each portion into an oblong loaf shape and place them into greased bread pans. Ensure the dough fills the pans evenly to avoid uneven baking. Cover the pans with a clean towel and allow the dough to rise again for 45–60 minutes, until it has roughly doubled in size. This second rise will create a soft, fluffy crumb inside the bread.
- Preheat the Oven: While the dough is rising, preheat your oven to 350°F (175°C). Ensure your oven rack is positioned in the center for even heat distribution. Preheating the oven fully is crucial for a well-baked crust and evenly cooked bread.
- Bake the Bread: Place the risen loaves in the preheated oven. Bake for 40–45 minutes. You’ll know the bread is ready when the tops are golden brown and the bottoms sound hollow when tapped. If desired, insert an instant-read thermometer into the center; the internal temperature should reach around 190–200°F (88–93°C).
- Add Butter and Cool: Once baked, carefully remove the loaves from the oven and let them sit in the pans for 5 minutes. Transfer the loaves to a wire rack. While still warm, brush the tops with a few pats of butter. This will give the crust a shiny, flavorful finish. Allow the bread to cool completely before slicing to maintain its structure and prevent sogginess.
- Store or Freeze: Store cooled bread in airtight bags at room temperature for 2–3 days. For longer storage, slice and freeze the loaves in freezer-safe bags for up to three months. Thaw slices as needed and toast for a fresh-from-the-oven experience.
Notes
- For a softer crumb, soak the cracked wheat in boiling water for 30–60 minutes before adding to the dough. Drain any excess water.
- Use a stand mixer with a dough hook to knead efficiently, but kneading by hand works as well—knead for 10–12 minutes until elastic.
- Avoid adding too much flour; the dough should be slightly sticky to maintain a soft texture.
- Brush the baked bread with butter while still warm to enhance flavor and add a tender crust.
- The bread can be sliced and frozen for up to three months; thaw and toast slices as needed.
- Adjust the sweetness by slightly increasing or decreasing honey to taste.
- For a golden crust, place an oven-safe dish of water on the bottom rack during baking for a humid environment.
Chef’s Secrets For Perfect Bread
To achieve a light, airy loaf with a tender crumb, the key is proper yeast activation and kneading.
Always ensure your water is warm but not hot—temperatures above 115°F can kill the yeast.
Kneading the dough sufficiently develops gluten, which gives the bread structure and chew.
Covering the dough in a warm, draft-free area encourages even rising.
Additionally, brushing with butter immediately after baking seals in moisture and adds a subtle richness to the crust.
Serving Suggestions For Any Meal
This hearty cracked wheat bread pairs wonderfully with both sweet and savory options.
Enjoy thick slices toasted with butter and jam for breakfast, or use it for sandwiches loaded with fresh vegetables, lean proteins, or nut butter.
It also complements soups, stews, and salads for a wholesome lunch or dinner.
Leftover slices can be cubed and toasted for homemade croutons or breadcrumbs, making this bread a versatile addition to your everyday meals.
Storage Tips For Long Freshness
For short-term storage, keep the bread in an airtight bag at room temperature for 2–3 days to maintain softness.
For longer-term use, slice the loaves and freeze in freezer-safe bags for up to three months.
To refresh frozen bread, thaw slices at room temperature and lightly toast or warm in the oven.
Avoid storing bread in the refrigerator, as it can dry out the crumb and reduce overall flavor and texture.
Frequently Asked Questions
1. Can I use whole wheat flour instead?
Yes! You can substitute up to half of the all-purpose flour with whole wheat flour for a denser, nuttier loaf. Adjust water slightly if needed, as whole wheat absorbs more moisture.
2. Why is my bread dense or heavy?
Dense bread usually results from under-kneading, insufficient yeast activity, or over-measuring flour. Ensure yeast is active, dough is slightly sticky, and allow adequate rise times in a warm, draft-free spot.
3. Can I make this bread without a stand mixer?
Absolutely. Knead by hand on a floured surface for 10–12 minutes until the dough is elastic. Be careful not to over-flour, as this can make the bread tough.
4. How do I achieve a softer crust?
Brushing the top with melted butter immediately after baking softens the crust. You can also cover the bread loosely with a clean towel while cooling to retain moisture.
5. Is this bread suitable for freezing?
Yes, it freezes beautifully. Slice first for easy access, place in airtight freezer bags, and store up to three months. Toast or warm slices directly from frozen for a fresh taste.
