All products are selected by our editorial team for quality. If you buy through our links, we may earn a small commission at no extra cost to you.
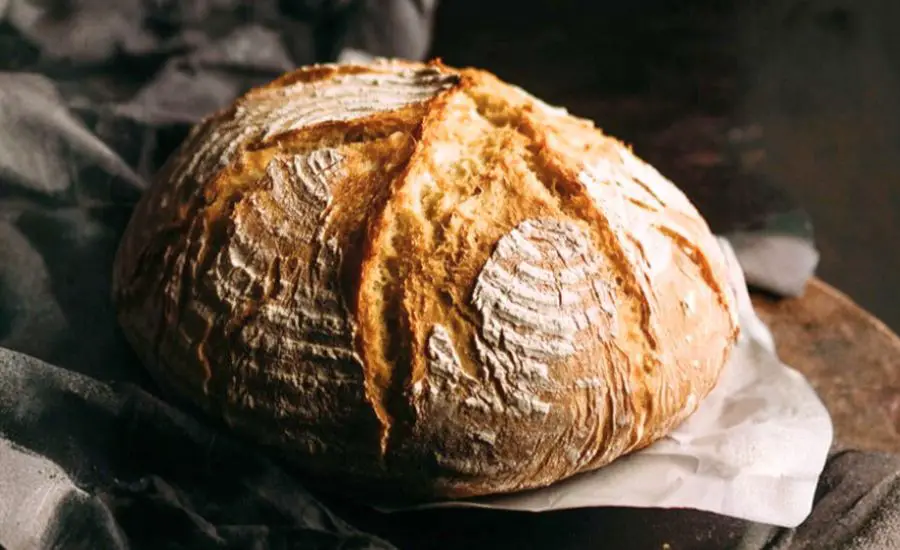
This Easy Crusty French Bread is a standout for both its simplicity and artisanal texture.
What makes it truly special is its effortlessly crisp crust paired with a soft, airy interior—all achieved without an overnight rise.
Using just a few simple, plant-based ingredients, this bread provides a wholesome option for everyday meals.
It’s naturally low in saturated fat, contains no animal products, and offers moderate fiber from all-purpose flour, making it a satisfying choice for breakfast, sandwiches, or as a side with soups and salads.
The recipe’s approachable method—proofing in a Dutch oven—ensures anyone can achieve bakery-quality results at home.
Its quick preparation and minimal hands-on time make it perfect for meal prep or a last-minute dinner addition.
Must-Have Tools for Perfect Results
Dutch Oven
Essential for creating the signature crust and airy interior. Its heavy, heat-retentive construction ensures even baking, producing bread that rivals artisanal loaves. Perfect for soups, stews, and braising as well.
Kitchen Scale
Accurately measures flour and other ingredients for consistent results. Using a scale reduces guesswork and ensures reliable bread every time, enhancing baking precision in all recipes.
Proofing Basket (Banneton)
Helps the dough maintain its shape while rising, giving professional-looking texture and patterns. Also useful for shaping artisan breads and rolls.
Spatula
Ideal for mixing sticky, wet dough without overworking it. A sturdy spatula is a versatile tool for folding, scraping, and transferring dough or batter in countless recipes.
Parchment Paper
Simplifies transferring dough to the Dutch oven and prevents sticking. A kitchen staple for baking, roasting, and even steaming delicate foods.

Quick Plant-Based Crusty French Bread
Equipment
- 1 Large Mixing Bowl or Stand Mixer with Dough Hook
- 1 Dutch Oven (4–6 quarts)
- 1 Proofing Basket or Medium Mixing Bowl
- 1 Spatula
- Parchment Paper (optional but recommended)
Ingredients
- 2 ¼ tsp active dry yeast 9 g
- 1 tsp sugar 4 g (or honey as substitute)
- 1 ¼ cups warm water 300 g
- 1 ¼ tsp kosher salt 8 g
- 2 ½ –3 ½ cups all-purpose flour 400 g, plus extra for dusting
Instructions
- Activate the Yeast: Begin by combining the active dry yeast, sugar, and warm water in a large mixing bowl. The water should feel comfortably warm to the touch—around 105–110°F—to encourage yeast activity without killing it.Stir gently, then let the mixture sit undisturbed for about 5 minutes. During this time, the yeast will begin to bubble and foam, signaling that it’s active and ready to work its magic in your bread.
- Incorporate the Flour: Once the yeast is bubbly, start adding 2 ½ cups of all-purpose flour to the bowl. Use a sturdy spatula to mix the flour with the yeast mixture, stirring until a sticky, shaggy dough begins to form. Don’t worry if it looks a little uneven at this stage—the goal is just to combine the ingredients so they start to bind.
- Add Salt and Fully Combine: Sprinkle in the kosher salt over the dough. Continue mixing until the salt is evenly distributed and all traces of dry flour disappear. The dough will still feel slightly wet and sticky—that’s normal for a slack dough and is actually essential for achieving a light, airy crumb in your finished bread.
- First Rise (Bulk Fermentation): Cover your mixing bowl with a clean tea towel or plastic wrap and leave it on the counter to rise for approximately 1 hour.During this time, the dough should roughly double in size.This resting period allows the yeast to ferment and create air bubbles that will give the bread its characteristic light texture. Avoid disturbing the dough while it rises to preserve the air pockets forming inside.
- Prepare Surface for Shaping: Lightly flour a clean surface such as a large cutting board or countertop.This will prevent the dough from sticking when you transfer it. Have your hands ready, and optionally, wet them lightly with cold water to help handle the dough without it adhering to your skin.
- Shape the Dough into a Loaf: Carefully tip the risen dough onto the floured surface.Without punching it down (to preserve the delicate air bubbles), gently fold the edges toward the center like folding an envelope. Repeat a few times until the dough forms a cohesive, slightly tight round. Flip it over so the seam is facing down, then gently pull the sides to round out the loaf.Place it seam-side down into a floured proofing basket or medium bowl, lined with a clean linen napkin if desired.
- Final Rise (Proofing): Cover the shaped dough with a tea towel and allow it to rise for another 30 minutes while you preheat your oven. This final rise will give the dough extra height and enhance the open crumb structure of the bread. At this stage, the dough should look slightly puffed and springy to the touch.
- Preheat the Oven and Dutch Oven: Place your Dutch oven with its lid on into the oven and preheat to 460°F (238°C). Preheating the pot ensures it’s extremely hot, which is key for forming a crisp, golden crust. This step may take about 30 minutes, so timing the proofing with preheating helps streamline the process.
- Transfer Dough to Dutch Oven: Once preheated, carefully remove the Dutch oven from the oven using oven mitts. Optionally, lay a piece of parchment paper on your counter and gently tip the proofed dough onto it, seam-side up. Using the parchment makes transferring easier and safer. Lift the dough carefully and place it into the hot Dutch oven. Immediately cover with the lid.
- Bake with Lid On: Return the Dutch oven to the oven and bake the bread covered for 30 minutes. The lid traps steam, which helps develop a crunchy crust while keeping the interior soft and airy. Avoid opening the lid during this period to maintain consistent heat and moisture.
- Bake Uncovered for Color: After the initial 30 minutes, remove the lid. The loaf should have started forming a beautiful, light golden crust. Continue baking uncovered for an additional 10–15 minutes or until the bread reaches a deep, rich brown color and sounds hollow when tapped on the bottom. This final stage ensures a crisp exterior without drying out the interior.
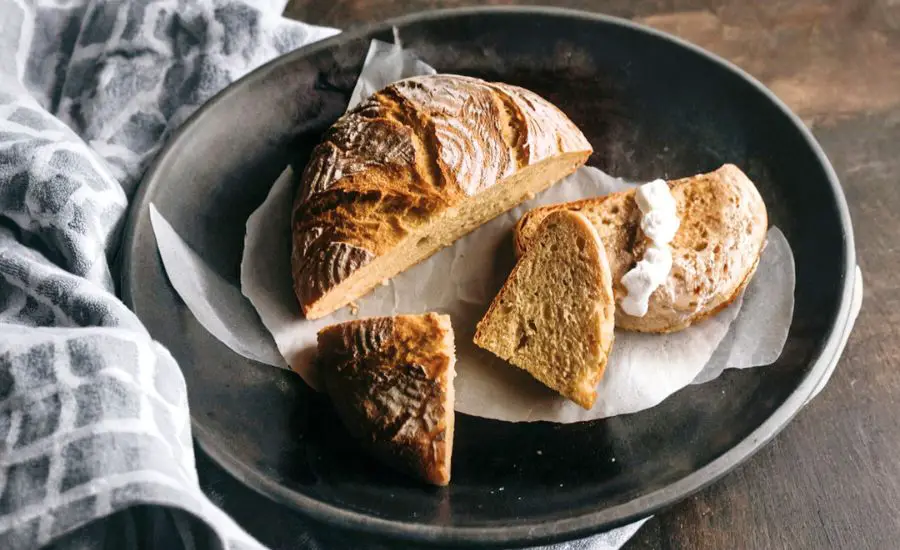
- Cool and Serve: Use oven mitts and a spatula (or the edges of the parchment paper) to carefully lift the loaf from the Dutch oven onto a cooling rack. Allow it to cool for at least 30 minutes before slicing. Cooling prevents the bread from becoming gummy inside and helps set the structure. Once cooled, slice and enjoy with butter, jam, or as a base for sandwiches.
Notes
- Always proof your yeast in warm water; too hot will kill it, too cold will slow activation.
- Use a kitchen scale for precise flour measurements—this improves consistency and bread texture.
- The dough is intentionally sticky; resist the urge to over-flour, as this keeps the crumb airy.
- Avoid punching down the dough—preserving air bubbles ensures a soft, open interior.
- A Dutch oven with a tight-fitting lid creates a crisp, golden crust that mimics bakery-style bread.
- Let the bread cool completely before slicing to avoid a gummy interior.
- Optional: sprinkle flour or cornmeal on the proofing surface for added texture and easy release.
Chef’s Secrets: Expert Bread Baking Tips
The secret to bakery-quality French bread at home lies in understanding dough hydration and steam.
This recipe uses a slightly wet dough, which is key to creating the airy, open crumb.
Folding the dough gently instead of punching it down preserves precious air pockets, giving your bread lightness and height.
Preheating a Dutch oven ensures immediate heat transfer, creating a crisp crust while keeping the interior tender.
For an extra artisanal touch, lightly score the dough with a sharp knife before baking—this encourages controlled expansion and creates attractive, rustic cracks.
Using quality, fresh yeast and unbleached flour enhances flavor naturally, while a brief final rise in a floured proofing basket adds structure without compressing the dough.
Serving Suggestions: Perfect Ways To Enjoy
This crusty French loaf is versatile and pairs beautifully with a variety of meals.
Slice it for sandwiches with fresh vegetables, hummus, or plant-based cheeses, or serve alongside soups and stews to soak up flavorful broths.
Toasted slices with avocado or nut butter make a simple yet satisfying breakfast.
For gatherings, cut the loaf into small rounds and top with garlic butter or olive tapenade for an easy appetizer.
Because it is plant-based and low in saturated fat, it complements both casual weekday dinners and special occasion spreads without overpowering other dishes.
Storage Tips: Keep Bread Fresh Longer
To maintain freshness, store the bread in a paper bag at room temperature for up to 2 days.
Avoid plastic bags, which can trap moisture and soften the crust.
For longer storage, slice and freeze the loaf in an airtight freezer bag for up to 3 months; thaw at room temperature or toast slices directly from frozen.
If the crust softens after freezing, briefly heat in a preheated oven at 350°F (175°C) for 5–10 minutes to restore crispness.
Proper cooling before storage is essential to prevent condensation and maintain the bread’s signature crunch.
Frequently Asked Questions: Common Baking Concerns
1. Can I use whole wheat flour instead of all-purpose?
Yes, you can substitute up to half of the all-purpose flour with whole wheat. The bread will be slightly denser and nuttier in flavor, but the technique remains the same. Consider adding a bit more water, as whole wheat flour absorbs more liquid.
2. Do I need a Dutch oven to bake this bread?
While a Dutch oven produces the best crust and rise, you can bake on a preheated baking stone or a heavy baking sheet covered with a large metal bowl. Steam the oven with water to mimic the moist environment a Dutch oven provides.
3. Can I make this bread ahead of time?
Absolutely. You can prepare the dough and refrigerate it for up to 12 hours during the first rise. Allow it to come to room temperature before shaping and baking. This makes it convenient for meal prep and planning ahead.
4. How do I get the bread to have an open, airy crumb?
Use the recommended flour-to-water ratio and avoid over-handling the dough. Gently fold during shaping to preserve air pockets, and do not punch down the dough. A warm, humid proofing environment also encourages good expansion.
5. Can I flavor this bread with herbs or seeds?
Yes! Add finely chopped fresh herbs, garlic, or seeds like sesame, poppy, or flax during the initial mixing step. Avoid adding too much extra flour to compensate, as this can affect the dough’s hydration and texture.
This recipe is inspired by lifeasastrawberry and has been carefully refined to enhance clarity, streamline preparation steps, and ensure accurate results. We’ve also included health benefits, nutritional highlights, and Must-Have Tools to help you get the best results every time you cook.
