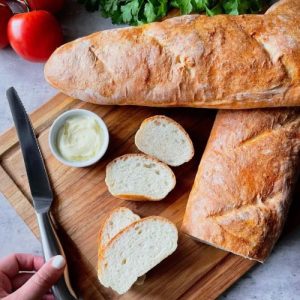
Experience the perfect balance of a golden, crunchy crust and a soft, airy interior with this homemade Italian bread.
Packed with complex carbs and plant-based protein from bread flour, it’s fiber-rich and naturally low in saturated fat.
Quick to prepare and versatile for sandwiches, toast, or dipping, this recipe is a satisfying, everyday baking staple for both beginners and seasoned home cooks.
Crusty Italian Bread
Equipment
- Large mixing bowl (1)
- Small bowl (1)
- Measuring cups and spoons
- Spatula (1)
- Sharp knife (1)
- Baking sheet (1)
- Plastic wrap (1 sheet)
- Kitchen towel (1)
Ingredients
- 650 grams bread flour about 5 1/4 cups
- 1 ¾ cups warm water 100–110°F
- 1 tablespoon granulated sugar
- 1 tablespoon active dry yeast
- 1 tablespoon unsalted butter room temperature
- 2 teaspoons salt
- 1 egg white
- 1 tablespoon cold water
- 1 tablespoon extra virgin olive oil
Instructions
- Bloom the Yeast: In a small bowl, combine 1 tablespoon of granulated sugar and 1 tablespoon of active dry yeast with 1 3/4 cups of warm water (temperature between 100–110°F is ideal). Whisk gently until fully dissolved. Let this mixture sit for about 5 minutes in a warm spot. You’ll know it’s ready when it becomes foamy and fragrant, signaling that the yeast is active and alive. This step ensures your bread rises beautifully.
- Prepare the Flour Base: In a large mixing bowl, whisk together 4 cups of bread flour and 2 teaspoons of salt. Make sure the salt is evenly distributed throughout the flour. This dry mixture will serve as the structure for your bread, giving it that soft yet airy interior while keeping it light.
- Combine Butter and Yeast: Once the yeast mixture is frothy, add 1 tablespoon of very soft butter to it and whisk until the butter is fully incorporated. Then, pour this yeast-butter mixture into the flour bowl. Using a spatula, gently fold the wet and dry ingredients together until a soft, sticky dough begins to form. At this stage, don’t worry about it being perfectly smooth; the kneading process will develop the gluten.
- Flour Your Work Surface: Generously sprinkle some of the remaining flour onto a clean counter or cutting board. This prevents the dough from sticking and makes kneading easier. Transfer the soft dough onto the floured surface, then lightly sprinkle a little more flour on top of the dough to keep it manageable.
- Knead the Dough: Using the palms of your hands, knead the dough for 5–7 minutes. Push, fold, and turn it repeatedly. Only add extra flour if the dough is too sticky, but be cautious—too much flour can make the bread dense. The goal is a smooth, tacky, but not sticky dough.
- First Rise (Proofing): Form the kneaded dough into a ball and place it in a large bowl lightly coated with olive oil.Turn the dough once or twice so the entire surface is lightly coated. Cover the bowl tightly with plastic wrap and place it in a warm, draft-free location. Allow it to rise for 30–40 minutes, or until it doubles in size. This rest allows the yeast to work its magic, creating air pockets and flavor.
- Shape the Loaves: Transfer the risen dough onto a floured surface and divide it into two equal portions. Take each portion and roll it into a large rectangle, then gently roll the rectangle into a tight cylinder. Pinch the seams together and tuck the ends under neatly. Proper shaping ensures even baking and that beautiful long loaf form.
- Prepare the Baking Surface: Lightly grease a baking sheet with olive oil to prevent sticking. Place the two shaped loaves seam-side down onto the sheet. Cover them with a clean kitchen towel and let them rest for 20 minutes in a warm spot. During this time, the dough will puff slightly, giving the bread a light, airy texture.
- Preheat the Oven: While the loaves are resting, preheat your oven to 425°F (220°C). Make sure it reaches full temperature before baking to achieve a golden, crisp crust.
- Score the Loaves: Once the loaves are puffy and ready, take a very sharp knife and make four shallow diagonal slashes across the top of each loaf. This allows steam to escape during baking and creates that signature artisan look.
- First Bake: Place the baking sheet with loaves in the preheated oven and bake at 425°F for 20 minutes. This initial bake starts forming a firm, golden crust while keeping the interior soft and fluffy.
- Apply Egg Wash: While the loaves bake, whisk together 1 egg white and 1 tablespoon of cold water. After the first 20 minutes of baking, quickly remove the loaves from the oven and brush the tops with the egg wash. This adds shine and color to the crust.
- Final Bake: Return the loaves to the oven and bake for an additional 5–7 minutes, or until the tops are a deep golden brown and crisp to the touch. The egg wash and extra bake ensure a perfectly crunchy crust without drying out the interior.
- Cooling: Carefully transfer the baking sheet to a heatproof surface and allow the loaves to cool for at least 20 minutes. Cooling ensures the interior sets properly and prevents the bread from becoming gummy when sliced.
- Storage and Serving: Once cooled, slice and serve immediately or wrap leftover loaves tightly in foil at room temperature. This bread is ideal for sandwiches, toast, or dipping in soups and sauces. It keeps well for 1–2 days and can be lightly reheated to refresh the crust.
Notes
- Make sure the water is warm, not hot; temperatures above 115°F can kill the yeast.
- Knead the dough until it’s smooth and elastic; this ensures a soft, airy interior.
- Use bread flour instead of all-purpose for better structure and chewiness.
- Don’t over-flour the dough while kneading; a slightly tacky dough gives the best texture.
- Let the bread cool completely before slicing to prevent a gummy interior.
- Egg wash adds color and shine, but can be skipped for a rustic look.
- Loaves can be shaped differently—round boule or longer baguette style—for variety.
- Baking times may vary depending on oven type, so keep an eye on the crust.
Chef’s Secrets To Perfect Loaves
Achieving the perfect crusty Italian bread starts with attention to detail. Blooming the yeast properly ensures a strong rise and airy texture inside.
Use high-quality bread flour; its higher protein content promotes gluten development, which is essential for a chewy, soft interior.
When kneading, a little tackiness is ideal—over-flouring makes the loaf dense.
Another key tip is scoring the dough deeply and evenly; this helps the bread expand without tearing and gives the classic artisan look.
Finally, a short final bake with an egg wash creates a golden, glossy crust that impresses every time.
Serving Suggestions And Meal Pairings
This Italian bread is incredibly versatile. Serve it warm with olive oil and balsamic vinegar for dipping, or slice it for hearty sandwiches with meats, cheeses, or roasted vegetables.
It’s also excellent for breakfast toast topped with avocado, eggs, or nut butter.
For a cozy meal, pair it with soups, stews, or pasta sauces.
Leftover bread can be transformed into croutons or bread pudding, making it a flexible and satisfying addition to everyday cooking.
Storage Tips For Freshness
To maintain freshness, allow the bread to cool completely before storing.
Wrap leftover loaves tightly in foil or a reusable bread bag to prevent them from drying out.
At room temperature, the bread will stay fresh for 1–2 days; for longer storage, freeze the loaves in a freezer-safe bag for up to 1 month.
When ready to eat, reheat in a 350°F oven for 5–10 minutes to restore its crispy crust and soft interior.
Avoid storing in plastic alone, as it traps moisture and softens the crust.
Frequently Asked Questions
1. Can I use all-purpose flour instead?
Yes, but bread flour is recommended for a chewier texture and better structure. All-purpose flour will work but may produce a slightly softer, less airy loaf.
2. Why isn’t my bread rising properly?
Check the yeast’s freshness and water temperature. If the water is too hot, it can kill the yeast; too cold, and it won’t activate. Also, allow enough proofing time in a warm, draft-free spot.
3. Can I make this bread without butter?
Yes, butter adds flavor and richness but isn’t essential. You can substitute with olive oil for a lighter loaf.
4. How do I get a super-crusty exterior?
Brush with egg wash for color and shine, or bake with a pan of water in the oven to create steam. This helps the crust become golden and crunchy.
5. Can I shape the bread differently?
Absolutely. While the recipe suggests cylindrical loaves, you can shape it into a round boule, small rolls, or even baguette-style loaves. Adjust baking time slightly for smaller or larger shapes.
