This easy English Muffin Bread delivers the perfect balance of soft, chewy texture and lightly crisp edges, reminiscent of classic English muffins.
High in protein and fiber, yet low in saturated fat, it’s a wholesome option for breakfast or snacks.
Quick to prepare and beginner-friendly, this bread is ideal for everyday cooking, meal prep, or simply enjoying with your favorite spreads.
English Muffin Bread
Equipment
- 1 loaf pan, 8 ¼ x 4 ¼ inches
- Mixing Bowl
- Microwave-safe container
- Whisk
- Mixer (or hand whisk)
- Plastic Wrap
- Cooling Rack
Ingredients
- 1 cup milk 2% or whole
- ¼ cup water
- 2 ¼ teaspoons instant yeast
- 2 ½ cups all-purpose flour 350 g
- 2 teaspoons sugar
- 1 teaspoon salt
- ¼ teaspoon baking soda
- Cornmeal for dusting the pan
Instructions
- Prepare the Pan: Start by preparing your loaf pan to ensure your bread doesn’t stick. Spray an 8 ¼ x 4 ¼-inch loaf pan generously with a non-stick baking spray. Then, sprinkle a layer of cornmeal over the bottom and sides of the pan, shaking off any excess. This will create a light coating that helps the sticky batter release easily after baking. Set the pan aside while you prepare the dough.
- Warm the Liquid: Pour 1 cup of milk (2% or whole) and ¼ cup of water into a microwave-safe container. Heat gently in the microwave until the liquid reaches approximately 110°F (warm to the touch, but not hot). This gentle warmth activates the yeast without killing it, which is crucial for a good rise. Stir the liquid to ensure even temperature throughout.
- Activate the Yeast: Sprinkle 2 ¼ teaspoons of instant yeast evenly over the warm milk and water mixture. Using a small whisk or fork, gently stir the yeast into the liquid until fully dissolved. Let it sit for about 5 minutes while you measure the dry ingredients. This step ensures the yeast is fully hydrated and ready to make the bread rise.
- Mix Dry Ingredients: In a separate bowl, combine 2 ½ cups of all-purpose flour, 2 teaspoons of sugar, 1 teaspoon of salt, and ¼ teaspoon of baking soda. Whisk these ingredients together thoroughly to distribute the salt, sugar, and soda evenly. Proper mixing at this stage ensures the bread will have a uniform texture and flavor.
- Combine Wet and Dry Ingredients: Gradually add the dry ingredient mixture to the yeast-liquid mixture in your mixing bowl. Using a stand mixer with a paddle attachment, beat the batter on medium speed for about 2 minutes. If mixing by hand, use a sturdy spoon and vigorous motion to incorporate the ingredients. The resulting batter will be very sticky and slightly thick, not like a traditional dough.
- Transfer Batter to Pan: Carefully pour the sticky batter into the prepared loaf pan. Smooth the surface with wet hands—just dip your hands in water, shake off excess, and gently pat the batter until it reaches the edges of the pan. Using wet hands prevents sticking and helps create an even top.
- Cover and Rise: Lightly cover the pan with plastic wrap that has been sprayed with baking spray (to prevent sticking). Place the pan in a warm, draft-free area and let the dough rise for 30–40 minutes, or until it has just risen slightly over the top of the pan. Avoid letting it rise too much; the goal is a gentle, controlled expansion for the perfect texture.
- Preheat the Oven: While the dough is rising, preheat your oven to 400°F (200°C). A fully preheated oven ensures that the bread will bake evenly, producing a golden-brown crust and the signature hollow sound when tapped.
- Bake the Bread: Remove the plastic wrap and place the loaf pan in the center of the preheated oven. Bake for 20–30 minutes, checking around 20 minutes. The bread is done when the top is golden brown and sounds hollow when lightly tapped. If the top browns too quickly, you can loosely cover it with aluminum foil for the remaining bake time.
- Cool the Bread: Once baked, carefully remove the pan from the oven and let it rest for 5 minutes. Run a butter knife along the edges to loosen the loaf, then turn it out onto a cooling rack. Allow the bread to cool completely before slicing; this prevents the texture from becoming gummy and ensures clean slices.
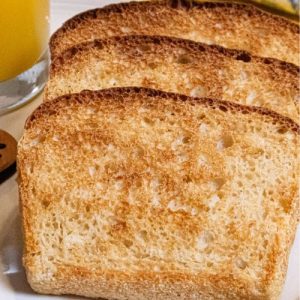
- Serve and Enjoy: Slice the cooled bread into 10 even slices. Toast lightly if desired and serve with your favorite spreads—honey, jam, butter, or cream cheese all pair beautifully. This bread also stores well and makes a convenient, protein- and fiber-rich option for quick breakfasts or snack prep.
Notes
- For best results, use a kitchen scale to measure flour accurately. Variations in volume can affect the texture of this bread.
- Ensure your liquid is warm, not hot, when activating yeast. Overheating can kill the yeast, preventing proper rising.
- Cornmeal is essential for preventing the sticky batter from sticking to the pan. Don’t skip it.
- Wetting your hands before smoothing the batter helps create an even top without sticking.
- The bread should cool completely before slicing to maintain its chewy texture and avoid tearing.
- Plastic wrap works better than a towel for covering this sticky dough during rising.
- Toast lightly before serving to enhance the bread’s signature flavor and texture.
Chef’s Secrets For Perfect Bread
Achieving the perfect texture in this English Muffin Bread requires attention to a few simple details.
First, make sure your yeast is fully dissolved in the warm liquid; this step ensures consistent rising.
Don’t skip the cornmeal in the pan—it not only prevents sticking but also adds a subtle crunch.
When smoothing the batter, wetting your hands is key; it keeps the sticky dough manageable and creates an even surface.
Lastly, patience is essential: allow the bread to rise fully but not excessively, and always let it cool completely before slicing to lock in its signature chewy texture.
Serving Suggestions For Every Meal
This versatile bread shines in many ways. Slice and lightly toast it for breakfast, then top with butter, jam, or honey for a quick, satisfying start to your day.
For savory options, layer with eggs, cheese, or avocado for a wholesome brunch sandwich.
It also makes a convenient base for mini pizzas or a side with soups and salads.
Its high protein and fiber content make it a great addition to any meal, keeping you full and energized throughout the day.
Storage Tips For Freshness
To keep this bread soft and fresh, store it in an airtight container at room temperature for up to three days.
For longer storage, wrap the cooled loaf tightly in plastic wrap or aluminum foil and freeze for up to three months.
When ready to eat, thaw at room temperature and lightly toast for the best texture.
Avoid refrigeration, as it can dry the bread and make it less enjoyable.
For meal prep, slice the bread before freezing so you can take out only what you need.
Frequently Asked Questions
1. Can I use skim milk instead of whole milk?
Yes, skim or 2% milk works fine. Whole milk produces a slightly richer flavor, while skim milk reduces fat slightly. Either option will yield a soft, chewy bread.
2. Why is my bread dense or not rising properly?
Dense bread usually results from yeast that was inactive or liquid that was too hot or cold. Always check the temperature of the milk-water mixture and ensure your yeast is fresh. Proper rising time is essential for light texture.
3. Can I use all whole wheat flour?
You can substitute some or all flour with whole wheat, but the bread will be denser and less airy. For best results, replace only half the flour and maintain the same liquid ratio.
4. How do I prevent the top from burning?
If the bread is browning too quickly, loosely cover it with aluminum foil during the last 5–10 minutes of baking. This allows the center to cook fully without over-browning the crust.
5. Can I make this bread ahead of time?
Absolutely! Prepare and bake as directed, then cool completely. Store in an airtight container or freeze for longer-term use. Slices can be toasted directly from the freezer for a quick, convenient breakfast or snack.
