This wholesome flaxseed bread is a nutritious, low-carb option packed with plant-based protein and fiber, perfect for heart health and sustained energy.
With its good fats, minimal sugar, and naturally gluten-free profile, it’s a guilt-free choice for breakfast, sandwiches, or meal prep.
Quick to mix and easy to bake, it’s an everyday bread that’s both satisfying and nourishing.
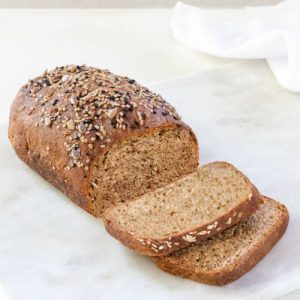
Flaxseed Bread
Equipment
- 1 large mixing bowl
- 1 loaf pan (8.5” x 4.5”) or 10” x 5”
- Measuring cups and spoons
- Spatula or Wooden Spoon
- Cooling Rack
- Optional: Vitamix or grinder for flaxseeds
Ingredients
- 2 ⅓ cups + 1 Tbsp 260 g golden flaxseed meal
- 1 cup 240 ml warm or hot water
- 1 Tbsp 12 g baking powder
- 1 tsp 6 g baking soda
- 1 tsp 5 ml apple cider vinegar
- ½ tsp 2.9 g salt
Instructions
- Preheat the Oven: Begin by setting your oven to 360°F (180°C) so it reaches the proper baking temperature while you prepare the dough. Preheating ensures even cooking and helps your bread rise correctly. If your oven has a fan setting, you can use it for more even heat distribution, but it’s not required.
- Prepare the Flaxseed Meal: If you’re using whole flaxseeds, measure approximately 2/3 to 3/4 cup of seeds per cup of meal needed. Grind the seeds into a very fine, flour-like texture using a blender, coffee grinder, or Vitamix. For the smoothest bread, sift the ground flaxseed to remove any larger pieces. This step ensures a uniform crumb and prevents a gritty texture.
- Combine the Dry Ingredients: In a large mixing bowl, measure and add the flaxseed meal, baking powder, baking soda, and salt. Stir these dry ingredients thoroughly using a spoon or spatula to ensure they are evenly distributed. This step is crucial because it helps the bread rise uniformly and ensures the flavor is consistent throughout.
- Mix in the Wet Ingredients: Pour the warm or hot water into the dry mixture. Immediately add the apple cider vinegar. Using a spoon or your hands, stir the mixture until it begins to stick together. You should see the flaxseed absorb the water and form a sticky, cohesive dough within about 30 seconds. Avoid over-mixing at this stage; the goal is a lump that holds together but is not overly dense.
- Shape the Dough: Once the dough has formed, gently shape it into a rough loaf using your hands. Keep your touch light—overworking the dough can make the bread dense. Smooth the surface with your palms to create a rounded, even top.This shaping will help your bread rise evenly and develop a nice, golden crust.
- Prepare the Baking Pan: Grease a loaf pan with a small amount of oil or line it with parchment paper. If you have an 8.5” x 4.5” loaf pan, your dough will fit perfectly. A 10” x 5” pan also works, but avoid pressing the dough into the corners—just let it rest naturally. Alternatively, you can bake the loaf on a parchment-lined baking sheet; the bread holds its shape very well.
- Optional Topping: For added texture and flavor, lightly mist the top of the loaf with water. Sprinkle seeds such as flax, sesame, or sunflower seeds evenly over the surface. Press them gently with your palm so they stick. This step gives your bread a visually appealing finish and adds a subtle crunch with each bite.
- Bake Immediately: Because baking soda and apple cider vinegar react immediately to create carbon dioxide for rising, it’s essential to place your loaf in the oven right after mixing. Do not let it rest at room temperature. Bake the bread for 60 minutes, or until the top is a deep golden brown. You can test doneness by gently tapping the crust—it should sound firm and slightly hollow.
- Cool in Pan: Once baking is complete, remove the bread from the oven and allow it to rest in the pan for 10 minutes. This helps the loaf firm up slightly before you handle it. Cooling in the pan prevents it from breaking or collapsing immediately after baking.
- Transfer to a Cooling Rack: Carefully lift the bread out of the pan and place it on a wire cooling rack. Allow it to cool completely before slicing. This step is important because cutting too early can result in a gummy texture, and letting it cool enhances the flavor and texture.
- Storage: Store your flaxseed bread in an airtight container in the refrigerator for up to 7 days. For longer storage, slice the bread and freeze in an airtight container for up to 3 months. Thawed slices are perfect for toasting or sandwiches and maintain nearly the same texture as fresh.
Notes
- For best results, grind your own flaxseeds into a fine meal. Store-bought flaxseed meal can be used, but make sure it is finely ground.
- Golden flaxseed meal creates a lighter, more visually appealing loaf; brown flaxseed meal will make the bread darker but still delicious.
- Weighing ingredients, especially the flaxseed meal and water, ensures consistent results and prevents dry or dense bread.
- Avoid overworking the dough—gentle handling preserves a light, fluffy texture.
- Bake immediately after mixing the baking soda and apple cider vinegar to maximize the bread’s rise.
- Optional seeds on top add texture, flavor, and visual appeal.
Chef’s Secrets For Perfect Loaf
To achieve a perfectly moist and well-risen loaf, the key is gentle handling of the dough.
Overmixing can compress the air bubbles created by the baking soda and vinegar reaction, resulting in a denser bread.
Sifting your flaxseed meal ensures a smooth texture, while using warm water helps the flax absorb moisture quickly.
For a golden crust, lightly mist the top with water and sprinkle seeds just before baking.
Finally, bake the bread immediately after mixing the leavening agents—delays can reduce its natural lift.
Serving Suggestions And Pairings
Flaxseed bread is versatile and pairs well with both savory and sweet toppings.
For breakfast, enjoy it toasted with almond butter or a smear of avocado and a pinch of salt.
For lunch or dinner, use it as a base for open-faced sandwiches with hummus, smoked salmon, or roasted vegetables.
Its mild, nutty flavor complements soups and salads beautifully.
You can also cut thick slices for a low-carb toast or serve alongside eggs for a hearty breakfast.
Storage Tips For Freshness
To maintain optimal freshness, store flaxseed bread in an airtight container in the refrigerator for up to 7 days.
If you want to keep it longer, slice the loaf before freezing—this makes it convenient to toast individual portions as needed.
Freeze in a sealed container or heavy-duty freezer bag for up to 3 months.
When ready to enjoy, thaw slices at room temperature or lightly toast them. Proper storage preserves texture, flavor, and prevents the bread from becoming overly dense.
Frequently Asked Questions
1. Can I use brown flaxseed meal?
Yes, you can, but brown flaxseed meal produces a darker, richer loaf. The flavor remains nutty and delicious, but the color is noticeably deeper.
For a lighter, golden appearance, golden flaxseed meal is recommended.
2. Is flaxseed bread gluten-free?
Yes, this bread is naturally gluten-free when made with only flaxseed meal and no wheat flour. It’s a great option for those avoiding gluten or seeking low-carb alternatives.
3. Can I make this bread without leavening agents?
Yes, the bread will still hold together, but it will be denser and less airy. Baking soda and vinegar help create a lighter, more fluffy texture, so for best results, include them.
4. How do I prevent the bread from becoming dry?
Do not overbake the loaf. Check for a firm, golden crust at around 55–60 minutes. Also, handle the dough gently and avoid letting it rest before baking to preserve moisture and texture.
5. Can I add other flavors or seeds?
Absolutely! You can mix in herbs, spices, or seeds like chia, sunflower, or sesame into the dough.
For a slightly sweet variation, consider adding a small amount of cinnamon or mashed banana. Experimenting with flavors works well, as flaxseed has a mild, adaptable taste.
