This garlic butter roast chicken is the ultimate weeknight or weekend dinner—juicy on the inside, golden and crispy on the outside.
Packed with protein and naturally low in carbs, it’s a wholesome choice that keeps you full without weighing you down.
Fresh herbs, lemon, and garlic infuse rich flavor while olive oil and butter provide heart-healthy fats.
Simple to prepare yet impressive, it’s a go-to dish for everyday cooking or family meals.
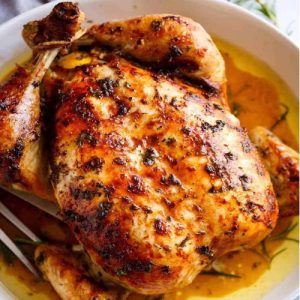
Garlic Butter Crispy Roast Chicken
Equipment
- 1 roasting pan or baking tray
- Foil (optional, for lining)
- 1 kitchen string (for tying legs)
- 1 small mixing bowl
- Paper towels (for patting dry)
- Basting brush or spoon
Ingredients
- 1 whole chicken 4 lbs / ~1.8 kg, room temperature, giblets & neck removed
- ¼ cup unsalted butter melted
- 3 tablespoons olive oil
- ¼ cup dry white wine optional, e.g., Sauvignon Blanc or Chardonnay
- 1 lemon halved
- Salt to taste
- Black pepper to taste
- 2 tablespoons fresh parsley chopped
- 4 cloves garlic minced
- 1 head garlic cut in half crosswise
- 3 sprigs fresh rosemary
Instructions
- Prepare the Oven and Pan: Preheat your oven to 430°F (220°C), or 400°F (200°C) if using a fan-forced setting. While the oven heats, line a roasting tray or large baking dish with foil for easy cleanup, or lightly grease it with oil to prevent sticking. A sturdy pan with sides works best to catch flavorful juices that can later be spooned over the chicken.
- Clean and Dry the Chicken: Remove the chicken from the refrigerator and allow it to come closer to room temperature—this ensures even cooking. Discard the neck, giblets, and any excess fat from the cavity if not already removed. Using paper towels, thoroughly pat the chicken dry, inside and out. Dry skin is key to achieving that golden, crisp exterior.
- Mix the Flavor Base: In a small bowl, combine the melted butter, olive oil, and white wine (if using). Squeeze the juice from half of the lemon into the mixture and whisk lightly until blended. This creates a fragrant, buttery baste that will flavor the meat from both the outside and inside.
- Season Generously: Rub the butter mixture all over the chicken—across the skin, under the skin (especially over the breast for added juiciness), and inside the cavity. Use your hands or a basting brush to get into every corner. Sprinkle salt, black pepper, and chopped parsley generously over the chicken, ensuring even coverage. A well-seasoned bird is the foundation of rich flavor.
- Infuse with Garlic and Herbs: Massage the minced garlic directly into the skin, pressing it gently so it adheres. For deep flavor infusion, place the halved garlic head, fresh rosemary sprigs, and the squeezed lemon half inside the cavity of the chicken. These aromatics will release their fragrance as the chicken roasts, perfuming the meat from within.
- Tie and Position the Chicken: Using kitchen string, tie the chicken legs together to keep the stuffing inside and promote even cooking. Tuck the wing tips underneath the body to prevent burning. Place the chicken breast-side up in the prepared roasting pan. This position ensures the breast stays tender while the skin crisps beautifully.
- Roast to Juicy Perfection: Transfer the pan to the preheated oven and roast for 1 hour and 15–20 minutes. Halfway through cooking, carefully remove the pan and baste the chicken with its own juices using a spoon or baster. This keeps the meat moist and the skin richly flavored. Return it to the oven and continue roasting until the skin is golden and the meat is nearly done.
- Check for Doneness: The chicken is fully cooked when the juices run clear after piercing the thickest part of the thigh with a skewer. For accuracy, insert a meat thermometer into the thigh without touching the bone—it should read at least 165°F (75°C). If the skin isn’t quite crisp enough, broil the chicken for an additional 2–3 minutes until it turns deep golden brown.
- Rest Before Serving: Remove the chicken from the oven and tent it loosely with foil. Let it rest for 10 minutes before carving.Resting allows the juices to redistribute throughout the meat, ensuring every slice is tender and succulent rather than dry.
- Serve and Enjoy: Transfer the roasted chicken to a serving platter. Spoon the pan juices over the meat for added flavor, and serve alongside the remaining half lemon, cut into wedges or slices, for a fresh citrusy kick. Pair with roasted vegetables, mashed potatoes, or a crisp salad for a complete, balanced meal.
Notes
- For best results, bring the chicken to room temperature before roasting—it ensures even cooking.
- Always pat the skin dry before seasoning to achieve extra-crispy skin.
- White wine adds depth of flavor, but you can substitute with chicken broth or skip it entirely.
- Fresh herbs like rosemary and parsley add fragrance, but thyme or sage can be used too.
- Don’t skip resting time; it keeps the chicken juicy and prevents it from drying out.
- Broiling for the last 2–3 minutes guarantees a golden-brown finish.
- Save the pan juices—they make a quick, flavorful gravy or drizzle.
- Use a meat thermometer to avoid undercooked or overcooked chicken.
- Tie the legs and tuck the wings to promote even cooking and prevent burning.
- Leftovers taste great in sandwiches, wraps, or salads.
Chef’s Secrets for Perfect Roast Chicken
The key to an unforgettable roast chicken lies in layering flavors and mastering technique.
Start by seasoning generously—not just on the surface, but under the skin and inside the cavity.
This ensures flavor penetrates the meat, not just the outer layer.
Always roast breast-side up, as it keeps the delicate breast meat juicy while the darker thigh meat cooks thoroughly.
Don’t rush the resting step; allowing the bird to sit covered for at least 10 minutes redistributes the juices so every bite is tender.
Finally, basting halfway through roasting and finishing with a quick broil give you that restaurant-worthy crispy skin.
Serving Suggestions to Elevate the Meal
This roast chicken is versatile enough to be the star of both a casual family dinner and an elegant dinner party.
For a classic pairing, serve with buttery mashed potatoes, roasted vegetables, or a simple garden salad.
To keep things lighter, pair with quinoa, steamed greens, or a citrus-dressed grain bowl.
The lemon wedges add a refreshing brightness that balances the richness of the garlic butter.
For gatherings, present the chicken whole on a platter with sprigs of rosemary and extra lemon slices—it makes a stunning centerpiece that invites everyone to dig in.
Storage Tips for Leftovers and Meal Prep
If you have leftovers, let the chicken cool to room temperature before storing.
Place carved pieces in an airtight container and refrigerate for up to 3–4 days.
For longer storage, freeze the meat in portion-sized containers for up to 3 months.
To reheat, warm gently in the oven at 300°F (150°C) until heated through, or in the microwave with a splash of broth to prevent drying.
The bones can also be simmered to make a rich homemade stock, perfect for soups and sauces.
This makes the recipe meal-prep friendly and ensures nothing goes to waste.
Frequently Asked Questions
1. Can I make this without wine?
Yes! White wine adds subtle depth, but you can replace it with chicken broth or even water. The chicken will still be juicy and flavorful, especially with the garlic, herbs, and butter.
2. How do I know when the chicken is fully cooked?
The most reliable method is to use a meat thermometer. Insert it into the thickest part of the thigh without touching the bone—the chicken is safe to eat when it reaches 165°F (75°C).
3. Can I prepare the chicken ahead of time?
Absolutely. You can season and stuff the chicken several hours in advance. Keep it covered in the refrigerator until ready to roast. Just let it sit at room temperature for 20–30 minutes before cooking for even results.
4. What can I do with leftovers?
Leftover chicken is incredibly versatile. Use it in salads, wraps, sandwiches, soups, or casseroles. The bones can be boiled to make a flavorful homemade stock.
5. How can I ensure the skin gets extra crispy?
Two simple tricks: always pat the chicken dry before roasting, and finish with a quick broil for 2–3 minutes. Brushing the skin with a little extra olive oil also enhances crispiness.
