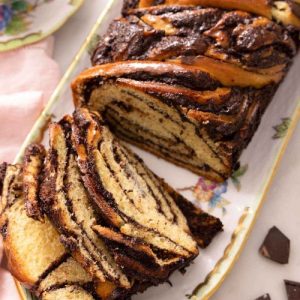
This Chocolate Babka is the perfect balance of soft, fluffy bread and rich chocolate swirls, making it both indulgent and nourishing.
With a good balance of protein from eggs, fiber from cocoa, and heart-healthy fats from dark chocolate, it’s a treat you can feel good about enjoying.
Whether served for breakfast, dessert, or meal-prep friendly snacks, this babka is comforting, satisfying, and a showstopper for any occasion.
Chocolate Babka
Equipment
- 1 Stand mixer with dough hook
- Rolling
- 1 Whisk
- 1 Offset spatula
- 1 Sharp Knife
- 2 Loaf pans (8×4-inch)
- Mixing Bowls
- Saucepan
Ingredients
For the Dough:
- 4 ½ cups 540 g all-purpose flour
- ½ cup 100 g granulated sugar
- 2 ¼ teaspoons instant yeast 1 packet, 7 g
- 4 large eggs room temperature
- ½ cup 120 ml whole milk, room temperature
- 1 ½ teaspoons kosher salt
- 10 tablespoons 142 g unsalted butter, softened
For the Filling:
- ½ cup 113 g unsalted butter, cubed
- ½ cup 120 ml heavy cream
- 8 oz 225 g dark chocolate, chopped
- ¾ cup 90 g powdered sugar
- ⅓ cup 30 g unsweetened cocoa powder
For the Syrup:
- ⅓ cup 66 g granulated sugar
- ⅓ cup 80 ml water
Instructions
- Mixing the Dry Base: In the bowl of your stand mixer, add the flour, sugar, and instant yeast. Whisk them together until evenly combined. This step ensures the yeast is distributed throughout the flour, helping the dough rise evenly later.
- Adding Wet Ingredients: Crack the eggs into the dry mixture, then pour in the milk and sprinkle in the salt. Using a dough hook attachment, mix on low speed for about 2 minutes, or just until the dough starts to come together. At this stage, the dough will look a little rough and shaggy—don’t worry, that’s normal.
- Incorporating the Butter: With the mixer running on low, begin adding the softened butter one tablespoon at a time. Wait until each piece is fully blended before adding the next. This slow addition helps the butter emulsify into the dough without breaking it apart. Continue kneading for about 10 minutes, scraping the bowl down once or twice, until the dough looks shiny, elastic, and smooth.It will still feel a little sticky but should stretch without tearing easily.
- First Rise (Cold Fermentation): Lightly oil a large mixing bowl and transfer the dough into it. Roll the dough gently so the entire surface gets coated in oil, which prevents it from drying out. Cover the bowl tightly with plastic wrap and refrigerate it for at least 8 hours, or overnight. This slow, chilled rise deepens the flavor and makes the dough easier to handle later.
- Preparing the Chocolate Filling: While the dough rests, make the filling. In a small saucepan over medium heat, combine the butter and cream. Heat just until the butter melts and the cream starts steaming. Remove from the stove, add the chopped dark chocolate, and stir until it melts completely into a glossy mixture. Whisk in the powdered sugar and cocoa powder until smooth. Transfer to a bowl and let it cool for about 1 hour, or until thick enough to spread without running.
- Rolling the Dough: When the dough is ready, grease two 8×4-inch loaf pans and line them with parchment paper. Lightly flour your work surface. Divide the dough in half and return one half to the refrigerator while working with the first. Using a rolling pin, roll the dough into a large rectangle measuring roughly 12 by 16 inches. Try to keep the edges straight and the thickness even.
- Spreading the Filling: With an offset spatula, spread half of the cooled chocolate filling evenly over the dough. Cover it almost to the edges, but leave a 1-inch border on one of the short sides. This clean edge will help the dough seal once it’s rolled.
- Rolling into a Coil: Starting at the short side opposite the border, roll the dough tightly into a log, similar to rolling up a jelly roll. Once rolled, pinch the seam to seal so the filling stays inside.
- Cutting and Shaping: Using a very sharp knife, slice the log lengthwise down the middle, exposing the chocolate layers inside. Place the two halves next to each other with the cut sides facing up. Carefully twist them together into a braid, making sure the cut surfaces stay on top so the chocolate swirls show. Tuck both ends underneath to secure the loaf. Place the shaped dough into one of the prepared pans.
- Repeat for the Second Loaf: Take the second half of the dough out of the refrigerator and repeat the same process—rolling, filling, coiling, cutting, twisting, and placing into the second loaf pan.
- Second Rise (Proofing): Loosely cover the pans with a kitchen towel or plastic wrap and let them sit in a warm, draft-free spot for 1 ½ to 2 hours. The dough should puff up noticeably, though it won’t double completely. This proofing step ensures the babka bakes light and fluffy rather than dense.
- Baking the Babka: Preheat your oven to 350°F (175°C). Once hot, bake the loaves for about 40 minutes. The tops should be golden brown and firm to the touch. To be extra sure, insert a wooden skewer into the center—if it comes out without sticky dough, it’s ready. You can also use an instant-read thermometer; the loaf should reach 190°F internally.
- Making the Syrup: While the babkas are baking, prepare the syrup. In a small saucepan, combine the sugar and water. Bring to a simmer over medium heat, stirring occasionally until the sugar dissolves completely. Remove from heat and let it cool slightly.
- Glazing the Loaves: The moment the babkas come out of the oven, brush the hot syrup generously over the tops. This step not only gives them a beautiful glossy shine but also locks in moisture, keeping the bread soft for days.
- Cooling and Serving: Allow the loaves to cool in their pans for about 30 minutes before removing. This helps them set and makes slicing easier. Serve warm for a gooey chocolate treat or at room temperature for easier slicing and storage.
Notes
- This recipe makes two (8×4-inch) loaves of chocolate babka.
- A slow, overnight chill in the refrigerator develops flavor and makes the dough easier to shape.
- Use good-quality dark chocolate for the filling—it melts smoothly and adds richness.
- Don’t skip the sugar syrup glaze; it keeps the babka soft and shiny.
- If you don’t own a stand mixer, you can knead by hand—it will take about 12–15 minutes.
- Dutch-processed cocoa powder works best for a fudgier, deeper chocolate flavor.
- Check doneness with a thermometer—the center should reach 190°F (88°C).
- The dough will be sticky at first; resist adding too much extra flour.
- Leftover slices taste amazing lightly toasted with butter or cream cheese.
- Babka freezes beautifully—wrap tightly and store for later enjoyment.
Chef’s Secrets for Perfect Babka
The secret to bakery-style babka lies in patience and technique.
Allowing the dough to rise slowly in the fridge not only deepens the flavor but also makes shaping easier, giving you neat swirls instead of messy layers.
Use softened butter for the dough so it incorporates smoothly without clumps.
When braiding, always keep the cut chocolate layers facing up—this guarantees those striking marbled ribbons once baked.
Lastly, never skip the syrup glaze; it seals in moisture and prevents the bread from drying out within a day or two.
Serving Suggestions You’ll Love
Chocolate babka is a versatile treat that can be enjoyed in many ways.
Serve warm slices alongside coffee or tea for a comforting breakfast, or pair with fresh berries and whipped cream for an elegant dessert.
For a brunch spread, it’s a show-stopping centerpiece next to fruit salad, yogurt, and eggs.
Leftover slices can be lightly toasted and spread with butter, cream cheese, or even peanut butter for a fun twist.
If you’re entertaining, cut babka into smaller bite-sized squares for an irresistible party platter.
Storage Tips for Freshness Guaranteed
Babka keeps best when stored properly. Once completely cooled, wrap the loaf tightly in plastic wrap or aluminum foil, then place it in an airtight container.
At room temperature, it will stay soft for up to 3 days.
For longer storage, refrigerate it for up to a week, though the texture may firm up slightly.
Babka also freezes wonderfully—wrap individual slices or whole loaves tightly in two layers of plastic wrap and then foil.
To serve, thaw overnight in the fridge and warm briefly in the oven before enjoying.
Frequently Asked Questions
1. Can I make babka without a stand mixer?
Yes! While a mixer saves time, you can knead the dough by hand. Expect to knead for about 12–15 minutes until the dough feels smooth and elastic. Be careful not to add too much extra flour during kneading—sticky dough is normal and gives a lighter loaf.
2. What kind of chocolate works best?
High-quality dark chocolate with around 60–70% cocoa content is ideal. It melts smoothly, balances sweetness, and gives the filling a rich depth of flavor. Avoid overly sweet milk chocolate, as it can make the babka taste cloying.
3. Why do I need the sugar syrup?
The syrup isn’t just for shine—it also locks in moisture, keeping the bread soft for days. Without it, the crust can dry out quickly. If you prefer less sweetness, brush on only half the syrup.
4. Can I add other flavors to babka?
Absolutely! Babka is very versatile. You can add a sprinkle of cinnamon, orange zest, or chopped nuts to the filling for extra flavor. Some even make savory versions with cheese or pesto.
5. How do I know when it’s fully baked?
The loaves should be golden brown and firm to the touch. Insert a skewer into the center—if it comes out clean, it’s ready. For accuracy, use a thermometer; the inside should read 190°F (88°C).
