Homemade taffy is a nostalgic treat that delights with its soft, chewy texture and customizable flavors and colors.
What makes this recipe truly special is its simplicity combined with the satisfying tactile experience of pulling the candy by hand—a fun activity for all ages.
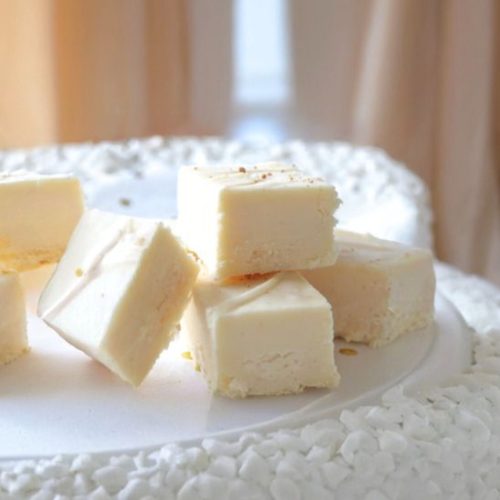
Easy Homemade Taffy
Equipment
- 1 Large heavy-bottomed saucepan
- 2 Jelly roll pans (buttered)
- 1 Candy thermometer
- 1 Wet pastry brush
- Lollipop sticks (optional)
Ingredients
- 2 cups granulated sugar
- 2 tablespoons cornstarch
- 1 cup light corn syrup
- 3 tablespoons half & half
- ¾ cup water
- 2 tablespoons unsalted butter
- 1 teaspoon sea salt
- Flavoring extracts 1/4 to 1 teaspoon, optional
- Food coloring optional
Instructions
- Prepare Your Work Area: Before you begin cooking, thoroughly butter two large jelly roll pans. This step is crucial because the buttered pans provide a non-stick surface for the hot taffy mixture once poured, allowing it to cool and be handled easily without sticking. Set these pans aside on a heat-safe surface. Having everything ready at this stage will help the process move smoothly once the candy mixture is ready to pour.
- Combine Dry Ingredients: In a large, heavy-bottomed saucepan, whisk together 2 cups of granulated sugar and 2 tablespoons of cornstarch. This ensures that the cornstarch is evenly distributed, preventing lumps and aiding in achieving the desired chewy texture in your taffy. The cornstarch also helps to keep the sugar crystals from clumping during cooking.
- Add Liquid Ingredients and Butter: Pour in 1 cup of light corn syrup, 3 tablespoons of half & half, and 3/4 cup of water to the sugar and cornstarch mixture. Add 2 tablespoons of unsalted butter and 1 teaspoon of sea salt. Stir all the ingredients thoroughly with a wooden spoon or heat-resistant spatula to combine everything uniformly. The butter adds richness and helps with the smooth texture, while the salt balances the sweetness and enhances flavor.
- Heat the Mixture Until Sugar Dissolves: Place the saucepan over medium-high heat. Stir constantly to prevent the sugar from settling and burning on the bottom of the pan. Continue stirring until the sugar crystals have completely dissolved into the liquid. You can test this by rubbing a small amount of the hot syrup between your fingers (carefully!) — it should feel smooth, not grainy.
- Bring to a Boil and Watch Carefully: Once the sugar has dissolved, cover the saucepan with a lid and allow the mixture to boil for about 3 minutes. During this time, the candy mixture will foam and rise rapidly. It’s important to watch it closely to ensure it doesn’t boil over.If the foam rises too high, gently stir it down with a spoon. This controlled boiling helps create the right consistency for soft taffy.
- Remove Lid and Attach Candy Thermometer: After the initial boil, remove the lid to prevent steam buildup and clip a candy thermometer securely to the side of the saucepan. This tool is essential for monitoring the temperature accurately, ensuring your taffy reaches the perfect stage for pulling without becoming too hard.
- Clean Sugar Crystals from Pan Sides: Use a wet pastry brush dipped in water to gently wash down any sugar crystals that may have formed on the sides of the saucepan. These crystals can cause unwanted crystallization in your candy, resulting in a gritty texture. Keeping the sides clean will help produce smooth, soft taffy.
- Continue Boiling to Exact Temperature: Allow the mixture to boil undisturbed over medium-high heat. The temperature will rise quickly once it hits a certain point, so stay alert.For high-altitude cooking, target a temperature between 242°F and 246°F; for sea-level cooking, aim for 252°F to 254°F.This temperature range is critical—too low and the taffy will be too soft; too high and it will become hard and brittle.
- Test Candy Consistency Without Thermometer (Optional): If you don’t have a candy thermometer, you can test the syrup by carefully dripping a small amount onto parchment paper. Wait a few seconds, then try to pull and twist the cooled drop. The candy should be pliable and stretch without breaking. If it snaps easily, it has overcooked and will be too hard.
- Remove from Heat and Divide (If Using Multiple Flavors/Colors): Once the syrup reaches the perfect temperature, immediately remove the saucepan from heat to stop cooking. If you plan to make two different flavors or colors, divide the hot syrup evenly into two separate buttered pans. This allows you to add different extracts and colorings to each batch without mixing flavors.
- Add Flavorings and Colors Quickly: Stir in your chosen flavorings (such as vanilla, peppermint, or fruit extracts) at a rate of 1/4 to 1 teaspoon per batch, depending on how strong you want the flavor. Add food coloring drops if desired. Stir gently but thoroughly to distribute the flavor and color evenly while the taffy is still hot and pliable.
- Cool Until Handleable: Allow the taffy to cool on the buttered pans until it becomes cool enough to touch comfortably but is still soft enough to pull—usually about 10-15 minutes. Cooling to this stage makes pulling easier and prevents burns while handling.
- Begin Pulling the Taffy: Lightly butter your hands to prevent sticking, then lift the taffy from the pan and start pulling it away from itself.Stretch and fold repeatedly until the candy becomes lighter in color and shiny in appearance. This pulling process aerates the taffy, creating the classic chewy texture and soft bite.
- Shape Your Taffy Creations: Once the taffy is pulled and glossy, roll it into long ropes. If you made two colors, twist them together for a fun striped effect. You can cut the ropes into bite-sized pieces, or form thin twisted ropes and roll them around lollipop sticks to make taffy pops—a favorite with kids. Wrap pieces individually in wax paper to keep them fresh.
- Store or Serve: Store your finished taffy in an airtight container or wrap pieces tightly to prevent them from drying out. Homemade taffy is best enjoyed within a few days but can last up to two weeks when properly stored.
Notes
- Use quality unsalted butter and pure extracts for the best flavor and texture.
- Always butter the pans thoroughly to prevent sticking during cooling.
- Monitor the candy temperature carefully—small differences affect taffy texture significantly.
- Use a wet pastry brush to wash down sugar crystals to avoid grainy candy.
- Flavor and color the taffy immediately after boiling for even distribution.
- Pull taffy with lightly buttered hands to prevent sticking.
- Store finished taffy in airtight containers or wrap in wax paper to maintain freshness.
- Be cautious when handling hot sugar syrup to avoid burns.
Although taffy is a sweet indulgence rather than a health food, this homemade version allows you to control the ingredients, avoiding artificial additives and opting for quality butter and natural flavorings.
While not a source of protein or fiber, it offers a satisfying, moderately sweet treat that can be enjoyed in moderation.
This recipe shines as a perfect weekend project or a festive activity, providing a hands-on way to bond with family or friends.
It’s quick to prepare, requires minimal equipment, and yields a colorful, personalized candy that’s ideal for sharing or gifting.
Must-Have Tools for Perfect Results
Candy Thermometer
This precise instrument is essential for reaching the exact temperature needed to achieve soft, pliable taffy without turning it hard. Beyond candy making, it’s invaluable for any kitchen tasks requiring temperature accuracy, such as frying or brewing.
Large Saucepan
A heavy-bottomed saucepan ensures even heat distribution during cooking, preventing hot spots that can cause burning or uneven boiling. This versatile pot is a kitchen staple for soups, sauces, and more.
Butter-Coated Jelly Roll Pans
These pans provide the perfect flat surface for pouring and cooling the taffy. Their non-stick property, enhanced by butter, makes handling sticky candy easier and they’re great for baking cookies or roasting vegetables.
Wet Pastry Brush
Used to wash down sugar crystals from pan sides, this tool prevents crystallization that could ruin candy texture. A pastry brush is also handy for glazing pastries, basting meats, and applying oils.
Lollipop Sticks (optional)
Ideal for shaping the taffy into fun candy pops, these sticks add a playful touch. They’re useful for cake pops, homemade lollipops, and other handheld treats.
Chef’s Secrets for Soft Taffy
Achieving the perfect soft taffy requires a few insider tips. First, precise temperature control is the cornerstone of success.
Using a reliable candy thermometer helps avoid overcooking, which leads to brittle candy.
Additionally, the cornstarch plays a subtle but crucial role by preventing unwanted crystallization and promoting chewiness.
When pulling the taffy, make sure your hands are lightly buttered to keep the sticky candy manageable.
Aerating the taffy by pulling it repeatedly not only changes the texture but also lightens the color, giving your candy that classic shiny finish.
Lastly, timing your flavor and coloring additions right after boiling ensures vibrant, consistent results.
Following these secrets will make your homemade taffy stand out for its ideal texture and delightful taste.
Serving Suggestions: Fun Ways To Enjoy
Homemade taffy is incredibly versatile and perfect for special occasions, holidays, or as a sweet gift.
Present taffy pieces wrapped in colorful wax paper for parties or use lollipop sticks to create whimsical taffy pops, a sure hit with kids.
Pair taffy with a hot cup of tea or coffee to balance the sweetness. You can also incorporate it into dessert platters or gift baskets, mixing flavors and colors for visual appeal.
For an interactive treat, invite family or friends to help pull and twist the taffy, making it a memorable activity as well as a delicious snack.
Storage Tips: Keeping Taffy Fresh
Proper storage is key to maintaining the soft, chewy texture of homemade taffy.
Once cooled and shaped, wrap individual pieces tightly in wax or parchment paper to prevent them from sticking together.
Store the wrapped pieces in an airtight container at room temperature, away from direct sunlight or heat sources.
Avoid refrigeration, which can cause the candy to harden and lose its softness.
If you plan to keep the taffy for more than two weeks, freezing is an option—just be sure to thaw at room temperature before unwrapping to prevent condensation and stickiness.
Frequently Asked Questions About Taffy
Q1: Can I make taffy without a candy thermometer?
Yes, you can use the cold-water test or drop a small amount of syrup onto parchment paper to check consistency. However, a thermometer ensures more consistent results.
Q2: What flavors work best for homemade taffy?
Classic vanilla, peppermint, lemon, and fruit extracts like strawberry or banana work wonderfully. Avoid oil-based flavors as they can affect texture.
Q3: How do I prevent the taffy from becoming too hard?
Monitor the temperature closely and remove the mixture from heat as soon as it reaches the recommended range. Overcooking causes hard, brittle candy.
Q4: Why does my taffy sometimes become grainy?
Graininess is usually caused by sugar crystallization. Using a wet pastry brush to wash down sugar crystals from pan sides helps prevent this.
Q5: Can I store taffy in the refrigerator?
It’s best to store taffy at room temperature. Refrigeration can make it hard and less enjoyable to eat.
