These No Fail Sea Salt and Garlic Kale Chips are a standout snack thanks to their perfect balance of crispiness and flavor while being incredibly healthy.
Kale is a powerhouse vegetable rich in fiber, vitamins A, C, and K, and packed with antioxidants.
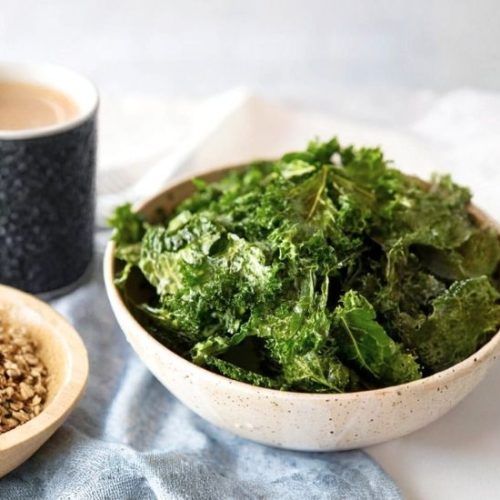
30-Minute Kale Chips with Sea Salt
Equipment
- 1 Baking Sheet (Half Sheet Pan)
- 1 Silicone Baking Mat
- 1 Salad Spinner
- 1 Olive Oil Mister or Spray Bottle
- 1 oven thermometer (optional but recommended)
Ingredients
- 1 large bunch kale about 6 cups of leaves, thoroughly washed and dried
- 1 tablespoon extra virgin olive oil
- 1 teaspoon sea salt
- ½ teaspoon garlic powder
Instructions
- Prepare the Kale Leaves: Remove the tough stems from the kale by holding each leaf and gently tearing or cutting along the stem. Tear the leaves into bite-sized pieces, roughly 2 to 3 inches wide. It’s important the leaves are dry to achieve crispiness, so either spin them in a salad spinner or pat gently with a clean kitchen towel.
- Lightly Oil the Kale: Place the kale pieces in a large mixing bowl. Drizzle the olive oil over the leaves, then use your hands to massage the oil into every nook and cranny of each piece. This ensures an even coating without oversaturating, which is key for crispy chips.
- Season the Leaves: Sprinkle the sea salt and garlic powder evenly over the kale. Toss gently with your hands or tongs until all the leaves are lightly and uniformly seasoned.
- Arrange on Baking Sheet: Line a baking sheet with a silicone baking mat or parchment paper. Spread the kale pieces out in a single layer, making sure they don’t overlap, which helps them bake evenly and crisp up properly.
- Bake Slowly and Evenly: Place the baking sheet in a preheated oven at 275°F (135°C). Bake the kale for 15 to 20 minutes, flipping the pieces halfway through the baking time to ensure both sides become perfectly crisp without burning.Keep an eye on the edges, as thinner parts may crisp faster.
- Cool and Serve: Once out of the oven, let the kale chips cool on the baking sheet for about 5 minutes. This resting time allows them to firm up and maintain their crunch. Serve immediately or store in an airtight container once fully cooled.
Notes
- Drying Is Crucial: Excess moisture will make your chips soggy instead of crispy. Use a salad spinner or thoroughly pat dry with towels after washing.
- Oil Moderation: Too much oil will weigh down the kale and prevent crisping. Use just enough to lightly coat each leaf.
- Season to Taste: Feel free to experiment with other seasonings like smoked paprika, nutritional yeast, or chili flakes for variety.
- Storage Tips: Store cooled kale chips in an airtight container at room temperature. They are best eaten within 1-2 days as they may lose crunch over time.
- Oven Temperature: Baking low and slow is key to avoid burning and ensures an even crisp texture.
This recipe uses just a touch of olive oil—a source of heart-healthy monounsaturated fats—and minimal seasoning to enhance the natural flavor without adding unnecessary calories or sodium.
Unlike traditional potato chips or buttered popcorn, these kale chips are low in carbs and saturated fat, making them a guilt-free option for those seeking nutritious, satisfying snacks.
Their simple preparation, involving massaging oil gently into each leaf and baking slowly, ensures even crispiness every time.
Ideal for quick snacks or meal prep, they’re perfect for busy individuals and families aiming to enjoy crunchy, savory treats without compromising health.
Must-Have Tools for Perfect Results
Baking Sheet (Half Sheet Pan)
This large, flat pan allows kale leaves to spread out evenly for optimal air circulation and even baking. Its durable construction ensures consistent heat distribution, making it an indispensable tool for roasting veggies and cookies alike.
Silicone Baking Mat
Perfect for preventing kale chips from sticking to the pan, this reusable mat also promotes even heat circulation and easy cleanup, making it eco-friendly and essential for crispy results.
Salad Spinner
Quickly drying kale after washing is crucial for crispy chips. A salad spinner efficiently removes excess water, preventing sogginess and ensuring perfect crunch every time.
Olive Oil Mister or Spray Bottle
For evenly coating kale leaves with a light mist of oil, an olive oil mister helps control usage and avoid over-oiling, preserving the crisp texture while adding just enough healthy fat.
Oven Thermometer
Maintaining the right baking temperature is key to slow, even crisping without burning. An oven thermometer provides accurate heat readings, helping you achieve flawless results consistently.
Chef’s Secrets for Crispy Kale Chips
Achieving perfectly crispy kale chips is all about attention to detail.
First, thoroughly drying the kale leaves after washing is essential—any moisture left on the leaves will steam them in the oven, resulting in limp chips.
Using a salad spinner works wonders here.
When applying olive oil, less is more: massage a light, even coating into each leaf to promote crispiness without sogginess.
Baking at a low temperature (around 275°F or 135°C) and baking slowly allows the kale to dry out evenly without burning.
Don’t overcrowd the baking sheet; air circulation is key for uniform crisping.
Flipping the chips halfway through baking ensures both sides become crunchy.
Lastly, resist the urge to eat them immediately — letting the chips cool on the baking sheet for a few minutes helps lock in their signature crunch.
Serving Suggestions for Healthy Snacking
Sea Salt and Garlic Kale Chips make a versatile snack that pairs well with a variety of meals.
They’re perfect on their own as a guilt-free crunchy treat or served alongside fresh dips like hummus, guacamole, or tzatziki for extra flavor.
You can also crumble them over salads or soups to add texture and a burst of savory taste.
For a light lunch, combine them with a bowl of fresh fruit or a protein-packed smoothie.
They’re kid-friendly and portable, making them an excellent choice for school lunches, office snacks, or even road trips.
Their satisfying crunch and savory notes can curb salty cravings while delivering nutrients.
Storage Tips to Maintain Freshness
To keep your kale chips crispy and fresh, store them in an airtight container at room temperature once they have completely cooled.
Moisture is the enemy of crispness, so avoid sealing them while still warm or storing them in humid environments like the refrigerator.
If chips soften over time, try reviving them by spreading them on a baking sheet and briefly reheating in a low oven (250°F or 120°C) for a few minutes to restore crunchiness.
Ideally, consume kale chips within one to two days for the best texture and flavor.
For larger batches, consider making smaller portions to avoid waste.
Frequently Asked Questions About Kale Chips
1. Can I use other oils besides olive oil?
Yes! While extra virgin olive oil adds a rich flavor and healthy fats, you can also use avocado oil, coconut oil, or grapeseed oil. Just make sure the oil has a mild taste so it doesn’t overpower the kale.
2. How do I prevent kale chips from burning?
Bake them at a low temperature (around 275°F/135°C) and keep a close eye on the chips during the last few minutes. Flip halfway through baking to promote even crisping and avoid burning thinner edges.
3. Can I add other seasonings?
Absolutely! Kale chips are very versatile. Try smoked paprika, nutritional yeast, chili powder, cumin, or even a sprinkle of parmesan cheese after baking for different flavor profiles.
4. How do I know when the chips are done?
The chips should be dry, brittle, and crisp to the touch without any soft or chewy spots. They will also darken slightly but shouldn’t be browned or burnt.
5. Can I store kale chips in the fridge?
It’s best to avoid refrigeration as the moisture can cause the chips to soften. Store them in an airtight container at room temperature to maintain their crunch.
