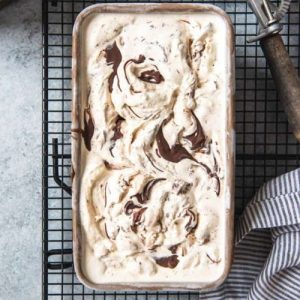
This Nutella Swirl Ice Cream is a creamy, indulgent treat that balances rich hazelnut flavor with smooth vanilla custard.
Made at home, it’s free from artificial additives yet full of wholesome goodness—think protein-packed egg yolks, calcium-rich milk, and good fats from hazelnuts.
With just a little prep and patience, you’ll enjoy a satisfying, crowd-pleasing dessert that’s as easy for weeknight cravings as it is for special gatherings.
Nutella Swirl Ice Cream
Equipment
- 1 Cuisinart 2-Quart Ice Cream Maker (or similar)
- 1 Saucepan (medium-sized)
- 1 mixing bowl (medium)
- 1 Whisk
- 1 Spatula or Wooden Spoon
- 1 Candy thermometer
- 1 Freezer-Safe Container
Ingredients
- 1 ½ cups heavy cream
- 1 ½ cups whole milk
- ½ cup granulated sugar divided
- 5 large egg yolks
- ¼ teaspoon salt
- 2 teaspoons vanilla extract pure
- 1 cup Nutella or other chocolate-hazelnut spread
Instructions
- Prepare the Base Mixture: In a medium-sized saucepan, combine the heavy cream, whole milk, half of the sugar (¼ cup), and salt. Place the pan over medium-high heat and stir gently to dissolve the sugar. Allow the mixture to heat slowly until it just reaches a gentle simmer—small bubbles will form around the edges of the pan, but do not let it come to a full boil. This heating process not only dissolves the sugar but also helps blend the cream and milk into a smooth, uniform base.
- Whisk the Egg Yolks and Sugar: While the cream mixture is heating, grab a medium mixing bowl. Add the egg yolks and the remaining ¼ cup of sugar. Using a whisk, beat the mixture vigorously for about 2–3 minutes, until the yolks turn a pale yellow and become slightly thickened. This step incorporates air and ensures the yolks are smooth, which will help create a silky custard base later.
- Temper the Egg Yolks: Once the cream mixture is hot (not boiling), carefully scoop out about 1 cup of the hot liquid. Very slowly, drizzle this hot cream into the whisked yolks while whisking constantly. This process is called tempering—it gradually raises the temperature of the egg yolks so they don’t scramble when combined with the hot cream. Take your time with this step; the key is to pour slowly and whisk continuously for a smooth blend.
- Combine and Cook the Custard: After tempering, pour the warmed yolk mixture back into the saucepan with the rest of the hot cream. Place the pan over medium heat and stir gently but continuously with a spatula or wooden spoon. Cook the mixture until it thickens enough to coat the back of the spoon. To test, dip the spoon into the custard and run your finger across the back—it should leave a clear line. For precision, use a candy thermometer: the custard is ready at 175°F (80°C). Avoid boiling, as that can curdle the eggs.
- Cool and Chill the Custard: Once thickened, immediately remove the custard from the heat. Pour it through a fine-mesh sieve into a clean bowl to catch any tiny bits of cooked egg. Stir in the vanilla extract. Let the mixture cool at room temperature for about 30 minutes, then cover the bowl with plastic wrap (press it directly onto the surface to prevent a skin from forming). Refrigerate for at least 2–3 hours, or until the custard is thoroughly chilled. A cold base is essential for smooth, creamy ice cream.
- Churn the Ice Cream: When the custard base is cold, pour it into your ice cream maker and churn according to the manufacturer’s instructions. In most machines, this will take about 20–25 minutes, during which the custard will gradually thicken into soft-serve consistency. Resist the urge to rush this step—the churning process incorporates air, which gives the ice cream its light, creamy texture.
- Add the Nutella Swirl: In the last 30 seconds of churning, begin adding the Nutella. Drop it into the machine in small spoonfuls so it gets gently pulled through the ice cream, creating ribbons of hazelnut-chocolate goodness. If your ice cream maker doesn’t blend it well, simply transfer the churned ice cream into a container, add dollops of Nutella, and use a butter knife to swirl it through by hand. Aim for thin ribbons rather than big clumps for the prettiest effect.
- Freeze Until Firm: Transfer the ice cream into a freezer-safe container. Smooth the top with a spatula, cover tightly with a lid or plastic wrap, and place in the freezer for at least 4 hours. This resting time allows the ice cream to set into a scoopable, firm texture. For easier serving, let the container sit at room temperature for 5 minutes before scooping.
- Serve and Enjoy: Scoop the ice cream into bowls or cones, making sure each serving has a beautiful swirl of Nutella running through it. This homemade delight is creamy, rich, and indulgent—perfect on its own or paired with brownies, waffles, or fresh fruit.
Notes
- Always temper the egg yolks slowly to avoid curdling.
- Chill the custard base thoroughly before churning for the creamiest texture.
- Use high-quality vanilla extract for the best flavor.
- Swirl Nutella gently to create ribbons instead of mixing it fully.
- For a nut-free version, swap Nutella with a chocolate spread alternative.
- Freeze in a shallow container for faster setting.
- Let ice cream sit at room temperature for 5 minutes before scooping.
- Add toppings like chopped hazelnuts or chocolate chips for extra crunch.
- Double the recipe if using a large-capacity ice cream maker.
- This recipe can be customized with caramel or peanut butter swirls.
Chef’s Secrets for Perfect Results
The secret to truly luxurious ice cream lies in patience and attention to detail.
Heating the custard gently ensures the eggs thicken without scrambling, giving the base its signature silky smoothness.
Always use fresh, high-quality cream and whole milk, as these form the backbone of both texture and flavor.
Another tip is to chill the custard overnight if possible—this deepens the flavors and guarantees better churning.
Finally, when adding Nutella, don’t overmix; gentle swirls create striking ribbons that make every scoop look and taste decadent.
Serving Suggestions That Delight Guests
Nutella Swirl Ice Cream is delicious on its own, but it shines even more when paired thoughtfully.
Serve a scoop over warm brownies or chocolate lava cake for an irresistible hot-and-cold dessert.
For a lighter pairing, try it alongside fresh strawberries, raspberries, or banana slices.
You can also serve it in waffle cones topped with crushed hazelnuts or drizzle extra Nutella for a double dose of flavor.
Hosting a dinner party? Layer scoops into a sundae glass with whipped cream and caramel sauce for a show-stopping dessert.
Storage Tips for Lasting Freshness
Homemade ice cream is best enjoyed fresh, but proper storage can keep it delicious for up to 2 weeks.
Always transfer the churned ice cream into a freezer-safe, airtight container.
Press a layer of parchment paper or plastic wrap directly onto the surface before sealing to prevent ice crystals from forming.
Store the container in the coldest part of your freezer, away from the door where temperature fluctuations are common.
If the ice cream becomes too firm, let it rest at room temperature for a few minutes before serving.
Frequently Asked Questions
1. Can I make this without an ice cream maker?
Yes! Pour the chilled custard into a shallow dish, freeze for 1 hour, then whisk vigorously.
Repeat this process every 30 minutes for about 3 hours, then swirl in the Nutella before the final freeze. The texture won’t be quite as airy but will still be creamy and delicious.
2. Can I substitute Nutella with something else?
Absolutely. You can use any chocolate-hazelnut spread, chocolate ganache, or even peanut butter for a different twist.
For a dairy-free option, try a vegan chocolate spread made with almond or cashew butter.
3. How do I prevent ice crystals from forming?
Always chill the custard completely before churning, store the ice cream in an airtight container, and cover the surface with parchment or plastic wrap.
Avoid frequent opening of the container, as exposure to air and temperature changes causes crystals to develop.
4. Is it safe to eat the custard with eggs?
Yes. The egg yolks are gently cooked to 175°F, which is a safe temperature that ensures the mixture thickens while eliminating any bacteria risk.
Using pasteurized eggs can provide extra peace of mind if you’re concerned.
5. Can I reduce the sugar in this recipe?
Yes, though it may slightly affect the texture. Sugar not only sweetens but also keeps the ice cream scoopable.
If you’d like to reduce sugar, try replacing a portion with honey, maple syrup, or a sugar substitute designed for baking and frozen desserts.
