This one-pot Garlic Parmesan Pasta is a quick and luxurious comfort meal made with simple ingredients and ready in just 20 minutes.
What sets it apart is the creamy, garlicky, buttery sauce that infuses the delicate angel hair pasta with rich flavor while cooking everything in one skillet—making both prep and cleanup a breeze.
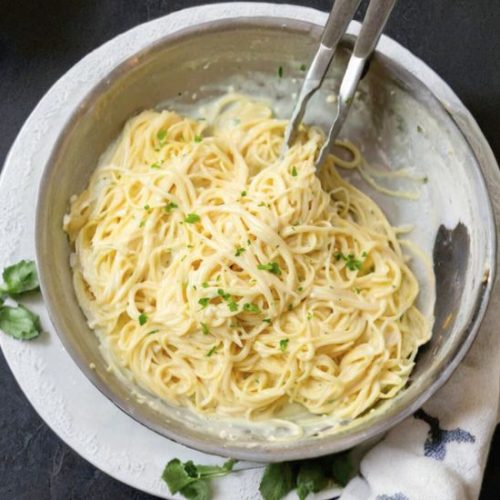
20-Minute One-Pot Garlic Parmesan Pasta
Equipment
- 1 Large Skillet or Sauté Pan – For cooking pasta and sauce in one pot.
- 1 Garlic Press or Knife – For mincing fresh garlic cloves.
- 1 Grater or Microplane – To finely shred fresh Parmesan cheese.
- 1 Set of Kitchen Tongs – To stir and serve pasta easily.
- 1 Measuring Cup Set – For accurate measurement of liquids and cheese.
Ingredients
- 8 ounces angel hair pasta
- 2 tablespoons butter for sautéing
- 1 tablespoon butter for finishing the pasta
- 4 cloves garlic finely minced
- 2 cups chicken broth preferably low sodium
- 1 cup whole milk or 2% milk as an alternative
- ½ cup Parmesan cheese freshly grated
- Fresh parsley chopped, for garnish
Optional Seasoning Blend (recommended for depth of flavor):
- ¼ teaspoon onion powder
- ¼ teaspoon dried oregano
- ¼ teaspoon dried thyme
- ¼ teaspoon dried parsley
- ¼ teaspoon black pepper
Instructions
- Prep Your Ingredients: Before you begin cooking, mince the garlic and finely grate the Parmesan cheese. Let the cheese sit at room temperature for 10 minutes so it blends smoothly into the sauce later.
- Sauté the Garlic: In a large skillet over medium heat, melt 2 tablespoons of butter. Add the minced garlic and sauté for 1 to 2 minutes, stirring gently until fragrant but not browned. This creates the base flavor for the entire dish.
- Build the Creamy Broth: Pour in the chicken broth, then sprinkle in the optional seasoning blend if using. Gradually whisk in the milk, stirring constantly to combine. Increase heat to bring the mixture to a gentle boil.This is crucial to ensure the pasta cooks evenly.
- Cook the Angel Hair Pasta: Once the liquid is boiling, gently place the angel hair pasta into the skillet. Break the strands in half if needed to fit, or gradually fold the noodles into the liquid as they soften using tongs. Let the pasta simmer uncovered for 4 to 5 minutes, stirring occasionally to prevent sticking or clumping. Avoid overcooking—the pasta should be just tender.
- Finish with Butter and Cheese: Lower the heat to the lowest setting. Add the remaining 1 tablespoon of butter and toss the pasta gently. Now, slowly sprinkle in the grated Parmesan, stirring continuously to create a smooth and creamy sauce. Turn off the heat during this step to prevent the cheese from curdling.
- Let It Thicken and Serve: The sauce may seem thin at first, but it will thicken as it rests. Allow the pasta to sit for 2 to 3 minutes off heat before serving.Garnish with a sprinkle of fresh parsley and serve immediately with a side of garlic bread or your favorite protein.
Notes
- Don’t Overcook the Pasta: Angel hair pasta cooks very quickly—watch it closely and follow the package time to avoid mushiness.
- Grate Cheese Fresh: Use a block of Parmesan and grate it yourself. Pre-shredded cheese doesn’t melt as smoothly and can cause a gritty sauce.
- Avoid High Heat When Adding Cheese: If the sauce is too hot, the cheese may separate and cause graininess. Always reduce the heat or turn it off first.
- Customizable Protein Additions: Feel free to toss in grilled chicken, shrimp, or even mushrooms to make it more filling.
- Pasta Absorbs Sauce Over Time: If making ahead, reserve a bit of warm milk or broth to loosen up the sauce when reheating.
- Use Half and Half for Richer Flavor: For a creamier version, you can swap out milk with half and half, though the sauce may be slightly thicker.
With 15g of protein per serving and only 382 calories, this dish delivers a surprisingly balanced nutritional profile. It features a good dose of calcium from Parmesan cheese, healthy fats from butter, and modest carbs—ideal for a satisfying lunch or dinner that won’t weigh you down.
The recipe is perfect for busy weeknights and even lends itself to meal prep.
Must-Have Tools for Perfect Results
All-Clad Stainless Steel Skillet (12-Inch)
A large, high-quality skillet ensures even heat distribution—key for simmering the sauce without scorching and cooking the pasta to perfection. Durable and versatile for everyday stovetop recipes.
OXO Good Grips Garlic Press
Effortlessly mince garlic cloves for that bold, aromatic foundation. This tool makes prep faster and hands cleaner, and it’s ideal for everything from pasta to marinades.
Microplane Premium Classic Zester
Grate Parmesan into ultra-fine shreds that melt evenly into the sauce. Also perfect for zesting citrus or grating spices, making it a multi-use essential.
Silicone-Coated Kitchen Tongs
Crucial for maneuvering and stirring delicate angel hair without breakage. Tongs provide control while tossing pasta or serving salad, making them a kitchen staple.
Cuisinart Box Grater (4-Sided)
For those who prefer block cheese over pre-shredded (which is recommended!), this sturdy grater gives you options for coarse, fine, and ribbon shredding all in one.Pair it with lean protein like chicken or shrimp and roasted veggies for a complete, wholesome plate.
Chef’s Secrets for Creamy Perfection
Achieving the perfect creamy garlic Parmesan pasta is all about timing, temperature, and technique.
First, always use freshly grated Parmesan cheese—it melts better and adds a nuttier, more authentic flavor than pre-shredded varieties.
Let the cheese sit at room temperature before adding it to the pasta to help it melt seamlessly into the sauce.
When adding the cheese, make sure the heat is turned off or set to very low to avoid curdling or graininess.
Stir the cheese in slowly and steadily for a silky, cohesive finish.
Be sure to use angel hair pasta specifically for this recipe, as its delicate texture perfectly absorbs the garlic cream sauce.
Lastly, simmer the pasta only until al dente; overcooking it will cause clumping and a mushy consistency.
This dish is all about timing and balance—when done right, it tastes like something from your favorite Italian bistro.
Best Ways to Serve This Pasta
This garlic Parmesan pasta is incredibly versatile and can be served as a main dish or a creamy side.
For a more filling meal, pair it with grilled chicken breast, sautéed shrimp, or roasted vegetables like zucchini or broccoli.
It also complements breaded chicken cutlets, pan-seared salmon, or meatless protein options like crispy tofu.
For sides, serve it with warm garlic bread, cheesy breadsticks, or a fresh garden salad with lemon vinaigrette to cut through the richness of the sauce.
A light white wine, such as Pinot Grigio or Chardonnay, pairs beautifully with the creamy garlic notes.
For a cozy dinner, serve it in warm bowls with a sprinkle of freshly cracked pepper and extra Parmesan on top.
The simplicity of this pasta allows it to blend well into many meal themes—from casual weeknight dinners to comforting weekend indulgence.
Storage and Reheating Made Easy
Store any leftover garlic Parmesan pasta in an airtight container in the refrigerator for up to 3 days.
As the pasta sits, it will continue to absorb some of the sauce, so it’s normal for it to thicken.
To reheat, add a splash of milk or chicken broth before warming it in a skillet over low heat.
Stir gently and frequently until the sauce loosens and becomes creamy again.
If using a microwave, heat in short intervals (30–45 seconds), stirring in between and adding a little liquid to maintain the desired consistency.
Freezing is not recommended for this dish, as the dairy-based sauce may separate and lose its texture when thawed.
For best results, enjoy this pasta freshly made or within a day or two when the sauce is still at its creamiest.
Frequently Asked Questions (With Answers)
1. Can I use spaghetti instead of angel hair pasta?
Yes, you can substitute spaghetti or another long pasta if needed. However, you may need to slightly increase the simmering time and adjust the liquid by a few tablespoons to ensure the pasta cooks evenly and doesn’t absorb too much sauce.
2. What type of Parmesan cheese works best?
Always use a wedge of high-quality Parmesan and grate it fresh. Brands like Belgioioso or Parmigiano-Reggiano offer the best texture and melt beautifully into sauces. Avoid pre-shredded or powdered cheese, as they often contain anti-caking agents that interfere with smooth melting.
3. How do I prevent the cheese from becoming grainy?
Grainy sauce usually happens when cheese is added over high heat. To avoid this, turn off the heat or reduce it to the lowest setting before slowly stirring in the Parmesan. Also, make sure the cheese is at room temperature before incorporating it.
4. Is this recipe vegetarian-friendly?
The dish can be vegetarian if you use vegetable broth instead of chicken broth and ensure your Parmesan cheese is made without animal rennet. Many imported Parmesans use rennet, but vegetarian alternatives are available in most grocery stores.
5. Can I add vegetables or protein to this dish?
Absolutely! This pasta is a great base for customization. You can toss in sautéed spinach, mushrooms, or peas for added nutrients. For protein, grilled chicken, shrimp, or even leftover rotisserie chicken work wonderfully to turn it into a heartier meal.
