All products are selected by our editorial team for quality. If you buy through our links, we may earn a small commission at no extra cost to you.
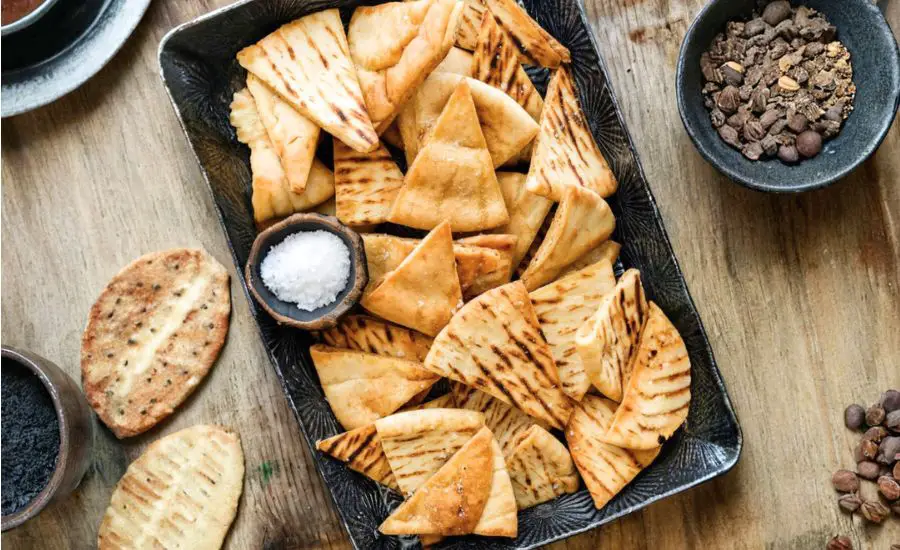
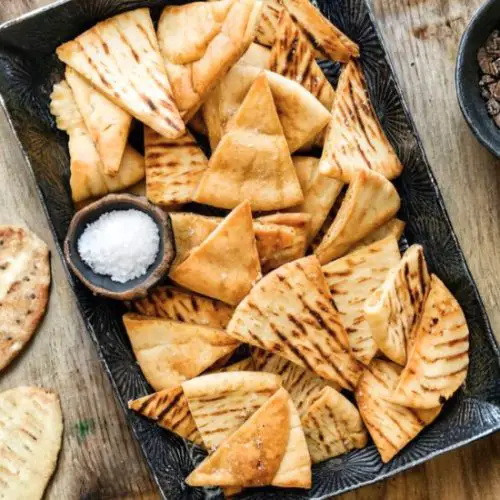
Homemade Pita Chips are a simple yet irresistible snack that brings a satisfying crunch to any table.
What makes this recipe truly appealing is its simplicity—just three basic ingredients transform into a golden, crispy snack in minutes.
These chips are an excellent source of plant-based protein and fiber, with healthy fats from olive oil that support heart health while keeping saturated fat low.
With only 160 calories per serving, they’re a guilt-free alternative to store-bought chips, making them perfect for snacking, entertaining, or pairing with hummus and other dips.
The recipe’s quick preparation and minimal cooking time make it ideal for busy weekdays or last-minute gatherings.
Plus, customizing the seasoning allows for endless flavor variations, turning a classic Greek-inspired snack into a versatile everyday staple.
Must-Have Tools for Perfect Results
Silpat Baking Mat
Provides a non-stick surface for evenly baking pita chips without added oils or greasing. Perfect for repeated use, it ensures effortless cleanup and consistent crispness.
Sharp Chef’s Knife
Essential for cutting pita bread into uniform triangles. A precise knife reduces the risk of uneven cooking and doubles as a versatile tool for slicing vegetables, fruits, and more.
Basting Brush
Helps evenly coat each pita triangle with olive oil, ensuring golden, crispy chips. Beyond this recipe, it’s perfect for glazing pastries, brushing marinades, or spreading butter.
Large Baking Sheet
Provides ample space for spreading pita triangles in a single layer, preventing overcrowding for even baking. A staple for roasting, baking, and sheet-pan meals.
Measuring Spoons
Ensure accurate portions of olive oil and salt, enhancing flavor balance. Their precision is invaluable for baking, cooking, and portion control.
15-Minute Pita Chips
Equipment
- 1 Large Baking Sheet
- 1 Silpat Baking Mat or Parchment Paper
- 1 Sharp chef’s knife
- 1 Basting Brush
- Measuring spoons
Ingredients
- 4 pieces Pita Bread
- 3 tablespoons Olive Oil
- Salt to taste (Sea Salt or Kosher Salt)
Instructions
- Preheat the Oven: Begin by setting your oven to 400°F (205°C). Preheating is essential to ensure that the pita chips bake evenly and achieve a crisp, golden-brown texture. While the oven warms up, you can prepare the baking sheet and pita bread. A properly preheated oven shortens cooking time and gives the chips a light, airy crunch.
- Prepare the Baking Surface: Line a large baking sheet with a Silpat baking mat or parchment paper. This non-stick surface prevents the pita chips from sticking, allowing them to crisp up beautifully without additional oil or risk of burning. Make sure the liner is flat and covers the entire sheet to provide an even cooking surface.
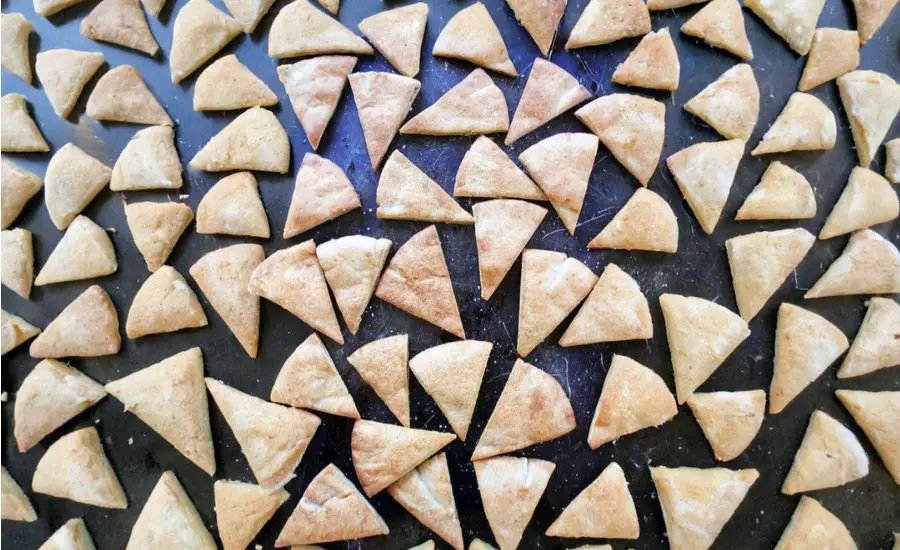
- Cut the Pita Bread into Triangles: Using a sharp chef’s knife, slice each pita bread into 8 even triangles. Cutting them uniformly ensures that all the chips cook at the same rate, avoiding burnt or undercooked pieces.Take care to apply gentle pressure to avoid tearing the bread. This step also creates a visually appealing, snackable shape perfect for dipping.
- Arrange the Pita Triangles: Place the cut pita triangles evenly on the prepared baking sheet in a single layer. Avoid overlapping, as crowded pieces may steam rather than bake, resulting in soft chips instead of crisp ones. Proper spacing allows hot air to circulate freely, giving each chip a perfect crunch.
- Brush with Olive Oil – First Side: Take a basting brush and lightly coat the top of each pita triangle with olive oil. The oil promotes even browning and adds a subtle, nutty flavor that enhances the natural taste of the bread. Use just enough to cover the surface without saturating the bread, maintaining a light, crispy texture.
- Brush with Olive Oil – Flip and Repeat: Carefully flip each pita triangle over and repeat the brushing process on the other side. This step ensures that both sides bake evenly and achieve a golden-brown finish. A consistent coating of oil is key to getting that signature crunch and appealing color.
- Sprinkle with Salt: Evenly sprinkle sea salt or kosher salt over the top of the oiled pita triangles. The salt not only enhances the flavor but also helps balance the natural sweetness of the bread. Adjust the amount to your taste preference, keeping in mind that a light dusting is often sufficient to elevate the flavor without overpowering it.
- Bake to Perfection: Place the baking sheet in the preheated oven and bake for approximately 10 minutes. Keep a close eye on the chips during the final few minutes, as oven temperatures can vary. The pita chips are ready when they are crisp, golden-brown, and slightly firm to the touch. Avoid overbaking to prevent bitterness from burnt edges.
- Cool Completely: Remove the baking sheet from the oven and let the pita chips cool completely on the sheet. Cooling allows them to firm up further, ensuring that every bite is crunchy. Do not attempt to eat them immediately, as warm chips can be slightly soft in the center.
- Serve or Store: Once cooled, serve the pita chips immediately with your favorite dips such as hummus, tzatziki, or guacamole. Alternatively, store them in an airtight container at room temperature for up to 5 days to maintain their crispness. Proper storage keeps the chips fresh and crunchy, making them perfect for quick snacking or meal prep.
Notes
- Use fresh pita bread for the best texture; older pita can be slightly dry and may crumble.
- Brush lightly with olive oil to avoid greasy chips.
- Ensure uniform triangle sizes for even baking and crispness.
- Experiment with seasonings—garlic powder, paprika, or za’atar can add a unique flavor twist.
- Store completely cooled chips in an airtight container to maintain crunch.
- Baking time may vary slightly depending on oven type; keep a close eye during the last few minutes.
Chef’s Secrets for Perfect Chips
The secret to perfectly crispy pita chips lies in three factors: uniform cutting, proper oiling, and precise baking.
Make sure each triangle is cut evenly to allow consistent heat distribution, preventing some chips from burning while others remain soft.
Brushing both sides lightly with olive oil ensures an even golden color and adds subtle richness without heaviness.
For added flavor, try lightly seasoning the chips before baking, or sprinkle a pinch of herbs after they come out of the oven to preserve the aromatic notes.
Finally, using a high-quality baking mat or parchment paper helps achieve an ideal crunch and avoids sticking or uneven browning.
Serving Suggestions for Enjoyable Snacks
Pita chips are versatile and pair wonderfully with a variety of dips and spreads.
Classic choices include hummus, tzatziki, baba ghanoush, or guacamole. For a fun twist, serve alongside a cheese board with soft cheeses, olives, and roasted vegetables.
They also work well as a crunchy topping for salads or soups, adding texture and a subtle savory flavor.
These chips make a perfect appetizer for parties or a wholesome snack for kids and adults alike.
Their lightly salted, golden crunch enhances both Mediterranean and modern fusion dishes.
Storage Tips to Keep Chips Crispy
To maintain maximum crunch, allow the pita chips to cool completely before storing.
Store them in an airtight container at room temperature, away from moisture and direct sunlight.
Avoid storing in the refrigerator, as this can introduce humidity and soften the chips.
For long-term storage, you can freeze the baked chips in a sealed bag; simply reheat in a 350°F oven for 3–5 minutes to restore crispness.
Following these steps ensures that your homemade chips remain fresh, crunchy, and ready to enjoy for several days.
Frequently Asked Questions About Pita Chips
1. Can I use whole wheat pita bread?
Yes! Whole wheat pita adds extra fiber and a nutty flavor. Just keep an eye on baking time, as whole wheat may brown slightly faster.
2. How do I make pita chips extra crispy?
Ensure uniform triangle sizes, brush both sides with olive oil, and do not overcrowd the baking sheet. Baking on a preheated oven helps achieve optimal crispness.
3. Can I add other seasonings?
Absolutely! Paprika, garlic powder, rosemary, or za’atar all enhance flavor. Sprinkle them before or after baking depending on whether you want the aroma to be baked in or more fragrant and fresh.
4. How long do homemade pita chips last?
Stored in an airtight container at room temperature, they remain fresh for up to 5 days. Avoid refrigeration to prevent moisture softening.
5. Can I make these chips ahead of time?
Yes, they can be prepared a day or two in advance. Keep them in a sealed container to preserve crunch, and serve straight from storage or lightly reheat for freshness.
This recipe is inspired by twopeasandtheirpod and has been carefully refined to enhance clarity, streamline preparation steps, and ensure accurate results. We’ve also included health benefits, nutritional highlights, and Must-Have Tools to help you get the best results every time you cook.
