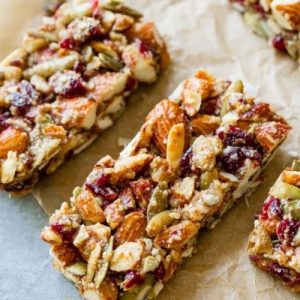
These Pumpkin Seed Cranberry Snack Bars are a perfect balance of chewy, crunchy, and naturally sweet, making them an ideal wholesome snack.
Packed with plant-based protein, fiber, and healthy fats from almonds and pumpkin seeds, they’re low in refined sugar and quick to prepare.
Perfect for on-the-go energy, meal prep, or a satisfying midday treat.
Pumpkin Seed Cranberry Snack Bars
Equipment
- 1 × 8-inch or 9-inch square baking pan
- 1 × Parchment paper
- 1 × silicone spatula or wooden spoon
- 1 × Mixing bowl (medium or large)
- 1 × Cooling Rack
- 1 × Refrigerator
Ingredients
- ¼ cup 85g honey
- ½ teaspoon pure vanilla extract
- ¼ cup 30g almond meal
- ⅛ teaspoon salt
- 1 teaspoon pumpkin pie spice
- 1 tablespoon 15g almond butter
- 1 ⅓ cups 187g whole almonds, roughly chopped
- ½ cup 60g dried cranberries
- ¾ cup 104g salted pepitas (shelled pumpkin seeds)
Instructions
- Prepare Your Baking Pan: Begin by preheating your oven to 300°F (149°C). While the oven warms up, line an 8-inch or 9-inch square baking pan with parchment paper. Make sure the parchment hangs over the edges of the pan—this overhang will help you lift the bars out easily after baking. Lightly grease the pan if desired to prevent sticking, but the parchment is usually sufficient. Setting this up ahead of time ensures a smooth assembly process.
- Mix the Wet Ingredients: In a medium mixing bowl, combine 1/4 cup (85g) of honey, 1/2 teaspoon of pure vanilla extract, and 1 tablespoon (15g) of almond butter. Using a silicone spatula or wooden spoon, stir the ingredients together until they form a smooth, slightly sticky mixture. The honey and almond butter should fully blend to create a cohesive base for your bars.
- Incorporate the Dry Ingredients: Add 1/4 cup (30g) almond meal, 1/8 teaspoon salt, and 1 teaspoon pumpkin pie spice to the wet mixture. Gently fold the dry ingredients in using a spatula until everything is evenly combined. Take care not to overmix; the goal is a uniform mixture without overworking the almond meal, which can make the bars too dense.
- Fold in the Crunchy Additions: Next, add 1 1/3 cups (187g) roughly chopped whole almonds, 1/2 cup (60g) dried cranberries, and 3/4 cup (104g) salted pepitas. Using a spatula, fold them into the mixture until every piece is coated with the almond-honey blend. Make sure the nuts and seeds are evenly distributed; this ensures every bar will have a perfect balance of crunch, sweetness, and flavor.
- Press the Mixture into the Pan: Transfer the combined mixture into the prepared baking pan. Using your spatula (or lightly greased hands), press the mixture firmly and evenly into the pan.The mixture should be packed tightly—this is crucial for bars that hold together after baking. Aim for a uniform thickness across the pan so the bars bake evenly.
- Bake Until Golden: Place the pan in the preheated oven and bake for 20–22 minutes. The bars should become lightly golden around the edges while remaining soft in the center. Keep a close eye toward the end of baking to avoid over-browning. The gentle heat ensures the honey and almond butter bind everything together without drying out the bars.
- Cool Completely in Pan: Once baked, remove the pan from the oven and set it on a wire cooling rack. Allow the bars to cool completely in the pan for at least one hour. Cooling in the pan is essential, as it helps the bars firm up slightly before refrigeration. This step reduces crumbling and ensures neat slices.
- Chill for Extra Firmness: After the initial cooling, transfer the pan to the refrigerator and chill for an additional hour. This extra step helps the bars set completely, creating a compact, chewy texture that stays together when cut.
- Remove and Slice the Bars: Use the parchment paper overhang to lift the entire block of bars from the pan. Place it on a cutting board and, using a sharp knife, cut into 12 even bars. For cleaner edges, wipe the knife with a damp cloth between cuts. The bars should hold their shape and be slightly sticky but firm.
- Wrap and Store: Individually wrap each bar in plastic wrap or parchment paper for convenience. Store at room temperature for up to one week or refrigerate for up to two weeks to maintain a firmer texture. For longer storage, freeze bars for up to three months and thaw before eating. Proper storage preserves freshness, flavor, and chewy consistency.
Notes
- Sweetener Tip: Honey works best for binding and flavor; avoid thinner syrups like maple or agave as they make bars too soft.
- Almond Meal Option: Use store-bought almond meal/flour or pulse almonds in a food processor until crumbly. Avoid overprocessing to prevent almond butter.
- Spice Swap: If you don’t have pumpkin pie spice, combine 1/4 tsp each cinnamon, nutmeg, ginger, and 1/8 tsp cloves and allspice.
- Salted vs Unsalted Seeds: Using salted pepitas adds a nice sweet-salty balance. If using unsalted, increase salt by 1/8 tsp or use salted almonds.
- Cooling Tip: Let bars cool in the pan, then chill in the refrigerator to firm up and prevent crumbling.
- Freezing Instructions: Wrap bars individually and freeze up to 3 months. Thaw before enjoying.
Chef’s Secrets For Perfect Bars
The key to these bars staying chewy yet firm is pressing the mixture tightly into the pan before baking.
Don’t skimp on this step—compact bars hold together better and slice neatly.
Use a silicone spatula or your hands (lightly greased) to press evenly.
Cooling completely in the pan before transferring to the fridge prevents breakage.
Toasting the almonds or pepitas lightly before mixing can enhance their flavor, adding a deeper, nutty aroma that complements the cranberries and pumpkin spice.
Serving Suggestions For Snack Bars
These bars are versatile and can be enjoyed anytime.
Slice into smaller pieces for kids’ lunchboxes, or pair a full bar with a cup of coffee, tea, or a smoothie for a balanced breakfast.
They also make a perfect pre- or post-workout snack, providing protein, fiber, and natural sugars for energy.
For a creative twist, spread a thin layer of nut butter on top or sprinkle with dark chocolate chips to elevate the flavor without compromising nutrition.
Storage Tips To Keep Fresh
To maintain optimal texture, store the bars in an airtight container.
They keep well at room temperature for up to a week but can become sticky, so refrigeration is ideal for longer freshness.
Individually wrapping bars prevents sticking and makes them convenient for grab-and-go snacking.
For extended storage, freeze the bars for up to three months; thaw at room temperature or in the fridge before serving.
Proper storage ensures they retain both their chewy texture and nutty flavor.
Frequently Asked Questions
1. Can I use maple syrup instead of honey?
Honey is recommended because it binds the mixture firmly and adds natural sweetness. Maple syrup or agave may make the bars too soft and crumbly.
2. Are these bars gluten-free?
Yes! The recipe uses almond meal and seeds, making it naturally grain-free and gluten-free. No flour or grains are needed.
3. Can I substitute other nuts for almonds?
Yes, you can try cashews, walnuts, or pecans. Keep the total nut weight similar for consistent texture. Rough chopping is key for crunch.
4. How long do bars last in the fridge?
They stay fresh for up to two weeks in an airtight container. Refrigeration prevents them from becoming sticky or overly soft.
5. Can I make these bars ahead of time?
Absolutely! Bars can be made up to a week in advance at room temperature or up to three months if frozen. Perfect for meal prep or gifting.
