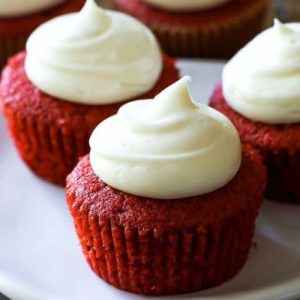
These Red Velvet Cupcakes are a healthier twist on a timeless favorite—soft, moist, and topped with a tangy cream cheese frosting.
Made with wholesome ingredients, they’re lower in saturated fat and a source of protein from eggs and buttermilk.
With just the right balance of indulgence and nutrition, these cupcakes are perfect for everyday baking—quick, easy, and great for sharing or meal prepping ahead of time.
Classic Red Velvet Cupcakes
Equipment
- 1 × 12-cup muffin pan
- 14 × cupcake liners
- 1 × handheld or stand mixer (with whisk & paddle attachment)
- 1 × Medium mixing bowl
- 1 × Large mixing bowl
- 1 × fine-mesh sieve (for sifting flour)
- 1 × Whisk
- 1 × silicone spatula or wooden spoon
- 1 × Cooling Rack
- 1 × piping bag (disposable or reusable)
- 1 × Wilton #12 round piping tip
Ingredients
- 2 large eggs room temperature (separated)
- 1 ⅓ cups 166 g all-purpose flour
- ¼ cup 32 g cornstarch
- ½ teaspoon baking soda
- 4 teaspoons 7 g unsweetened cocoa powder
- ¼ teaspoon salt
- ¼ cup 56 g unsalted butter, softened
- 1 cup 200 g granulated sugar
- ½ cup 120 ml canola or vegetable oil
- 2 teaspoons vanilla extract
- ½ teaspoon distilled white vinegar
- 2 tablespoons red food coloring or adjust as preferred
- ½ cup 120 ml buttermilk, room temperature
- Cream cheese frosting for topping
Instructions
- Preheat and Prepare Your Baking Pan: Start by preheating your oven to 350°F (177°C). Line a 12-cup muffin pan with cupcake liners. Since this recipe makes 14 cupcakes, you’ll need to line a second pan with 2 extra liners or bake those in a small second batch later. Having everything prepared before mixing ensures the batter can go into the oven immediately, which helps the cupcakes rise properly.
- Whip the Egg Whites to Soft Peaks: Separate the eggs carefully, placing the egg whites in a medium-sized mixing bowl and the yolks aside for later. Using a handheld mixer or a stand mixer fitted with the whisk attachment, whip the egg whites on high speed until they reach soft peak stage—this usually takes about 2–3 minutes. The peaks should hold their shape but still curl over when lifted. Set this bowl aside; these whipped egg whites will be folded in later to make the cupcakes extra fluffy.
- Sift and Combine the Dry Ingredients: In a separate medium bowl, sift together flour and cornstarch to create a light, cake-like texture. Add the baking soda, cocoa powder, and salt to the sifted mixture, whisking well to ensure everything is evenly distributed. Sifting not only eliminates lumps but also aerates the flour, resulting in lighter, more delicate cupcakes.
- Cream the Butter and Sugar: In a large mixing bowl, add the softened butter and beat it on high speed using the paddle attachment of your mixer until smooth and creamy (about 1 minute). Add the granulated sugar and continue beating on high for another 2 minutes until the mixture looks fluffy and pale. Be sure to scrape down the sides and bottom of the bowl with a spatula so no butter clumps remain. Proper creaming is essential for creating a tender crumb in the cupcakes.
- Blend in the Oil and Egg Yolks: Pour in the oil and beat on high speed for about 2 minutes. At this stage, the mixture may look slightly separated or “piece-y,” but that’s completely normal—it won’t affect the final result. Add the egg yolks along with the vanilla extract and continue beating on medium-high speed until the mixture is smooth and well combined. This step gives the cupcakes richness and depth of flavor.
- Add Vinegar and Food Coloring: Mix in the vinegar and your desired amount of red food coloring. Start with about 2 tablespoons of liquid food coloring for a deep, vibrant red, but you can adjust depending on how intense you want the color. Beat on low speed until evenly combined and the batter is tinted a uniform red.
- Alternate Dry Ingredients and Buttermilk: With the mixer on low speed, begin adding the dry ingredients in three separate additions, alternating with the buttermilk. Always start and finish with the dry mixture (dry–wet–dry–wet–dry). Mix each addition just until incorporated; avoid overmixing as it can make the cupcakes dense. The batter at this point should be smooth, slightly thick, and silky.
- Fold in the Whipped Egg Whites: Using a spatula or wooden spoon, gently fold the whipped egg whites into the batter. Do this slowly and carefully to avoid deflating them, as they add airiness to the cupcakes. Fold until no visible streaks of egg white remain, but don’t overwork the batter. You should end up with a light, fluffy mixture ready for baking.
- Fill the Cupcake Liners: Spoon the batter into the prepared cupcake liners, filling each one about ½ to ⅔ full. This allows room for the cupcakes to rise without overflowing. Distribute the batter evenly so the cupcakes bake uniformly.
- Bake Until Perfectly Set: Place the pan in the preheated oven and bake for 20–21 minutes. Check doneness by gently pressing the top of a cupcake—it should spring back when lightly touched. Alternatively, insert a toothpick into the center; it should come out clean or with just a few moist crumbs.Avoid overbaking, as that can dry out the cupcakes.
- Cool the Cupcakes Properly: Once baked, remove the cupcakes from the oven and allow them to cool in the pan for about 5 minutes. Afterward, transfer them carefully to a wire cooling rack to cool completely. Proper cooling is crucial before frosting; otherwise, the frosting will melt and slide off.
- Prepare and Apply the Cream Cheese Frosting: While the cupcakes cool, prepare your favorite cream cheese frosting. Once the cupcakes are fully cooled, pipe or spread the frosting on top. For best results, use a piping bag fitted with a round Wilton #12 tip rather than a star tip, as cream cheese frosting tends to be softer and doesn’t hold sharp patterns well. Frost immediately before serving for the freshest taste.
- Serve, Store, or Freeze: Enjoy your cupcakes right away, or store leftovers in an airtight container. Frosted cupcakes keep well at room temperature or in the refrigerator for up to 3 days. If you want to make them ahead, you can freeze unfrosted cupcakes for up to 3 months. Simply thaw overnight in the refrigerator before frosting and serving.
Notes
- You’ll get about 14 cupcakes from this recipe, so use a second pan for the extra 2.
- Room temperature ingredients are essential—cold eggs or buttermilk may cause the batter to curdle.
- Use cake flour if you have it; otherwise, the flour + cornstarch mix works perfectly.
- The cupcakes rely on buttermilk for tenderness and flavor; a homemade version (milk + vinegar/lemon) works in a pinch.
- Food coloring is optional; the cupcakes taste the same without it, but the deep red hue makes them extra appealing.
- Fold egg whites gently into the batter to keep them light and airy.
- Do not overfill liners—only half to two-thirds full is perfect.
- Baking times vary; start checking at 18 minutes to avoid overbaking.
- Use a round piping tip for frosting, as cream cheese frosting doesn’t hold sharp designs well.
- For best results, frost just before serving to keep cupcakes fresh and attractive.
Chef’s Secrets for Perfect Results
The secret to bakery-style red velvet cupcakes lies in the balance of ingredients and technique.
Always cream the butter and sugar thoroughly to create a soft, tender crumb.
Whipping the egg whites separately is another game-changer—it adds extra volume, making the cupcakes lighter and fluffier.
When adding dry ingredients and buttermilk, alternate carefully and mix only until combined to avoid overworking the batter.
Finally, fold in the whipped egg whites with patience; this ensures your cupcakes bake up tall and airy rather than dense.
Remember: small details, like using room temperature ingredients and proper sifting, make a noticeable difference.
Serving Suggestions and Pairing Ideas
Red velvet cupcakes are versatile and can be enjoyed in many ways.
Serve them as an elegant dessert at dinner parties, birthdays, or afternoon tea.
Their vibrant color makes them especially festive for Valentine’s Day, Christmas, or anniversaries.
Pair these cupcakes with hot drinks such as coffee, cappuccino, or spiced chai for a cozy experience, or serve them with chilled milk for a classic combination.
For a touch of sophistication, top each cupcake with fresh berries, chocolate shavings, or a sprinkle of crushed nuts.
You can even arrange them on a tiered stand as a centerpiece for gatherings—guaranteed to impress.
Storage Tips for Freshness Guaranteed
To keep your cupcakes fresh, store unfrosted cupcakes at room temperature in an airtight container for up to 2 days.
Once frosted, they are best stored in the refrigerator, tightly covered, for up to 3 days.
Bring refrigerated cupcakes to room temperature before serving for the best texture and flavor.
If you’re planning ahead, freeze unfrosted cupcakes in a single layer, wrapped tightly in plastic wrap, for up to 3 months.
When ready to use, thaw them overnight in the refrigerator, then frost and serve.
Avoid freezing cream cheese frosting, as it tends to lose its creamy texture after thawing.
Frequently Asked Questions
1. Why do I need buttermilk in this recipe?
Buttermilk provides acidity, which reacts with the baking soda to help the cupcakes rise. It also adds moisture and a subtle tang that balances the sweetness of the frosting. Without it, the cupcakes may taste flat and be less tender.
2. Can I skip the red food coloring?
Yes, the food coloring is purely aesthetic and doesn’t affect the flavor. Your cupcakes will still have the same delicious taste, just without the iconic red hue. You can also experiment with natural alternatives like beet juice powder, though the color won’t be as vibrant.
3. How do I prevent dry cupcakes?
The key is not to overbake. Start checking them at the 18-minute mark, and remove them as soon as a toothpick comes out clean. Also, make sure to measure your flour correctly—spoon it into the measuring cup and level it off, rather than scooping directly, to avoid adding too much.
4. What frosting works best with red velvet?
Classic cream cheese frosting is the traditional choice, thanks to its tangy flavor that complements the sweet, cocoa-rich cupcakes. However, you can also pair them with buttercream, whipped cream, or even a mascarpone-based frosting if you prefer something less tangy.
5. Can I make these cupcakes ahead of time?
Absolutely! Bake the cupcakes up to a day in advance, store them covered at room temperature, and frost them just before serving. For longer storage, freeze the unfrosted cupcakes and thaw as needed. This makes them an excellent option for party prep or busy schedules.
