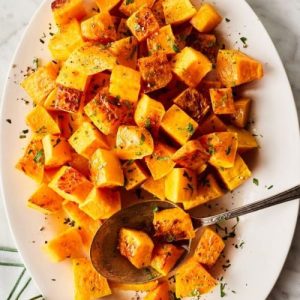
Roasted butternut squash is a cozy, nutrient-dense side that transforms simple ingredients into golden, caramelized bites of flavor.
Naturally rich in fiber, vitamins A and C, and healthy carbs, it offers sustained energy while being low in saturated fat.
This recipe is quick, wholesome, and perfect for everyday cooking—whether you’re meal-prepping for the week, tossing it into salads, or serving it as a comforting side dish.
Roasted Butternut Squash
Equipment
- 1 Large Baking Sheet
- Parchment Paper (for lining)
- 1 Sharp Knife
- 1 Cutting board
- 1 Mixing Bowl
- 1 wooden spoon (or spatula)
Ingredients
- 1 medium butternut squash about 2 lbs, peeled, seeds removed, and cut into 1-inch cubes
- 2 tablespoons extra-virgin olive oil
- ½ teaspoon sea salt
- ¼ teaspoon freshly ground black pepper
- 2 tablespoons chopped fresh parsley optional, for garnish
Instructions
- Preheat and Prepare the Oven: Begin by setting your oven to 400°F (200°C). This temperature is ideal for caramelizing the natural sugars in butternut squash, giving it that irresistible golden-brown edge.While the oven warms up, line a large baking sheet with parchment paper. The parchment prevents sticking, makes cleanup easier, and helps the squash roast evenly without drying out.
- Peel, Scoop, and Cube the Squash: Place the butternut squash on a stable cutting board. Using a sharp chef’s knife, carefully slice off both ends. Peel away the tough outer skin with a vegetable peeler, exposing the bright orange flesh. Cut the squash in half lengthwise, scoop out the seeds with a spoon, and discard (or save for roasting later). Chop the flesh into 1-inch cubes, aiming for consistent size so they cook at the same rate.
- Season Generously: Transfer the squash cubes into a mixing bowl. Drizzle with extra-virgin olive oil, ensuring each cube is lightly coated to encourage crisp edges. Sprinkle with sea salt and a few grinds of black pepper. Toss everything thoroughly with a wooden spoon or your hands, making sure the oil and seasonings are evenly distributed. This step ensures every bite is flavorful.
- Arrange on the Baking Sheet: Spread the seasoned cubes out onto the prepared baking sheet in a single, even layer. Avoid overcrowding—if the cubes are piled on top of each other, they’ll steam instead of roast. Give them space so the hot oven air can circulate around each piece, creating that perfect golden crust.
- Roast to Perfection: Place the tray on the center rack of your preheated oven.Roast for 30–35 minutes, flipping the cubes halfway through with a spatula to promote even browning. By the end of cooking, the squash should be tender on the inside, slightly crisp on the edges, and caramelized to a rich golden color. If you prefer extra crispness, let it roast for an additional 5 minutes, keeping a close eye to avoid burning.
- Add a Fresh Finish: Once the squash is done, remove the baking sheet from the oven and allow it to cool slightly. For a burst of freshness, sprinkle with chopped parsley before serving. This garnish adds a pop of color and a mild, herby flavor that balances the natural sweetness of the squash.
- Serve and Enjoy: Transfer the roasted butternut squash to a serving platter or bowl. It can be enjoyed immediately as a nutritious side dish, mixed into grain bowls or salads, blended into soups, or stored for meal prep throughout the week.
Notes
- Cut the squash into evenly sized cubes for even cooking.
- A drizzle of olive oil helps caramelize and crisp the edges.
- Don’t overcrowd the baking sheet—spread cubes in a single layer.
- Flip halfway through roasting for golden color on all sides.
- Fresh parsley or other herbs add brightness before serving.
- For extra flavor, add garlic powder, smoked paprika, or cinnamon.
- Roast the seeds separately for a crunchy snack.
- Works beautifully for meal prep—stays fresh for days.
- Adjust roasting time based on cube size.
- For extra-crisp edges, leave the squash in the oven for an extra 5 minutes.
Chef’s Secrets to Perfect Roasting
The secret to truly irresistible roasted butternut squash lies in the details.
First, make sure your squash cubes are uniform—this ensures that they roast at the same pace and prevents some pieces from burning while others remain undercooked.
Using parchment paper is more than a cleanup trick; it creates a buffer between the high heat of the pan and the squash, allowing caramelization without sticking.
Another key is not crowding the pan—when the squash has room to breathe, hot air circulates evenly, giving you crisp, golden edges.
Finally, seasoning is flexible—olive oil, salt, and pepper form the base, but experimenting with spices like smoked paprika, cumin, or even a pinch of cinnamon can completely transform the flavor profile.
Serving Suggestions for Every Occasion
Roasted butternut squash is wonderfully versatile, making it a reliable choice for everyday meals.
As a side dish, it pairs beautifully with roasted chicken, baked salmon, or plant-based mains like lentil loaf or grain bowls.
For a lighter option, toss it into a crisp fall salad with greens, dried cranberries, pecans, and feta cheese.
If you enjoy meal bowls, add the squash to quinoa or rice bowls with beans, greens, and a drizzle of tahini or yogurt dressing.
You can also mash roasted squash into soups for added creaminess or blend it into pasta sauces for a naturally sweet, velvety base.
Its natural sweetness complements both savory and slightly sweet flavors, making it one of the most adaptable vegetables to roast
Storage Tips for Longer Freshness
This recipe is excellent for meal prep since roasted squash holds up well after cooking.
Allow the squash to cool completely before storing—this prevents condensation, which can make the cubes soggy.
Store in an airtight container in the refrigerator for up to 4 days.
For reheating, a quick roast in the oven or a few minutes in an air fryer helps restore crispness, while microwaving works if you’re in a hurry.
For longer storage, roasted butternut squash can also be frozen: place cooled cubes on a baking sheet in a single layer, freeze until solid, then transfer to freezer bags.
Frozen cubes can last up to 3 months and can be reheated directly in the oven—perfect for busy weeks.
Frequently Asked Questions
1. Do I have to peel butternut squash before roasting?
Yes, peeling is recommended for this recipe since the skin is quite tough. However, if you prefer less prep work, you can roast squash halves with the skin on and scoop out the flesh after roasting.
2. How do I know when the squash is done?
The cubes should be fork-tender in the center with caramelized edges. A good sign is when they are golden brown on the outside but soft when pierced with a fork.
3. Can I add more seasonings?
Absolutely! While olive oil, salt, and pepper create a delicious base, you can elevate the flavor with spices like garlic powder, paprika, thyme, or rosemary. For a sweet twist, try cinnamon or nutmeg.
4. Can I roast frozen butternut squash cubes?
Yes, but keep in mind that frozen squash releases more moisture, which can prevent crisping. To help, roast them at a slightly higher temperature (425°F) and give them extra time in the oven.
5. What can I serve roasted butternut squash with?
It pairs well with roasted meats, grain bowls, salads, or even soups. It’s also a great vegetarian option when combined with beans, lentils, or leafy greens for a satisfying meal.
