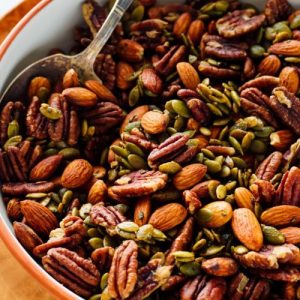
These Roasted Party Nuts are the perfect balance of sweet, savory, and lightly spicy flavors, making them irresistible for any occasion.
Packed with plant-based protein, fiber, and heart-healthy fats, they’re a nutritious snack that supports energy and satiety.
Quick to prepare and ideal for meal prep or entertaining, they offer a wholesome, satisfying bite without excess sugar or saturated fat.
Roasted Party Nuts
Equipment
- 1 Large Rimmed Baking Sheet
- Parchment paper or silicone baking mat
- 1 small mixing bowl
- Whisk or spoon
- Measuring cups and spoons
Ingredients
- 2 cups whole almonds
- 2 cups pecan or walnut halves
- 1 ½ cups pepitas green pumpkin seeds
- 2 tablespoons finely chopped fresh rosemary optional
- 2 tablespoons maple syrup
- 2 tablespoons unsalted butter melted
- 1 ½ teaspoons kosher salt*
- 1 teaspoon vanilla extract
- ¼ teaspoon cayenne pepper optional, adjust to taste
Instructions
- Preheat and Prepare the Baking Sheet: Start by preheating your oven to 325°F (165°C). While the oven warms up, line a large rimmed baking sheet with parchment paper or a silicone baking mat. This step is crucial because it prevents the maple syrup from sticking to the pan, which can make cleanup tricky. Ensure the lining is smooth, with no folds or wrinkles, so your nuts roast evenly.
- Arrange the Nuts: In a large bowl or directly on the prepared baking sheet, combine 2 cups of whole almonds, 2 cups of pecan or walnut halves, and 1 ½ cups of pepitas. Spread them in a loose, even layer. Take a moment to inspect your nuts and remove any broken pieces if desired. This ensures uniform roasting and a visually appealing result.
- Mix the Sweet and Savory Coating: In a small mixing bowl, combine 2 tablespoons of melted butter, 2 tablespoons of maple syrup, 1 ½ teaspoons of kosher salt, 1 teaspoon of vanilla extract, and ¼ teaspoon of cayenne pepper. If you are adding 2 tablespoons of finely chopped fresh rosemary, include it now. Use a whisk or spoon to gently mix until the ingredients form a smooth, cohesive coating. This step ensures each nut will be evenly flavored.
- Coat the Nuts Evenly: Pour the prepared mixture over the nuts on your baking sheet. Use a spatula or large spoon to gently toss the nuts until each one is lightly and evenly coated with the syrup-butter mixture. Spread the nuts back into a single layer. Don’t worry if a little maple syrup pools at the bottom of the pan; it will caramelize as the nuts bake.
- First Bake Interval: Place the baking sheet in the preheated oven and bake for 10 minutes. After this first interval, carefully remove the pan and use a spatula to stir the nuts, redistributing them so that all sides have a chance to roast evenly. This initial stirring helps prevent uneven caramelization.
- Continued Roasting and Stirring: Return the pan to the oven and continue baking for 5-minute intervals, stirring after each interval. Repeat this process until the nuts are deeply golden, usually totaling 23 to 26 minutes. Watch closely toward the end; the nuts should be roasted and the maple syrup mostly absorbed or slightly crystallized.
- Final Stir and Cooling: Remove the pan from the oven. While still warm, give the nuts one final gentle stir to break up any clusters and ensure an even layer. Let them cool on the baking sheet for 10 minutes. This allows the coating to harden slightly without making the nuts sticky.
- Separate Clumps and Store: Once the nuts are mostly cool but still slightly warm, gently separate any large clusters. Then allow the nuts to cool completely on the pan. Store them in an airtight container or sealed bag at room temperature. They will stay fresh and crunchy for up to 2 months, making them perfect for meal prep, snacking, or gifting.
Notes
- Use raw, unsalted nuts for the best flavor and control over seasoning.
- Kosher salt varies by brand; adjust according to taste (e.g., Morton vs. Diamond Crystal).
- Optional rosemary or herbs add an aromatic, savory note—experiment with thyme or sage.
- Maple syrup is preferable to honey for a crisp, non-sticky coating.
- Stirring frequently during baking ensures even caramelization and prevents burning.
- Cooling completely is essential for proper crunch and separation of clusters.
- Swap nuts freely (cashews, hazelnuts, or walnuts) as long as total volume remains 5 ½ cups.
- Dairy-free version: replace butter with extra-virgin olive oil.
Chef’s Secrets For Perfect Nuts
The key to perfectly roasted party nuts is temperature control and even coating.
Preheat the oven to 325°F and line your pan carefully to avoid sticking.
When combining the nuts with the syrup-butter mixture, use a gentle folding motion rather than vigorous stirring; this ensures every nut is evenly coated without breaking.
Stirring at regular intervals during baking is crucial—this prevents burning while helping the syrup caramelize evenly.
Choosing raw, unsalted nuts lets the natural flavors shine while giving you flexibility in seasoning.
Finally, resist the temptation to eat the nuts immediately; allowing them to cool completely lets the coating harden, giving that perfect crisp texture.
Serving Suggestions For Every Occasion
These roasted nuts are incredibly versatile and pair beautifully with both casual and formal occasions.
Serve them warm alongside a cheese board or add them to salads for extra crunch and flavor.
They also make a fantastic topping for oatmeal, yogurt, or smoothie bowls, providing protein and healthy fats to start the day.
For a sweet-savory snack, combine them with dried fruit or dark chocolate chips.
They’re ideal for gifting in decorative jars or bringing to parties, making them a delightful treat for friends and family alike.
Storage Tips To Keep Fresh
Store your roasted party nuts in an airtight container at room temperature for up to 2 months.
Make sure the nuts are fully cooled before sealing the container to prevent moisture buildup and sogginess.
For longer storage, consider refrigerating for up to 3 months or freezing for up to 6 months; just bring them to room temperature before serving.
Avoid storing in humid areas or near strong odors, as nuts can absorb smells and lose their crispness.
For best texture, gently shake or toss the nuts before serving to separate any clusters that may have formed.
Frequently Asked Questions
1. Can I use other nuts besides almonds or pecans?
Absolutely! You can substitute or mix in cashews, hazelnuts, or macadamia nuts. Just maintain the total volume at 5 ½ cups. Keep in mind that some nuts, like cashews, don’t crisp as well as almonds or pecans.
2. How do I make this recipe vegan or dairy-free?
Simply replace the butter with extra-virgin olive oil or another neutral oil. The nuts will still roast beautifully and achieve a crisp, flavorful coating.
3. Can I make these nuts ahead of time?
Yes! These nuts are perfect for meal prep or gifting. They can be stored in an airtight container at room temperature for up to 2 months or frozen for extended storage.
4. How can I prevent the nuts from sticking together?
Cool the nuts completely before storing. If clusters form, gently break them apart with your hands or a spatula. Avoid stacking or packing them tightly while still warm.
5. Can I reduce the sweetness or spice?
Certainly. Reduce the maple syrup slightly for a less sweet snack, or omit the cayenne if you prefer no heat. The balance of butter, vanilla, and salt still gives a deliciously rich flavor even with adjustments.
