All products are selected by our editorial team for quality. If you buy through our links, we may earn a small commission at no extra cost to you.
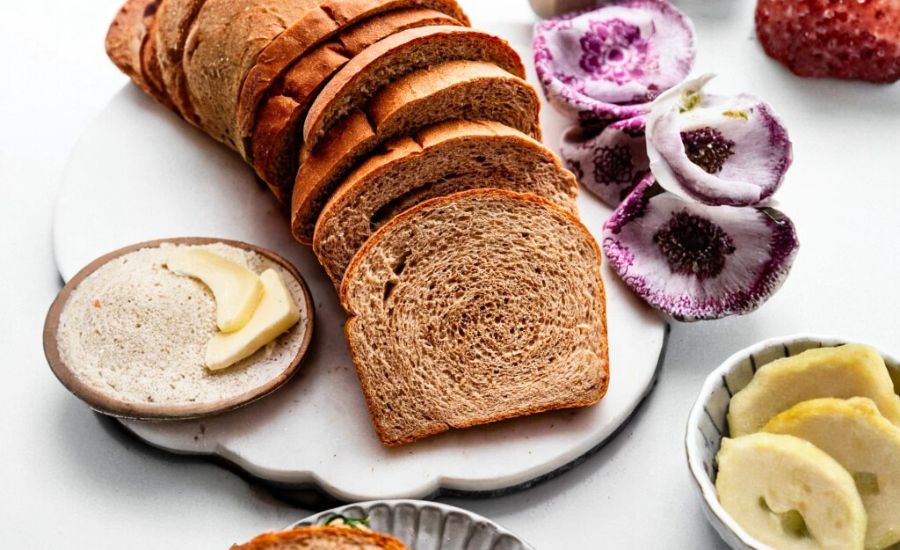
This soft and hearty Whole Wheat Bread isn’t just a delicious homemade alternative to store-bought loaves—it’s a nutritional powerhouse and a satisfying staple you’ll return to again and again.
What makes it stand out is the use of a sponge starter, which gives the bread incredible depth of flavor and a tender, airy crumb without sacrificing the nutty richness of whole wheat flour.
Whether you’re using 100% whole wheat or blending in bread flour for a loftier texture, the result is a nourishing, well-balanced loaf.
Nutritionally, this bread is packed with fiber, thanks to whole wheat flour, which supports digestive health and helps maintain steady energy levels throughout the day.
It also contains plant-based protein, beneficial complex carbs, and healthy fats from butter—making it more satiating than typical white bread. Plus, it’s lower in sugar and saturated fat than most store-bought varieties.
This recipe is an excellent choice for everyday cooking. While it does require rise time, the hands-on steps are minimal and beginner-friendly.
It freezes beautifully and holds up well in lunchboxes, as toast, or in hearty sandwiches—making it ideal for meal prep and weekly routines.
Must-Have Tools for Perfect Results
KitchenAid Artisan Stand Mixer
Designed for heavy doughs, this stand mixer with a dough hook attachment makes kneading effortless and consistent.
It’s a major time-saver for bread recipes and equally useful for batters, whipped cream, and cookie doughs.
USA Pan 9×5-Inch Loaf Pan
This commercial-grade loaf pan promotes even browning and prevents sticking, giving your bread a professional shape and crust.
A versatile essential for banana bread, meatloaf, and quick breads.
ThermoPro Digital Instant-Read Thermometer
No more guessing if your loaf is done. This thermometer gives quick, accurate readings to ensure your bread reaches the ideal 195–200°F internal temp. Also indispensable for meats, caramel, and baked casseroles.
OXO Silicone Pastry Brush
Ideal for brushing the loaf with egg white for that golden oat-studded top. Heat-resistant and easy to clean, it’s also great for greasing pans or brushing sauces on roasted veggies or grilled food.
Joseph Joseph Rolling Pin with Adjustable Rings
Perfect for evenly flattening the dough before shaping the loaf. The adjustable thickness rings ensure consistent results, whether you’re baking bread, cookies, or pizza dough.

Soft and Hearty Whole Wheat Bread
Equipment
- 1 Stand Mixer (with dough hook attachment) or 1 Large Mixing Bowl and 1 Wooden Spoon
- 1 9×5-Inch Loaf Pan
- 1 Instant-Read Thermometer
- 1 Rolling Pin
- 1 Pastry Brush
- 1 Wire Cooling Rack
- 1 Measuring Cup Set + Measuring Spoon Set
Ingredients
For the Sponge Starter:
- 1 cup 240 ml warm water (about 110°F / 43°C)
- ⅓ cup 80 ml warm whole milk (about 110°F / 43°C)
- 2¼ teaspoons 7 g active dry or instant yeast (1 standard packet)
- 2 cups 260 g whole wheat flour, spooned and leveled
For the Dough:
- 3 tablespoons 63 g honey
- 3 tablespoons 43 g unsalted butter, softened
- 1 teaspoon lemon juice or apple cider vinegar
- 1⅓ cups 173 g whole wheat flour, spooned and leveled (plus extra as needed)
- 1¼ teaspoons salt
Optional Topping:
- 1 egg white lightly beaten
- 1 tablespoon whole oats
Instructions
- Make the Sponge Base: In a large mixing bowl or the bowl of your stand mixer, combine warm water, warm milk, and yeast. Stir in 2 cups of whole wheat flour until you form a thick, sticky batter. Cover the bowl loosely with a towel or plastic wrap and let the sponge rest at room temperature until it becomes puffy and doubled in size—this typically takes 1 to 1.5 hours, though it can take up to 2 hours depending on conditions.
- Form the Dough: Once the sponge has risen, add honey, softened butter, lemon juice, remaining 1⅓ cups of flour, and salt to the bowl. Using a dough hook on medium speed (or a sturdy spoon and strong arm), mix until the dough pulls away from the sides of the bowl and forms a ball—about 3 minutes. If the dough is too wet or loose to handle, gradually mix in more flour, one tablespoon at a time, just until the dough becomes manageable and only slightly sticky.
- Knead Until Smooth: Continue kneading the dough for 8 to 10 minutes—either with your stand mixer on low-medium speed or by hand on a lightly floured surface. The dough should become soft and elastic but not dry. It should slightly stick to your fingers but pull away cleanly when gently poked.
- Let the Dough Rise: Transfer the kneaded dough to a greased bowl, turning it once to lightly coat all sides with oil. Cover and place in a warm area to rise until doubled in size—about 1.5 to 2 hours.
- Shape the Loaf: After the first rise, gently punch down the dough to release built-up air. On a lightly floured surface, roll it out into a rough rectangle (about 8×15 inches). Starting from one short end, roll it up tightly into a log, tucking in the ends if needed. Place the shaped loaf into a greased 9×5-inch pan, seam side down.
- Final Rise: Cover the loaf and let it rise again until it peaks about 1 inch above the rim of the pan. This second rise usually takes 45 to 60 minutes.
- Prepare to Bake: Position your oven rack to the lower third of the oven and preheat to 350°F (177°C). If adding the oat topping, gently brush the top of the risen loaf with beaten egg white and sprinkle oats on top just before baking.
- Bake to Perfection: Place the pan in the oven and bake for 36 to 40 minutes, or until the top is golden brown. If it begins to darken too quickly, loosely cover it with foil around the 20-minute mark. The loaf is fully baked when it sounds hollow when tapped or when a thermometer inserted into the center reads 195–200°F (90–93°C).
- Cool and Slice: Let the bread cool in the pan for 10 minutes before transferring it to a wire rack to cool completely. Slice when fully cooled or slightly warm, if preferred.
Notes
For a longer fermentation:
- Option 1: Shape the loaf, cover, and refrigerate overnight (Step 6). Allow to rest at room temperature for 1–2 hours the next day before baking.
- Option 2: Refrigerate after kneading (Step 3), then let rise at room temperature for 2 hours before shaping and continuing.
Chef’s Tips for Bread Success
Making whole wheat bread that’s both soft and hearty can feel intimidating, but a few key secrets make all the difference.
First, using a sponge starter not only boosts the bread’s flavor but also improves its texture by allowing the yeast to activate gently before kneading.
Don’t rush the rising times; patience results in better fermentation and a lighter crumb.
When kneading, aim for a dough that is soft and slightly sticky—adding flour sparingly to avoid a dry loaf.
If you don’t have a stand mixer, don’t worry! Kneading by hand on a floured surface works just as well, though it requires more elbow grease.
Lastly, tenting the bread with foil if it browns too fast keeps the crust from burning while ensuring the inside bakes fully.
Serving Ideas to Enjoy Bread
This whole wheat bread is incredibly versatile, making it a fantastic base for countless meals.
Serve it sliced and toasted with creamy avocado, a drizzle of olive oil, and a sprinkle of sea salt for a healthy breakfast or snack.
It also pairs beautifully with hearty soups and stews, soaking up broths and adding texture.
For lunch, use it to craft satisfying sandwiches with roasted veggies, hummus, or nut butter.
The subtle sweetness from the honey enhances both savory and sweet toppings, so don’t hesitate to use it in French toast or bread pudding recipes for a wholesome twist.
Best Practices for Storage
To keep your bread fresh, store it tightly wrapped in plastic or in an airtight container at room temperature.
Avoid refrigeration, which dries bread out faster. This loaf stays fresh for up to a week but freezes beautifully, either before or after baking.
For freezing before baking, shape and freeze the dough in the pan, then thaw and rise fully before baking.
For baked bread, wrap it well and thaw on the counter or in the fridge.
When reheating, a quick toast or warming wrapped in foil in the oven revives the soft crumb and crust.
Frequently Asked Questions Answered
Q1: Can I substitute bread flour for whole wheat flour?
Yes! You can replace up to 1 cup of whole wheat flour with bread flour for a lighter, taller loaf. This can be added either to the sponge or the dough stage depending on your preference.
Q2: What if I don’t have whole milk?
Whole milk is recommended for its richness and texture, but low-fat or plant-based milks like almond or oat milk work well too. Just make sure to warm the milk to activate the yeast properly.
Q3: Can I make this bread without a stand mixer?
Absolutely! Kneading by hand on a lightly floured surface works just as well. It takes more effort and time but gives you good control over dough consistency.
Q4: How do I know when the bread is fully baked?
Tap the bottom of the loaf—it should sound hollow. For precision, use an instant-read thermometer; the center should read 195–200°F (90–93°C).
Q5: Can I add seeds or nuts to this recipe?
Yes! Adding up to ½ cup of seeds like sunflower, flax, or chopped nuts during the kneading stage adds texture and nutrition without affecting the dough’s rise.
This recipe is inspired by sallysbakingaddiction and has been carefully refined to enhance clarity, streamline preparation steps, and ensure accurate results. We’ve also included health benefits, nutritional highlights, and Must-Have Tools to help you get the best results every time you cook.


