All products are selected by our editorial team for quality. If you buy through our links, we may earn a small commission at no extra cost to you.
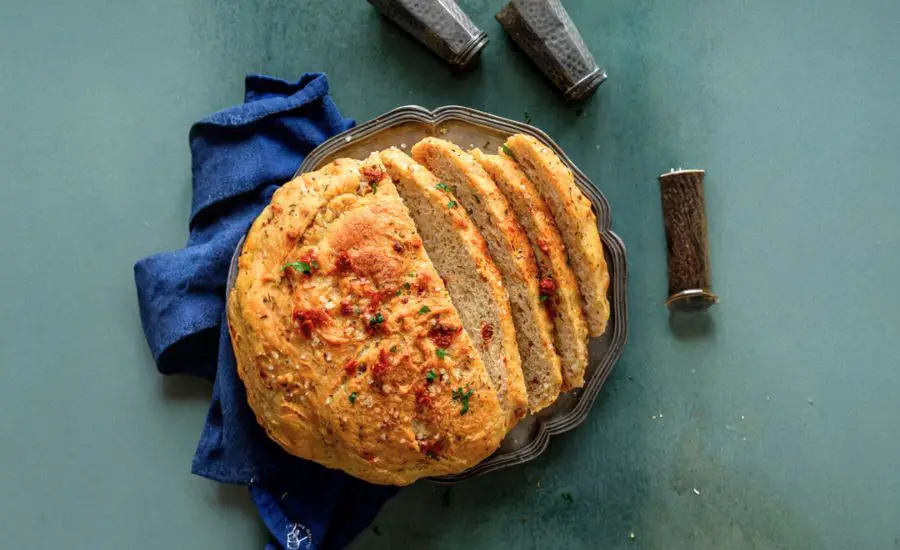
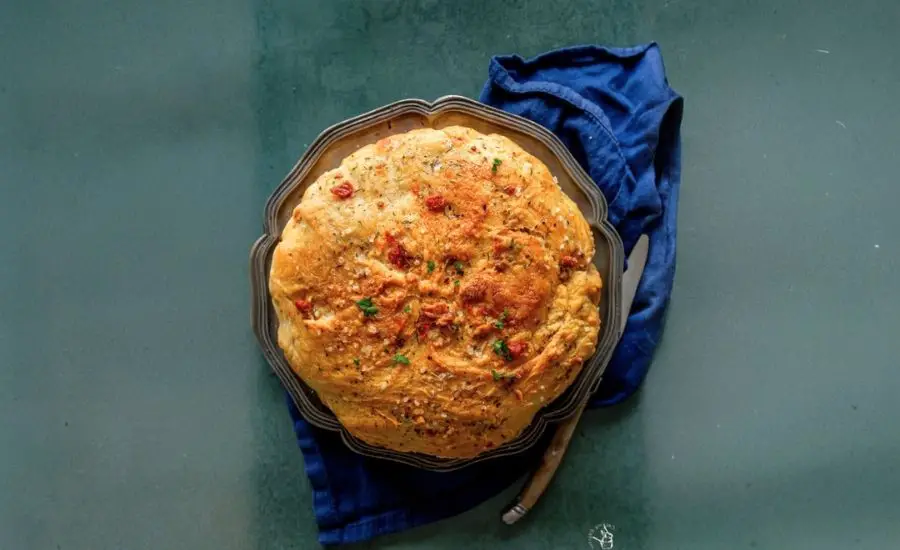
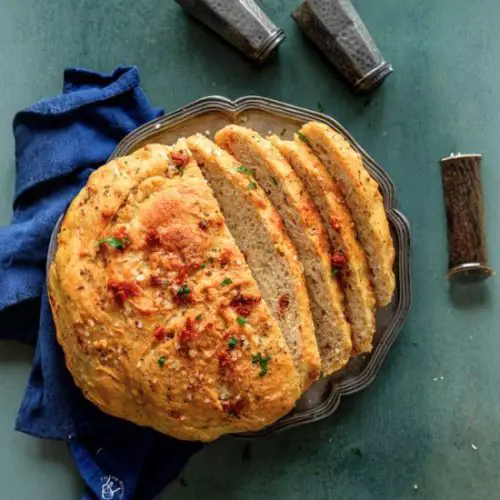
This sundried tomato bread recipe stands out for its vibrant flavor and effortless preparation.
Infused with sun-kissed tomatoes and aromatic herbs, it delivers a delightful burst of savory goodness in every bite.
Beyond taste, it offers nutritional benefits: made primarily with strong white bread flour and extra virgin olive oil, it provides a good balance of complex carbohydrates and healthy fats.
The olive oil contributes heart-healthy monounsaturated fats, while sundried tomatoes add fiber, antioxidants, and a modest amount of plant-based protein.
This bread is perfect for everyday cooking because it requires minimal kneading, saving time and effort without sacrificing texture or flavor.
Its versatility makes it great for breakfast, sandwiches, or as a side with meals.
Plus, the use of a dutch oven ensures a crisp crust and soft, airy crumb — hallmarks of artisan bread — right from your home oven.
Must-Have Tools for Perfect Results
Dutch Oven
Essential for baking the bread with a perfect crust and moist interior by trapping steam. This versatile cookware is also perfect for slow-cooking, roasting, and simmering stews in any kitchen.
Parchment Paper
Helps transfer dough easily and prevents sticking during baking. It’s a kitchen staple that simplifies clean-up and works well for baking cookies, roasting vegetables, and more.
Mixing Bowls
Used for combining ingredients and proofing dough. Durable and easy to clean, mixing bowls are indispensable for all cooking and baking tasks.
Serrated Bread Knife
Designed to effortlessly slice through crusty bread without crushing the soft crumb. It’s a must-have for clean, even slices of any loaf or baked goods.
Kitchen Towel
Provides a breathable cover to keep dough warm during proving, ensuring proper rise. A multipurpose tool, kitchen towels are essential for countless cooking and cleaning tasks.
Sun-Dried Tomato Bread
Equipment
- 1 Dutch oven (or cast iron loaf pan with lid)
- 1 Sheet of parchment paper
- Mixing bowls (for dough and proofing)
- Serrated bread knife (for slicing)
- Clean kitchen towel (for covering dough during proving)
Ingredients
- 3 cups strong white bread flour
- 1½ teaspoons instant yeast
- ¼ cup extra virgin olive oil
- 1½ cups warm water plus more if needed
- 1 teaspoon granulated sugar
- 1 teaspoon salt
- ¼ cup sundried tomatoes finely chopped
- 1 teaspoon dried mixed herbs
Instructions
- Activate the Yeast: Combine the warm water, yeast, and sugar in a small bowl. Stir gently and let the mixture rest for about 10 minutes until it becomes frothy and bubbly, indicating the yeast is active.
- Mix Dry Ingredients: In a large mixing bowl, combine the bread flour, salt, sundried tomatoes, and dried herbs. Stir these dry ingredients to evenly distribute the herbs and tomatoes.
- Combine Wet and Dry Ingredients: Slowly pour the frothy yeast mixture and olive oil into the flour mixture, stirring gently as you go. Mix until a loose, sticky dough forms. If the dough feels too dry, add a little more warm water, one tablespoon at a time, until it comes together.
- Shape and First Proof: Lightly flour a clean surface or a piece of parchment paper. Transfer the dough onto it and shape it roughly into a round ball without kneading too much. Place the dough in a lightly oiled bowl, cover it loosely with plastic wrap or a damp towel, and leave it in a warm spot to rise until it doubles in size — about 1 hour.
- Prepare for Second Proof: Once risen, transfer the dough to a fresh piece of floured parchment paper. Gently shape it into a round loaf, being careful not to press out all the air bubbles. Cover the dough again with a clean kitchen towel and let it rest for another 30 minutes.
- Preheat Oven and Dutch Oven: While the dough is proofing, preheat your oven to 220°C (430°F) or Gas Mark 7. Place your Dutch oven (with the lid) inside the oven to heat up thoroughly.
- Bake the Bread: Optionally, sprinkle the top of the loaf with extra dried herbs and sea salt for added flavor. Score the surface lightly with a sharp knife or bread lame to allow controlled expansion. Using the parchment paper, carefully lift the dough and place it into the hot Dutch oven. Cover with the lid and bake for 30 minutes.
- Finish Baking: Remove the lid and continue baking for another 15–20 minutes, or until the crust turns a rich golden brown and sounds hollow when tapped.
- Cool and Slice: Carefully remove the bread from the oven and transfer it to a wire rack. Let it cool completely before slicing with a serrated knife to preserve the crumb texture.
Notes
- Proofing Tip: If you have a warm spot like inside an Instant Pot on the yogurt setting, use it to proof the dough faster and more consistently.
- Flour Type: Using strong bread flour is key for good gluten development and structure. All-purpose flour can be used but may result in a less airy crumb.
- Water Temperature: Ensure the water is warm (not hot) to activate the yeast without killing it—ideally around 100-110°F (38-43°C).
- Herb Variations: Feel free to experiment with fresh herbs like rosemary or thyme for different flavor profiles.
- Storage: Store cooled bread in a paper bag or bread box to maintain crust crispness. For longer storage, wrap tightly and freeze.
Chef’s Expert Tips For Baking
Achieving the perfect sundried tomato bread begins with patience and attention to detail.
First, make sure your yeast is fresh and activated properly—watch for that frothy foam as a sign it’s ready.
Don’t rush the proving stages; letting the dough double in size and then rest again ensures a light, airy crumb and deep flavor development.
When shaping the dough, handle it gently to preserve the air pockets that create a fluffy texture inside the bread.
Using a Dutch oven to bake traps steam, which forms a crisp, golden crust that contrasts beautifully with the soft interior.
Finally, scoring the dough isn’t just decorative; it allows the bread to expand without cracking unevenly.
Experiment with different herbs or add finely chopped olives for a delicious twist!
Delicious Ways To Serve Bread
This sundried tomato bread is a versatile companion to many dishes.
It’s wonderful toasted and slathered with butter or cream cheese for a savory breakfast treat.
Pair it with hearty soups, stews, or pasta dishes to soak up flavorful sauces.
For a satisfying lunch, slice it thin and use it for gourmet sandwiches filled with fresh mozzarella, basil, and roasted vegetables.
It also makes an excellent base for bruschetta — simply top with diced tomatoes, garlic, and a drizzle of balsamic glaze.
Because of its robust flavor, this bread can elevate even simple meals, turning everyday dishes into something special.
Best Practices For Storage
To maintain the bread’s fresh-from-the-oven quality, store it in a paper bag or loosely wrapped in a clean kitchen towel at room temperature.
This keeps the crust crisp while preventing the inside from drying out.
Avoid sealing it in plastic wrap immediately, as this can trap moisture and make the crust soggy. For longer-term storage, slice the bread and freeze it in airtight bags, separating slices with parchment paper to prevent sticking.
When ready to eat, simply toast or warm slices straight from the freezer for a freshly baked taste.
Always let leftover bread cool completely before storing to avoid condensation buildup.
Frequently Asked Questions (FAQs) Answered
Q1: Can I use all-purpose flour instead of bread flour?
Yes, but bread flour is preferred for its higher protein content, which helps create better gluten structure and a chewier texture. All-purpose flour will still work but expect a softer, less elastic crumb.
Q2: How do I know if my yeast is still good?
If your yeast doesn’t foam after mixing with warm water and sugar within 10 minutes, it may be expired or inactive. Always check the expiration date and store yeast in a cool, dry place.
Q3: Can I add fresh herbs instead of dried?
Absolutely! Fresh herbs like rosemary or thyme add vibrant aroma and flavor. Use about three times the amount of fresh herbs compared to dried to maintain balance.
Q4: Is it necessary to use a Dutch oven for baking?
While not mandatory, a Dutch oven helps trap steam for a crisp crust and soft interior. If you don’t have one, try baking the loaf on a preheated baking stone with a pan of water nearby for steam.
Q5: How long does the bread stay fresh?
At room temperature, the bread is best consumed within 2-3 days. After that, it can become stale but freezing slices can extend freshness for several weeks.
This recipe is inspired by jcookingodyssey and has been carefully refined to enhance clarity, streamline preparation steps, and ensure accurate results. We’ve also included health benefits, nutritional highlights, and Must-Have Tools to help you get the best results every time you cook.
