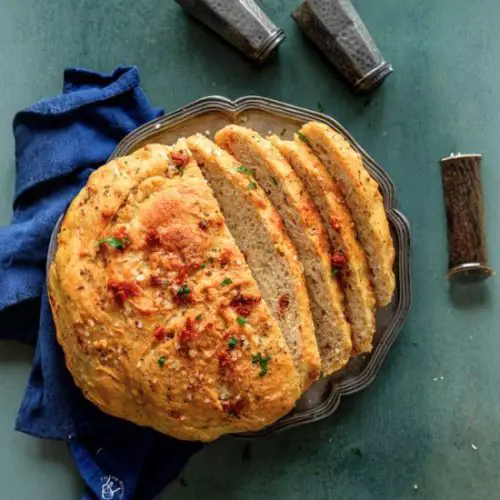
Sun-Dried Tomato Bread
Enjoy the rustic charm of this no-knead sundried tomato bread, bursting with rich flavors and easy to make at home. It’s perfect for sharing or meal prep and pairs wonderfully with your favorite spreads or meals.
Equipment
- 1 Dutch oven (or cast iron loaf pan with lid)
- 1 Sheet of parchment paper
- Mixing bowls (for dough and proofing)
- Serrated bread knife (for slicing)
- Clean kitchen towel (for covering dough during proving)
Ingredients
- 3 cups strong white bread flour
- 1½ teaspoons instant yeast
- ¼ cup extra virgin olive oil
- 1½ cups warm water plus more if needed
- 1 teaspoon granulated sugar
- 1 teaspoon salt
- ¼ cup sundried tomatoes finely chopped
- 1 teaspoon dried mixed herbs
Instructions
- Activate the Yeast: Combine the warm water, yeast, and sugar in a small bowl. Stir gently and let the mixture rest for about 10 minutes until it becomes frothy and bubbly, indicating the yeast is active.
- Mix Dry Ingredients: In a large mixing bowl, combine the bread flour, salt, sundried tomatoes, and dried herbs. Stir these dry ingredients to evenly distribute the herbs and tomatoes.
- Combine Wet and Dry Ingredients: Slowly pour the frothy yeast mixture and olive oil into the flour mixture, stirring gently as you go. Mix until a loose, sticky dough forms. If the dough feels too dry, add a little more warm water, one tablespoon at a time, until it comes together.
- Shape and First Proof: Lightly flour a clean surface or a piece of parchment paper. Transfer the dough onto it and shape it roughly into a round ball without kneading too much. Place the dough in a lightly oiled bowl, cover it loosely with plastic wrap or a damp towel, and leave it in a warm spot to rise until it doubles in size — about 1 hour.
- Prepare for Second Proof: Once risen, transfer the dough to a fresh piece of floured parchment paper. Gently shape it into a round loaf, being careful not to press out all the air bubbles. Cover the dough again with a clean kitchen towel and let it rest for another 30 minutes.
- Preheat Oven and Dutch Oven: While the dough is proofing, preheat your oven to 220°C (430°F) or Gas Mark 7. Place your Dutch oven (with the lid) inside the oven to heat up thoroughly.
- Bake the Bread: Optionally, sprinkle the top of the loaf with extra dried herbs and sea salt for added flavor. Score the surface lightly with a sharp knife or bread lame to allow controlled expansion. Using the parchment paper, carefully lift the dough and place it into the hot Dutch oven. Cover with the lid and bake for 30 minutes.
- Finish Baking: Remove the lid and continue baking for another 15–20 minutes, or until the crust turns a rich golden brown and sounds hollow when tapped.
- Cool and Slice: Carefully remove the bread from the oven and transfer it to a wire rack. Let it cool completely before slicing with a serrated knife to preserve the crumb texture.
Notes
- Proofing Tip: If you have a warm spot like inside an Instant Pot on the yogurt setting, use it to proof the dough faster and more consistently.
- Flour Type: Using strong bread flour is key for good gluten development and structure. All-purpose flour can be used but may result in a less airy crumb.
- Water Temperature: Ensure the water is warm (not hot) to activate the yeast without killing it—ideally around 100-110°F (38-43°C).
- Herb Variations: Feel free to experiment with fresh herbs like rosemary or thyme for different flavor profiles.
- Storage: Store cooled bread in a paper bag or bread box to maintain crust crispness. For longer storage, wrap tightly and freeze.
