All products are selected by our editorial team for quality. If you buy through our links, we may earn a small commission at no extra cost to you.
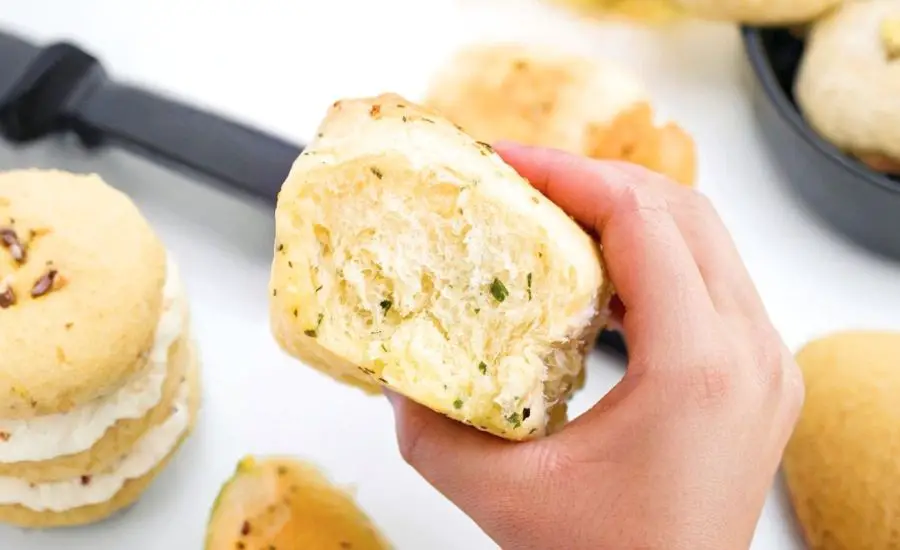
These Garlic Dinner Rolls stand out for their pillowy softness, rich garlic-herb aroma, and golden, buttery finish that makes them irresistible at any meal.
What sets them apart is the infusion of fresh herbs and garlic in both the dough and the butter topping, delivering bold flavor in every bite.
While indulgent in texture, they offer modest health-conscious perks: made with bread flour, they provide complex carbohydrates for sustained energy and a small but notable dose of protein and B-vitamins from the eggs and milk.
The use of unsalted butter allows for better control over sodium intake, and the addition of herbs like rosemary and parsley introduces antioxidants and anti-inflammatory properties.
These rolls are great for everyday cooking—they’re meal-prep friendly, freezer-compatible, and versatile enough to serve with soups, stews, or holiday roasts.

Whether you’re cooking for family or impressing guests, these rolls bring a bakery-quality touch to your table with simple pantry staples and rewarding flavor.
Must-Have Tools for Perfect Results
KitchenAid Artisan Stand Mixer
This stand mixer with a dough hook attachment is your best friend for hassle-free kneading. It ensures the dough develops the right elasticity without manual labor. Ideal for baking enthusiasts, it’s a multi-purpose powerhouse for everything from cookies to bread.
9×13 Nonstick Baking Pan
This pan ensures even baking and consistent browning. Its size is perfect for fitting all 12 rolls comfortably while allowing enough room to rise and expand. A durable nonstick surface makes cleanup easy and prevents sticking.
Instant-Read Digital Thermometer
Perfect for checking your milk temperature (110–115°F) to properly activate the yeast. Also useful for checking doneness in baked goods, meats, and even candy making.
Silicone Pastry Brush
A soft, heat-safe brush makes applying garlic herb butter easy and mess-free. Unlike bristle brushes, it doesn’t shed and can be tossed into the dishwasher.
Dough Scraper/Bench Knife
Helpful when dividing the dough into even portions and cleaning your work surface. It’s also great for shaping and transferring dough without tearing.
Garlic Herb Dinner Rolls
Equipment
- 1 Stand Mixer with Dough Hook Attachment – for kneading the dough effortlessly and efficiently.
- 1 9×13 Baking Pan – to bake the rolls evenly with a perfect golden crust.
- 1 Silicone Pastry Brush – to brush the garlic herb butter over the rolls before and after baking.
- 1 Mixing Bowl (large) – for proofing the dough in a warm, oiled environment.
- 1 Dough Scraper or Bench Knife – for portioning and shaping the rolls evenly.
Ingredients
For the Dough:
- 1 cup whole milk warmed to 110–115°F
- 2 ¼ teaspoons active dry yeast 1 packet
- 2 tablespoons + 1 teaspoon granulated sugar divided
- 2 large eggs lightly beaten
- ¼ cup unsalted butter melted and cooled
- 1 teaspoon garlic powder
- 1 ½ teaspoons fine sea salt
- 3 ½ to 4 cups bread flour plus extra for dusting
- ¾ tablespoon fresh rosemary finely chopped
- 2 tablespoons fresh parsley finely chopped and fully dried
- 1 teaspoon dried oregano
For the Garlic Herb Butter:
- 6 tablespoons unsalted butter melted
- ½ tablespoon Italian seasoning
- 3 cloves garlic minced
Instructions
- Activate the Yeast: In the bowl of a stand mixer, combine the warmed milk and 1 teaspoon of sugar. Sprinkle in the yeast, stir gently, and let it sit for about 10–15 minutes until bubbly and foamy. This ensures the yeast is alive and active—if there's no foam, discard and try again with new yeast.
- Mix the Wet Ingredients: Attach the dough hook to your stand mixer. Add the remaining 2 tablespoons of sugar, beaten eggs, melted butter, garlic powder, and salt into the activated yeast mixture. Mix on medium speed until everything is well blended.
- Form the Dough: Gradually add in 3 cups of bread flour, one cup at a time, while mixing on medium-low speed. Use a spatula to scrape the sides as needed. Slowly incorporate additional flour, ¼ cup at a time, until the dough starts to come together and pulls away from the sides of the bowl. You’re looking for a dough that is soft, slightly sticky, and elastic. Avoid over-flouring.
- Knead and Add Herbs: Turn the mixer to medium-high and knead the dough for about 3 minutes, or knead by hand for 8–10 minutes until smooth and stretchy. Reduce speed and mix in rosemary, parsley, and oregano until evenly distributed. Turn the dough out onto a lightly floured surface and knead for another 3–4 minutes. The dough should bounce back slowly when poked.
- First Rise: Shape the dough into a ball and place it in a lightly oiled mixing bowl, turning once to coat all sides. Cover tightly with plastic wrap or a clean towel. Let it rise in a warm, draft-free space for about 1 hour, or until it has doubled in size.
- Shape the Rolls: Punch down the risen dough to release air. Transfer it to a clean, lightly floured surface. Divide the dough in half, then cut each half into six equal portions (you’ll have 12 pieces total). Shape each piece into a smooth ball by pulling the sides underneath and pinching the bottom.
- Second Rise: Arrange the dough balls evenly in a greased 9×13-inch baking dish. Cover again with plastic wrap or a towel, and let rise in a warm spot for 1 to 1.5 hours, or until the rolls are noticeably puffy and have nearly doubled.
- Preheat and Prepare the Butter: While the rolls are finishing their rise, preheat your oven to 350°F. In a small bowl, mix together the melted butter, Italian seasoning, and minced garlic for the garlic herb butter. Once the rolls have risen, brush the tops generously with the butter mixture.
- Bake to Golden Perfection: Bake in the preheated oven for 18–20 minutes, or until the tops are golden brown and the rolls are tall and fluffy. For extra shine and flavor, brush the rolls again with melted butter as soon as they come out of the oven.
- Serve and Enjoy: Allow the rolls to cool slightly in the pan, then serve warm. They’re perfect alongside soups, roasts, or as a flavorful side to any meal.
Notes
- Flour Amount: Start with 3 ½ cups of flour and add more only as needed. The dough should be moist and soft, not dry or stiff.
- Herb Tips: Be sure to pat the parsley completely dry before adding to the dough—excess moisture can alter the dough texture.
- No Stand Mixer? You can knead the dough by hand. It will take about 8–10 minutes of firm kneading to develop the gluten structure.
- Warm Rise Environment: A good place for proofing dough is inside a turned-off oven with the light on, or near a warm window.
- Make Ahead: You can shape the rolls, cover tightly, and refrigerate overnight before the second rise. Let them come to room temperature and rise before baking the next day.
Chef’s Secrets for Fluffy Garlic Rolls
The secret to making tall, pillowy-soft garlic dinner rolls lies in dough handling and proofing technique.
Always begin with properly activated yeast—your milk should be warm (not hot) between 110°F and 115°F to create the ideal environment for the yeast to bloom.
If your yeast doesn’t foam within 15 minutes, it’s likely inactive and should be replaced.
During mixing, avoid adding too much flour too quickly—this can lead to dense rolls.
The dough should be soft, slightly tacky, and elastic. Kneading well helps develop gluten, which gives the rolls structure and that delightful pull-apart texture.
Incorporating fresh herbs toward the end of kneading ensures they’re evenly distributed without overworking the dough.
For the best rise, let the dough rest in a slightly warm, draft-free spot like an oven with just the light turned on.
And don’t forget the buttery brush—applying garlic herb butter before and after baking adds depth, aroma, and shine.
Delicious Ways to Serve These Rolls
These garlic herb dinner rolls are a versatile side dish that pairs well with just about everything.
Serve them warm at holiday dinners alongside roast turkey, ham, or beef tenderloin for a comforting, flavor-packed companion.
For everyday meals, they’re excellent with soups like tomato basil or creamy potato leek, and they make a great addition to hearty stews or pasta dishes.
Split them open to make mini sliders—stuff them with pulled pork, meatballs, or grilled veggies for an easy lunch.
Hosting a brunch? Turn them into savory breakfast rolls by pairing them with scrambled eggs and avocado.
They also work beautifully as a base for dipping sauces, like marinara, garlic butter, or even herbed olive oil.
However you serve them, these rolls always bring warmth and flavor to the table.
Smart Storage and Freezing Advice
To keep your garlic dinner rolls tasting fresh, store any leftovers in an airtight container or zip-top bag at room temperature for up to 2 days.
For longer storage, refrigerate them for up to 4–5 days, though reheating before serving is recommended to restore softness.
To reheat, wrap the rolls in foil and warm them in a 300°F oven for 10–12 minutes, or microwave for about 20 seconds each.
These rolls also freeze beautifully. After baking and cooling completely, wrap them tightly in plastic wrap and then aluminum foil or place them in a freezer-safe bag.
Freeze for up to 2 months. To serve, let them thaw at room temperature and then warm in the oven to restore their fluffy texture and fresh-baked taste.
If freezing unbaked shaped rolls, let them thaw and rise before baking as usual.
Frequently Asked Questions (FAQs)
1. Can I make the dough ahead of time?
Yes! After shaping the rolls and placing them in the baking dish, cover them tightly and refrigerate overnight. The next day, let them come to room temperature and rise until doubled in size before baking.
2. What if I don’t have bread flour?
You can use all-purpose flour instead, though bread flour gives the rolls a chewier texture and better rise due to its higher protein content. If using all-purpose flour, the texture may be slightly softer and less structured.
3. Can I use dried herbs instead of fresh?
Absolutely. If fresh herbs aren’t available, you can substitute with dried versions. Use about one-third the amount, since dried herbs are more concentrated. Just be sure to evenly mix them into the dough for consistent flavor.
4. How do I make these rolls vegan?
To make this recipe vegan, substitute the milk with a plant-based alternative (like oat or almond milk), use melted vegan butter, and replace the eggs with 1/4 cup of unsweetened applesauce or a flax egg per egg.
5. My dough didn’t rise—what went wrong?
If your dough doesn’t rise, it’s likely due to inactive yeast or a proofing environment that’s too cold. Always check the yeast expiration date and make sure your warm milk is between 110°F and 115°F. Also, give the dough a cozy, draft-free place to rest.
This recipe is inspired by cookingformysoul and has been carefully refined to enhance clarity, streamline preparation steps, and ensure accurate results. We’ve also included health benefits, nutritional highlights, and Must-Have Tools to help you get the best results every time you cook.
