All products are selected by our editorial team for quality. If you buy through our links, we may earn a small commission at no extra cost to you.
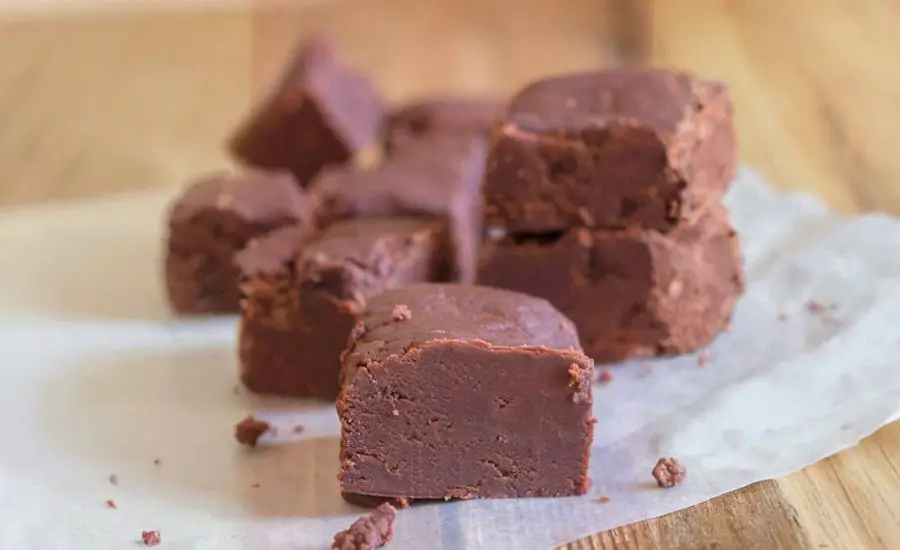
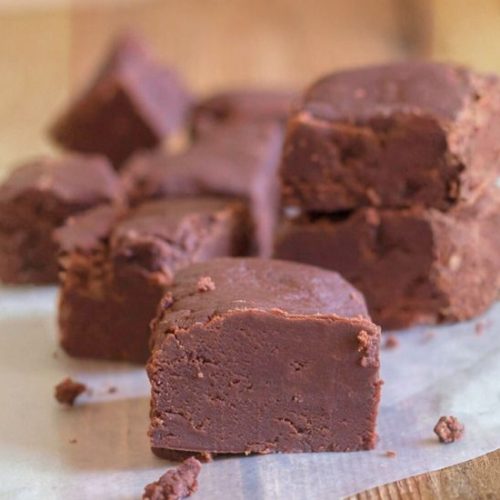
This Old Fashioned Chocolate Fudge is a timeless classic that stands out for its creamy yet slightly crumbly texture and rich, deep chocolate flavor—delivered through simple, quality ingredients without the need for corn syrup or condensed milk.
What makes it truly special is the traditional stovetop method that requires patience but rewards with authentic melt-in-your-mouth indulgence.
Though a dessert, it offers a modest calorie count (154 kcal per piece) and contains real butter for good fats, plus a touch of protein from milk.
This fudge skips artificial additives, making it a more wholesome treat. Its slow-cooked nature and lack of preservatives mean it’s best enjoyed fresh or stored properly, but it also freezes well for future cravings.
This recipe is perfect for everyday cooking when you want a satisfying, nostalgic sweet that’s both straightforward and rewarding, ideal for gifting or holiday treats, and satisfying for chocolate lovers of all ages.
Must-Have Tools for Perfect Results
Heavy-Bottomed Saucepan
Essential for even heat distribution to prevent scorching the sugar mixture. Its durability ensures smooth cooking and precise temperature control, making it a versatile staple for sauces, candies, and more.
Candy Thermometer
Critical for reaching the exact 234°F (112°C) temperature needed for perfect fudge consistency. This tool guarantees professional results in all your candy-making endeavors.
Wooden Spoon
Perfect for stirring without scratching your cookware or introducing unwanted metallic flavors. Its sturdy construction allows you to beat the fudge mixture just right for the ideal texture.
8-Inch Square Pan with Parchment Paper
Provides the perfect shape and easy removal of fudge squares. Parchment paper prevents sticking and makes cleanup effortless, a must-have for baking and candy recipes.
Butter Knife or Sharp Chef’s Knife
For clean, precise cutting of fudge squares, ensuring neat presentation and easy serving.
Chocolate Fudge
Equipment
- 1 heavy-bottomed saucepan
- 1 Candy thermometer
- 1 Wooden Spoon
- 1 8-inch square pan lined with buttered parchment paper
- 1 Butter knife or sharp chef’s knife
Ingredients
- 3 cups granulated sugar
- ⅔ cup unsweetened Dutch-process cocoa powder
- ⅛ teaspoon salt increase to 1/4 teaspoon if using unsalted butter
- 1 ½ cups whole milk
- ¼ cup butter preferably salted, softened to room temperature
- 1 teaspoon pure vanilla extract
Instructions
- Prepare Your Pan: Begin by lining an 8-inch square baking pan with parchment paper. Lightly grease the parchment with butter to ensure easy removal of the fudge later.
- Combine Dry Ingredients: In a medium, heavy-bottomed saucepan, thoroughly whisk together the granulated sugar, Dutch-process cocoa powder, and salt. This ensures an even distribution of cocoa and salt throughout the sugar base.
- Add Milk and Start Cooking: Pour in the whole milk and stir gently using a wooden spoon—avoid using a whisk or metal spoon to prevent texture issues. Place the saucepan over medium heat, stirring constantly to dissolve the sugar and cocoa evenly.
- Bring to a Strong Boil: Continue stirring until the mixture reaches a vigorous boil. This typically takes about 15 minutes. The mixture should bubble strongly but not scorch on the bottom—adjust heat as needed.
- Reduce Heat and Cook Without Stirring: Lower the heat to medium-low and let the mixture simmer without stirring. Monitor the temperature carefully with a candy thermometer until it reaches 234°F (112°C), approximately 30 minutes. This stage is crucial for the fudge’s texture.
- Add Butter and Vanilla, Then Cool: Remove the pan from heat. Stir in the softened butter and vanilla extract gently, but do not stir vigorously. Allow the mixture to cool to about 110°F (43°C) at room temperature, which will take roughly 30 minutes.
- Beat to Perfect Consistency: Using a wooden spoon, beat the cooled mixture continuously for 6 to 8 minutes. You’ll notice the glossy surface start to dull and thicken—that’s when the fudge is ready to set.
- Pour and Set: Quickly transfer the beaten fudge into the prepared pan and spread it evenly. Let it cool completely at room temperature. For best results, allow it to rest overnight to firm up fully.
- Slice and Store: Once firm, cut the fudge into approximately 20 squares using a butter knife or sharp chef’s knife. Store pieces in an airtight container at room temperature for up to two weeks, refrigerate for 3-4 weeks, or freeze for up to 3 months.
Notes
- Butter Type: If you prefer unsalted butter, increase the salt to 1/4 teaspoon to balance flavor.
- Avoid Stirring During Cooking: Stirring while simmering can cause graininess. Stir only when indicated.
- Preventing Graininess: Before cooking, rub the inside edges of your saucepan with butter to prevent sugar crystals from forming on the sides. Do not scrape the sides while boiling.
- Temperature Adjustments for Altitude: For high altitudes, reduce the cooking temperature by 2°F for every 1,000 feet above sea level.
- Storage Tips: Wrap individual fudge pieces in parchment or wax paper before storing to prevent sticking.
- Troubleshooting Soft Fudge: If your fudge doesn’t set properly, gently reheat it to the target temperature and repeat the beating process. For fudge that’s too hard, warm it slightly and stir in a small amount of milk.
Chef’s Secrets for Perfect Fudge
Achieving the ideal old-fashioned fudge requires a few key techniques that ensure a smooth, creamy texture without graininess.
First, use a heavy-bottomed saucepan to distribute heat evenly and avoid scorching. Rubbing the pan’s sides with butter before cooking helps prevent stray sugar crystals from causing a gritty texture.
Stir the sugar, cocoa, and milk mixture constantly until it reaches a rolling boil, but once you reduce the heat, resist stirring until the temperature hits the precise 234°F (112°C).
Use a reliable candy thermometer for accuracy; temperature is crucial for perfect crystallization.
When cooling, be patient—allowing the mixture to reach around 110°F before beating is essential for developing the right consistency.
Beat vigorously with a wooden spoon until the fudge loses its gloss, signaling readiness to set.
These steps take time but are vital for that classic melt-in-your-mouth experience.
Serving Suggestions to Impress Guests
Old-fashioned chocolate fudge is wonderfully versatile for serving occasions.
Present it cut into neat squares on a decorative platter for holiday parties or family gatherings, and consider pairing it with fresh berries or nuts for contrast.
It pairs beautifully with a cup of robust coffee, creamy hot chocolate, or even a glass of red wine, such as a smooth Merlot or Zinfandel, which complements the rich chocolate flavor.
For a festive twist, try adding a sprinkle of sea salt or a dash of cinnamon on top before serving.
This fudge also makes a thoughtful homemade gift—wrap pieces in parchment paper and tie with a ribbon for an elegant presentation that’s sure to delight.
Storage Tips to Keep Fudge Fresh
Proper storage is key to maintaining the fudge’s perfect texture and flavor.
Store your fudge pieces in an airtight container at room temperature for up to two weeks, making sure to separate layers with parchment paper to prevent sticking.
If you prefer a firmer texture or live in a warm climate, refrigeration extends freshness for 3 to 4 weeks but may slightly harden the fudge—allow it to come to room temperature before serving.
For long-term storage, fudge freezes exceptionally well.
Wrap tightly in parchment and place inside a sealed freezer bag; it can be frozen for up to three months.
To thaw, simply leave the fudge at room temperature for several hours, keeping it wrapped to avoid condensation.
Frequently Asked Questions About Fudge
Q1: Can I use low-fat or skim milk instead of whole milk?
Whole milk is recommended because its fat content contributes to the fudge’s creamy texture. Using low-fat or skim milk may result in a less rich and potentially grainier fudge.
Q2: What if my fudge is too soft or doesn’t set?
This usually means it didn’t reach the proper cooking temperature. Reheat gently to 234°F and beat again until it thickens. Ensure your candy thermometer is accurate for best results.
Q3: Can I substitute butter with margarine or oil?
Butter adds flavor and texture that margarine or oil can’t replicate. Using substitutes may affect the fudge’s taste and consistency.
Q4: Why shouldn’t I stir the mixture during the simmering phase?
Stirring can cause sugar crystals to form on the sides and bottom, resulting in a grainy texture. It’s best to stir only until the boil starts, then let it cook undisturbed.
Q5: How can I add flavors like mint or nuts?
Add extracts like mint alongside vanilla during the butter step for subtle flavor infusion. For nuts or coconut flakes, fold them in quickly after beating and before spreading the fudge in the pan.
This recipe is inspired by anitalianinmykitchen and has been carefully refined to enhance clarity, streamline preparation steps, and ensure accurate results. We’ve also included health benefits, nutritional highlights, and Must-Have Tools to help you get the best results every time you cook.
