This Two Ingredient Pineapple Coconut Ice Cream is a tropical treat that’s as refreshing as it is effortless.
With just frozen pineapple chunks and full-fat canned coconut milk, it delivers a creamy, naturally sweet dessert that’s 100% dairy-free, vegan, and gluten-free.
5-Minute Coconut Pineapple Ice Cream
Equipment
- 1 Food Processor – for blending frozen pineapple and coconut milk
- 1 Silicone Spatula – for scraping and transferring the ice cream
- 1 Ice Cream Scoop – for neat, easy serving
- 1 Freezer-Safe Container – to store the finished ice cream
- 1 Can Opener (optional) – if your canned coconut milk doesn’t have a pull-tab
Ingredients
- 4 cups frozen pineapple chunks
- 1 cup full-fat canned coconut milk
Instructions
- Break Down the Frozen Pineapple: Place the frozen pineapple chunks into a large-capacity food processor. Pulse several times to break them into smaller pieces. This step helps prevent overworking your processor and makes blending smoother in the next stage.
- Blend with Creamy Coconut Milk: Pour in the full-fat canned coconut milk. Pulse and blend the mixture in intervals, scraping down the sides as needed. Continue blending until the texture becomes smooth, thick, and creamy—similar to soft-serve ice cream.
- Serve or Freeze for Later: For immediate enjoyment, scoop and serve the soft-serve-style ice cream right away. For a firmer, scoopable consistency, transfer the mixture into a freezer-safe container and freeze for 1–2 hours, or until solid.
Notes
- Use Full-Fat Coconut Milk: For the creamiest texture and richest flavor, avoid light coconut milk. Full-fat varieties provide the necessary fat content to mimic real ice cream.
- Frozen Fruit Only: Ensure the pineapple is fully frozen before blending. Fresh fruit will result in a slushy texture instead of ice cream.
- Blender Option: If you don’t own a food processor, a high-powered blender can also be used—just add the coconut milk gradually and stir as needed to help the mixture circulate.
- Flavor Boost Ideas: Add a splash of vanilla extract, a few fresh mint leaves, or a pinch of sea salt for extra flavor depth.
- Make It Ahead: You can double the recipe and freeze in individual containers for a ready-to-eat, healthy dessert option all week long.
The frozen pineapple provides fiber and vitamin C, while the coconut milk offers good fats that support satiety and energy.
There’s no added sugar or processed ingredients—just clean, whole-food goodness.
This recipe is not only quick (ready in 5 minutes!), but also ideal for meal prep.
Simply blend and enjoy immediately as soft serve or freeze for a firmer texture.
It’s the perfect healthy indulgence for summer days, post-workout cravings, or family-friendly snacks.
Whether you’re following a plant-based diet or just want to eat more whole foods, this recipe proves that nutritious can still be delicious.
Must-Have Tools for Perfect Results
Cuisinart 14-Cup Food Processor
Perfectly Blends Frozen Fruit: This powerhouse appliance effortlessly pulverizes frozen pineapple into a smooth, creamy texture. It’s essential for recipes like this that require quick, even blending. A must-have for smoothies, nut butters, dips, and dough.
BPA-Free Silicone Spatula Set
Scrapes Every Last Drop: These flexible spatulas help you transfer every bit of your creamy ice cream from the processor without waste. They’re also heat-resistant, making them great for cooking and baking.
Stainless Steel Ice Cream Scoop
Scoop with Ease: This sturdy scoop glides through the thick, frozen mixture without bending. It creates neat, uniform portions—perfect for serving or styling.
Freezer-Safe Glass Storage Containers (with lids)
Store for Later Enjoyment: Ideal for freezing your homemade ice cream with an airtight seal that prevents freezer burn. Great for portioning other freezer meals and batch-prepped snacks.
Coconut Milk Can Organizer Rack
Keeps Pantry Tidy: If you’re a fan of coconut milk recipes, this helps keep cans neatly stored and easy to grab. Makes organizing your pantry smarter and stress-free.
Chef’s Secrets to Creamy Perfection
Achieving the perfect creamy texture in this pineapple coconut ice cream hinges on using the right ingredients and blending technique.
Always opt for full-fat canned coconut milk rather than the light version; the higher fat content is key to a rich, smooth consistency that mimics traditional ice cream.
Make sure your pineapple chunks are thoroughly frozen before processing — this helps prevent watery or icy results.
Pulsing the food processor in intervals allows the mixture to break down gradually, creating a velvety texture without overheating your machine.
If your mixture feels too thick to blend, a small splash of coconut milk can help loosen it up without sacrificing creaminess.
For extra flavor, a hint of vanilla extract or a sprinkle of toasted coconut flakes added just before serving can elevate the tropical notes beautifully.
Serving Suggestions for Refreshing Enjoyment
This pineapple coconut ice cream is wonderfully versatile.
Serve it immediately as a soft-serve treat for a quick, cooling snack or freeze it longer for a firmer scoopable dessert.
It pairs beautifully with fresh berries or sliced tropical fruits like mango or kiwi for added texture and vibrant flavor.
For an indulgent twist, drizzle with homemade chocolate sauce or a spoonful of passion fruit puree.
You can also serve it alongside warm, spiced desserts such as a cinnamon apple crumble or baked banana for a delightful contrast of temperatures.
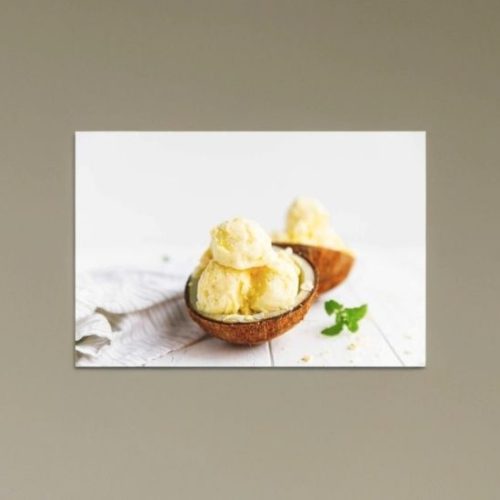
For a fun presentation, serve in coconut shells or chilled bowls and garnish with mint leaves or a sprinkle of toasted nuts to add a satisfying crunch.
Best Practices for Storage and Freshness
To maintain the freshness and texture of your homemade pineapple coconut ice cream, store it in an airtight freezer-safe container to prevent ice crystals from forming.
If you plan to freeze it for more than a day or two, place a layer of parchment paper or plastic wrap directly on the surface before sealing the lid to further minimize freezer burn.
When ready to serve, allow the ice cream to sit at room temperature for about 5–10 minutes to soften slightly, making scooping easier.
Avoid repeated thawing and refreezing, as this can negatively impact the texture and flavor.
For best results, consume within one week to enjoy the optimal taste and creaminess.
Frequently Asked Questions Answered Clearly
1. Can I use fresh pineapple instead of frozen?
Fresh pineapple lacks the firmness needed to create the ice cream’s creamy texture. If using fresh fruit, chop it and freeze it solid before blending.
2. Is full-fat coconut milk necessary?
Yes, full-fat coconut milk provides the richness and fat content essential for a creamy, scoopable texture. Light coconut milk will result in a thinner, less satisfying dessert.
3. How can I make this recipe nut-free and vegan?
This recipe is naturally vegan and nut-free, as it relies solely on pineapple and coconut milk—both plant-based and allergen-friendly ingredients.
4. Can I add sweeteners or other flavors?
Absolutely! Although the pineapple is naturally sweet, you can add a small amount of honey, maple syrup, or vanilla extract to customize sweetness and flavor.
5. What is the best way to serve leftovers?
Store leftovers in an airtight container in the freezer. Let them thaw slightly before scooping for easier serving and to maintain a smooth texture.
