This Fluffy Matcha Sponge Cake is a delightful treat that brings the delicate bitterness of matcha tea into a light, airy dessert perfect for any occasion.
What makes this recipe stand out is its simplicity combined with an elegant flavor profile, balancing sweetness with the natural earthiness of green tea powder.
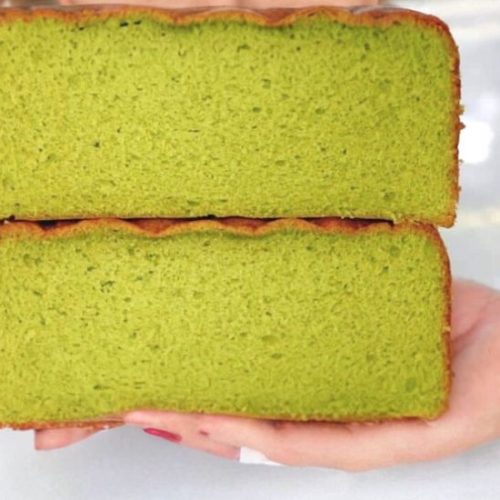
Delicious Matcha Sponge Cake
Equipment
- 1 6-inch round cake pan
- 1 Fine Mesh Sieve
- 1 Stand mixer or hand mixer
- 1 silicone spatula
- Parchment paper (enough to line the pan)
Ingredients
- 100 g whole eggs about 2 large eggs
- 70 g granulated sugar ⅓ cup
- 55 g cake flour ½ cup
- 5 g matcha powder 2 teaspoons
- 15 g milk 1 tablespoon
- 15 g neutral oil 1 tablespoon, such as vegetable or canola
Instructions
- Preheat and Prepare the Oven: Begin by setting your oven temperature to 355°F (180°C). This moderate heat is essential to ensure the cake bakes evenly without drying out. While the oven warms, position the rack in the center to allow balanced air circulation, which promotes a consistent rise and golden color on your sponge cake.
- Prepare the Cake Pan: Line your 6-inch round cake pan with parchment paper to prevent sticking and promote easy cake release.To do this, cut a circle of parchment paper matching the pan’s bottom diameter, then gently press it into the pan. For the sides, cut strips of parchment paper or use a butter and flour dusting method: lightly grease the pan with softened butter, dust with flour, and tap out the excess. This extra step ensures the cake won’t stick and keeps the edges neat.
- Warm the Eggs and Sugar: In a heatproof mixing bowl, combine the whole eggs (about 100 grams) and granulated sugar (70 grams). Place this bowl over a pot of gently simmering water, creating a warm water bath. Constantly whisk the eggs and sugar as they warm, until the mixture reaches about 40–45°C (104–113°F)—warm to the touch, similar to a baby’s bath temperature. This warming step is crucial: it helps dissolve the sugar and allows the eggs to whip up into a stable, voluminous foam, which gives the sponge its light texture.
- Whip the Egg and Sugar Mixture to Fluffy Peaks: Transfer the warmed egg-sugar mixture to your stand mixer or hand mixer. Using the whisk attachment, beat on high speed until the batter becomes thick, pale, and fluffy. To test readiness, lift the whisk and let the batter fall back into the bowl — it should flow slowly and hold soft ribbons or lines on the surface for a few seconds before blending in. This peak stage traps air bubbles vital for the cake’s airy structure.
- Refine the Batter Texture at Low Speed: After achieving the fluffy peak, reduce the mixer speed to low and continue whisking briefly until the batter gains a shiny, smooth texture.This step gently tightens the foam by reducing large air bubbles, creating a finer crumb in the finished cake.
- Sift and Combine Dry Ingredients: Using your fine mesh sieve, sift together the cake flour (55 grams) and matcha powder (5 grams) directly over a bowl or the mixing bowl. This step removes any lumps and ensures the powdery ingredients are evenly mixed, which helps distribute the matcha’s vibrant green color and distinct flavor uniformly throughout the cake.
- Gently Fold Dry Ingredients Into Batter: Add the sifted cake flour and matcha mixture to the whipped egg batter. Using a flexible silicone spatula, carefully fold the dry ingredients in with slow, gentle strokes. The goal is to combine without deflating the aerated egg foam, so avoid vigorous stirring. Continue folding until the flour and matcha are fully incorporated and no streaks remain.
- Incorporate Milk and Oil Smoothly: Measure out the milk (15 grams) and oil (15 grams), then pour them evenly over the batter. Fold these liquids gently into the mixture using the same folding technique. Adding milk and oil at this stage contributes moisture and richness, resulting in a tender crumb and slight sheen on the cake’s surface. The batter should flow smoothly when dropped from the spatula, indicating proper consistency.
- Transfer Batter to Pan and Prepare for Baking: Pour the completed batter immediately into your prepared cake pan, smoothing the surface gently with your spatula for even thickness. Promptly transferring the batter ensures the trapped air doesn’t escape prematurely, which is critical for a good rise.
- Bake Until Perfectly Set: Place the cake pan in the preheated oven on the center rack. Bake for approximately 25 minutes if making one 6-inch cake batch. If you’re increasing to 1.5 batches for a taller cake, extend baking time to 30–35 minutes. For cupcakes, reduce baking time to about 15 minutes. Keep in mind, oven temperatures vary, so start checking doneness around the minimum time. The cake is ready when it springs back gently to the touch and a toothpick inserted into the center comes out clean.
- Cool and Remove Cake Without Damage: Once baked, immediately remove the pan from the oven. Carefully invert the pan onto a cooling rack or clean surface, allowing the cake to release upside down — this technique helps maintain the cake’s height and prevents collapsing as it cools. Let the cake cool completely before slicing to ensure clean cuts and the best texture.
Notes
- Use a kitchen scale for precise measurements to ensure consistent results.
- Warming the eggs and sugar in a water bath is essential for volume and texture.
- Gently fold dry ingredients to avoid deflating the whipped eggs.
- Adjust baking times depending on your oven’s characteristics and pan size.
- Let the cake cool completely upside down to maintain fluffiness and avoid collapse.
- Store wrapped tightly to keep the cake moist and fresh.
Besides its unique taste, matcha is rich in antioxidants and provides a gentle caffeine boost without the jitters, making this cake a mindful indulgence.
With a moderate amount of protein from whole eggs and healthy fats from milk and oil, this sponge cake offers a satisfying texture without being overly heavy.
Its low saturated fat content and fiber from matcha powder contribute to a healthier dessert choice.
This cake is incredibly versatile — quick to prepare, suitable for both casual snacking and special events, and ideal for meal prep when stored properly.
Whether enjoyed plain or as a base for layered desserts, it’s a wonderful everyday baking option that pleases both the palate and the health-conscious baker.
Must-Have Tools for Perfect Results
Cake Pan (6-inch Round)
Essential for shaping your sponge cake to the ideal height and texture. Its compact size is perfect for small batches, saving oven space and ensuring even baking. A durable cake pan is a staple for every baker aiming for flawless, professional-looking cakes.
Fine Mesh Sieve
Used to sift matcha powder and flour together, this tool ensures no lumps and guarantees an ultra-smooth batter. Beyond this recipe, a sieve is invaluable for sifting dry ingredients or dusting powdered sugar on desserts.
Stand Mixer or Hand Mixer
Crucial for whipping eggs and sugar to the perfect fluffy consistency that creates the sponge’s airy structure. These mixers also speed up preparation time and improve texture for all your baking projects.
Silicone Spatula
Ideal for gently folding flour and matcha into the egg mixture without deflating the batter. Its flexibility makes it a multipurpose kitchen tool for scraping bowls and folding batters delicately, preserving volume and texture.
Parchment Paper
Used to line the cake pan, parchment prevents sticking and helps with easy cake removal. It’s a versatile kitchen essential that simplifies cleanup and ensures perfect presentation every time.
Chef’s Secrets for Flawless Cakes
Achieving the perfect fluffy sponge begins with properly warming the eggs and sugar.
The gentle heat stabilizes the egg proteins, allowing you to whip them into a voluminous, stable foam that traps air and creates that signature light texture.
Don’t rush this step; consistent whisking over a warm water bath is key. When folding in the flour and matcha, use slow, deliberate movements with a flexible spatula to preserve the air bubbles.
Overmixing can lead to a dense cake.
Lastly, flipping the cake pan upside down immediately after baking prevents the sponge from collapsing under its own weight as it cools, ensuring a tall, airy final product.
Serving Suggestions to Impress Guests
This matcha sponge cake pairs wonderfully with a variety of accompaniments.
For a classic presentation, dust the top with powdered sugar or sift additional matcha powder for an elegant touch.
Add a dollop of lightly sweetened whipped cream or fresh berries for contrast and freshness.
The subtle bitterness of the matcha complements creamy elements like vanilla custard or mascarpone cheese, making it ideal for layered desserts or trifles.
You can also slice and layer it with sweet red bean paste or matcha-flavored frosting to create a traditional Japanese-inspired treat that’s sure to impress.
Storage Tips to Maintain Freshness
To keep your matcha sponge cake moist and flavorful, wrap it tightly in plastic wrap immediately after it has fully cooled.
For short-term storage, place it in an airtight container and refrigerate, where it will stay fresh for up to three days.
For longer storage, freeze the cake tightly wrapped in multiple layers of plastic wrap and foil; it will keep well for up to two months.
When ready to enjoy, thaw the cake slowly in the refrigerator overnight.
Avoid leaving the cake uncovered, as sponge cakes can dry out quickly due to their delicate crumb.
Frequently Asked Questions (FAQs) About This Cake
Q1: Can I substitute all-purpose flour for cake flour?
Yes, you can, but cake flour produces a lighter, more tender crumb due to its lower protein content. If you use all-purpose flour, consider removing 1 tablespoon per cup and adding cornstarch to mimic cake flour’s texture.
Q2: What if I don’t have matcha powder?
You can try substituting with finely ground green tea powder or even spinach powder for color, but the signature flavor will differ. Matcha has a unique earthy bitterness that is central to this cake’s appeal.
Q3: Can I make this recipe vegan?
This recipe relies on whole eggs for structure, so a vegan version would require egg replacers like aquafaba or commercial substitutes, which may alter texture. Experimentation is key for a vegan sponge cake.
Q4: Why is it important to flip the cake after baking?
Flipping the cake while warm prevents it from collapsing due to gravity. Cooling it upside down helps maintain volume and a fluffy texture.
Q5: How can I tell when the cake is fully baked?
The cake is done when it springs back lightly when touched and a toothpick inserted in the center comes out clean or with a few moist crumbs but no wet batter.
This recipe is inspired by pastryliving and has been carefully refined to enhance clarity, streamline preparation steps, and ensure accurate results. We’ve also included health benefits, nutritional highlights, and Must-Have Tools to help you get the best results every time you cook.
