All products are selected by our editorial team for quality. If you buy through our links, we may earn a small commission at no extra cost to you.
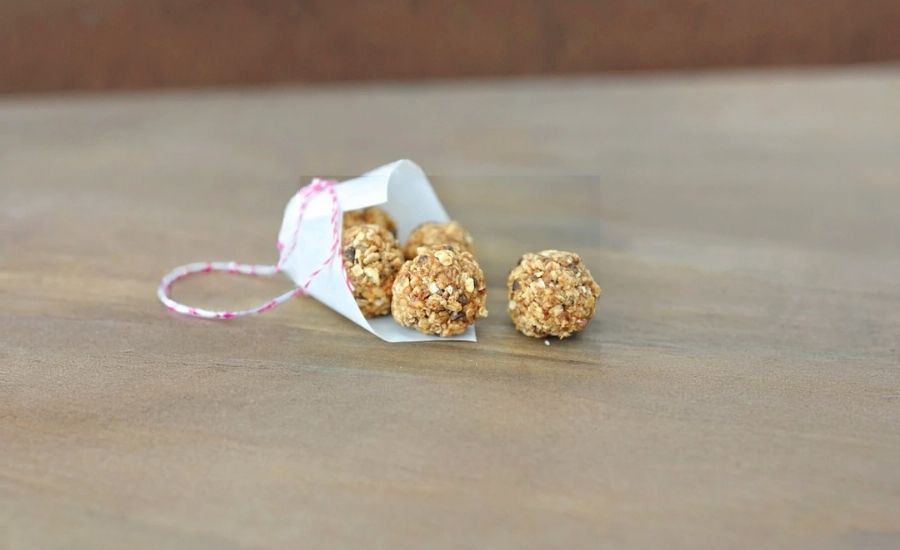
No-Bake Granola Bites offer a delicious and wholesome snack that combines convenience with nutrition, making them perfect for busy lifestyles.
What sets this recipe apart is its balance of textures and flavors—the chewy oats and crispy rice cereal blend seamlessly with creamy peanut butter and a touch of sweet honey, while mini chocolate chips add just the right hint of indulgence.
Nutritionally, these bites shine as a protein-rich and fiber-packed snack, featuring ground flaxseed that delivers omega-3 fatty acids and antioxidants.
With moderate healthy fats from peanut butter and coconut oil, they provide sustained energy without the crash often caused by sugary snacks.
Since they require no baking, this recipe is incredibly quick and easy, ideal for meal prep or on-the-go nourishment.
Plus, their customizable nature allows you to tweak ingredients to your liking, making these granola bites a versatile staple in any kitchen.
Must-Have Tools for Perfect Results
Large Mixing Bowl
Essential for gently combining ingredients without crushing the crispy rice cereal, this bowl’s ample size provides plenty of room for easy mixing and ensures a uniform blend.
A sturdy mixing bowl is a kitchen must-have for preparing everything from batters to salads.
Cookie Scoop
This tool guarantees consistent, perfectly sized granola bites, saving time and effort during shaping.
Beyond this recipe, a cookie scoop helps portion cookie dough, muffin batter, or even meatballs, making it invaluable for precise cooking.
Parchment or Wax Paper
Used to line your baking sheet, it prevents sticking and makes cleanup effortless.
Parchment paper is a versatile kitchen staple for baking, roasting, and wrapping food safely.
Cooking Sheet (Baking Sheet)
A flat, sturdy surface to chill the granola bites evenly in the fridge, the baking sheet’s broad design allows for proper air circulation and easy storage.
This tool is indispensable for baking cookies, roasting vegetables, and more.
Measuring Cups and Spoons
Accurate measurement of ingredients ensures the perfect consistency and flavor balance in your granola bites.
These tools are fundamental for precision cooking and baking in every kitchen.
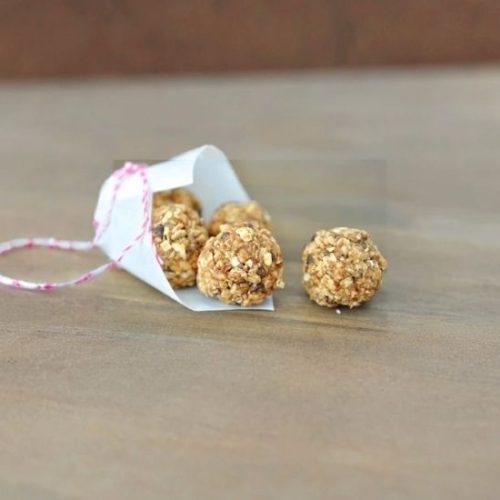
No-Bake Granola Bites
Equipment
- 1 large mixing bowl
- 1 Cookie Scoop (or hands for rolling)
- 1 Baking Sheet
- Parchment or Wax Paper (to line baking sheet)
- Measuring cups and spoons
Ingredients
- 2 cups quick oats about 200 grams
- 1 cup crispy rice cereal such as Rice Krispies
- 1 cup creamy peanut butter approximately 255 grams
- 1 cup ground flaxseed about 96 grams
- 1 cup mini chocolate chips around 170 grams
- ⅔ cup honey or agave syrup about 227 grams
- 2 teaspoons pure vanilla extract
- 2 tablespoons coconut oil preferably extra-virgin for flavor
Instructions
- Gather and Prepare Ingredients: Start by measuring out all the ingredients accurately. Having everything ready will make the mixing process smooth and efficient.
- Mix Dry Ingredients Together: In a large bowl, combine the quick oats, crispy rice cereal, ground flaxseed, and mini chocolate chips. Stir gently to mix evenly, being careful not to crush the crispy cereal, which provides a light crunch.
- Blend Wet Ingredients Separately: In a small microwave-safe bowl or saucepan, warm the peanut butter, honey (or agave), and coconut oil just until softened and easy to stir (about 20-30 seconds in the microwave). Stir in the vanilla extract until fully incorporated.
- Combine Wet and Dry Components: Pour the peanut butter mixture over the dry ingredients. Using a spatula or wooden spoon, fold everything together gently but thoroughly, ensuring every oat and cereal flake is coated with the sticky mixture. Aim for an even, sticky consistency that will hold together when formed.
- Shape Into Bite-Sized Balls: Using a cookie scoop or a tablespoon, scoop out rounded portions of the mixture. Roll each portion gently between your palms to form smooth, compact balls. Place the formed bites onto a baking sheet lined with parchment or wax paper, spacing them slightly apart.
- Chill to Set: Transfer the baking sheet to the refrigerator and allow the bites to firm up for at least 1 to 2 hours. This chilling step helps the mixture solidify so the bites hold their shape perfectly.
- Store and Enjoy: Once set, transfer the granola bites to an airtight container or zip-top bags. Store in the refrigerator for up to one week or freeze for several months. Enjoy as a quick snack anytime!
Notes
- Optional Add-Ins: Feel free to add 2 tablespoons of ground chia seeds to boost fiber and omega-3 content, or mix in dried fruit, shredded coconut, or nuts for extra texture and flavor. Just adjust the quantities slightly to maintain the binding consistency.
- Peanut Butter Variations: Natural peanut butter works well here but may require a bit more chilling time due to oil separation. You can also swap for almond butter or sunflower seed butter to suit dietary preferences.
- Sweetener Choices: Honey lends a floral sweetness, while agave nectar provides a mild flavor and vegan-friendly option. Maple syrup can also be used but may alter the texture slightly.
- Coconut Oil: Adding coconut oil adds a smooth richness and subtle tropical note, especially if you use virgin coconut oil. If omitted, the bites will still hold but may be a bit less silky.
- Mixing Tips: Stir gently to preserve the crunch of the cereal. Overmixing can crush the flakes and change the texture.
Chef’s Secrets to Perfect Granola Bites
Creating the perfect no-bake granola bites is all about balancing texture and flavor while ensuring the mixture binds well.
One key secret is gently folding the wet ingredients into the dry without crushing the crispy rice cereal, which keeps the bites delightfully crunchy.
Warming the peanut butter, honey, and coconut oil slightly helps them blend smoothly, ensuring every bite is rich and evenly coated.
Using ground flaxseed not only adds nutrition but also acts as a natural binder, helping the bites hold their shape during chilling.
If the mixture feels too loose or crumbly, refrigerate it for 10-15 minutes before shaping, which firms it up for easier rolling.
Don’t skip the chilling step—it’s essential for the bites to set properly and maintain their texture.
Finally, consider experimenting with mix-ins like chia seeds, shredded coconut, or dried fruit to personalize your snack without compromising the structure.
Serving Suggestions to Elevate Snack Time
No-bake granola bites are a versatile snack that pairs wonderfully with a variety of accompaniments.
Serve them alongside a cup of herbal tea or a chilled glass of almond milk for a wholesome afternoon boost.
They also make an excellent pre- or post-workout snack, offering a quick source of protein and energy.
For a fun twist, crumble the bites over yogurt or smoothie bowls to add crunch and flavor.
Pack them in lunchboxes or snack bags for convenient on-the-go fuel during busy days.
Because they’re bite-sized and not too sweet, they also work well as a light dessert option or a healthy alternative to candy.
Feel free to customize toppings by rolling the shaped bites in finely chopped nuts or cacao nibs before chilling for an extra flavor pop.
Storage Tips for Freshness and Flavor
Proper storage is crucial to keep your granola bites fresh, flavorful, and crunchy.
After chilling and setting, store them in an airtight container in the refrigerator, where they’ll stay fresh for up to one week.
For longer storage, freezing is an excellent option—place the bites in freezer-safe bags or containers and they’ll keep well for several months.
When ready to enjoy, simply thaw at room temperature for 10-15 minutes or pop a few bites in the microwave for a few seconds to soften slightly.
Avoid storing granola bites in warm or humid environments, as moisture can cause the crispy cereal to become soggy.
Using parchment or wax paper between layers in the container prevents sticking and makes it easy to grab just the amount you want.
Frequently Asked Questions About Granola Bites
1. Can I substitute peanut butter with other nut butters?
Absolutely! Almond butter, cashew butter, or sunflower seed butter can be used as alternatives. Just keep in mind that each nut butter has a slightly different flavor and consistency, which may affect texture and taste slightly.
2. What can I use instead of honey or agave?
Maple syrup or brown rice syrup can work as natural sweeteners, though they might alter the texture a bit. For a less sticky option, you can also try date syrup or even mashed ripe bananas.
3. How do I make these bites vegan?
To make the recipe vegan, simply swap honey for agave nectar or maple syrup, and ensure your chocolate chips are dairy-free. Coconut oil and nut butters are naturally vegan-friendly.
4. Can I add other ingredients like nuts or dried fruit?
Yes! Adding chopped nuts, dried cranberries, raisins, or shredded coconut can enhance both flavor and texture. Just adjust the wet ingredients slightly if the mixture becomes too dry.
5. How do I prevent the granola bites from falling apart?
Make sure to mix the ingredients thoroughly and warm the wet ingredients enough so they bind well. Chilling the mixture before shaping helps it firm up. If it’s still crumbly, add a bit more peanut butter or honey to increase stickiness.
This recipe is inspired by melskitchencafe and has been carefully refined to enhance clarity, streamline preparation steps, and ensure accurate results. We’ve also included health benefits, nutritional highlights, and Must-Have Tools to help you get the best results every time you cook.
