Chocolate Date Truffles
Decadent yet healthy, these Chocolate Date Truffles combine sweet dates, crunchy nuts, and rich cocoa for a quick, protein-packed snack. Perfect for meal prep or an anytime chocolate craving, they are naturally sweet, nutrient-dense, and ready in just a few minutes.
Equipment
- processor
- 1 bowl for cocoa powder
- Parchment-lined baking sheet
- Measuring cups and spoons
- Hands for rolling
Ingredients
- 1 ½ cups 270 g fresh dates, pitted
- ¼ cup 40 g almonds
- ⅓ cup 95 g peanut butter
- 1 tablespoon dutch-processed cocoa powder plus extra for dusting
Instructions
- Prepare the Ingredients: Start by gathering all your ingredients in one place: pitted dates, almonds, peanut butter, and cocoa powder. Make sure the dates are soft and fresh; if they feel a bit dry, soak them in warm water for 10 minutes, then drain thoroughly. This ensures your truffles will be smooth and easy to shape.
- Process the Dates and Nuts: Place the pitted dates and almonds into a food processor. Pulse the mixture in short bursts until the nuts are finely chopped and evenly combined with the dates. The goal is a sticky, cohesive texture where the nuts are noticeable but small enough to blend well with the dates.
- Add Peanut Butter and Cocoa: Once the dates and almonds are ready, add the peanut butter and 1 tablespoon of cocoa powder to the food processor. Process the mixture until all ingredients are fully incorporated. You should have a rich, dark, slightly sticky dough that holds together easily when pressed. Taste the mixture and adjust if needed—if you prefer a sweeter truffle, add a teaspoon of maple syrup or a few extra dates.
- Prepare Your Rolling Station: Line a baking sheet with parchment paper and set it aside. Pour a small amount of cocoa powder into a shallow bowl for dusting later. To make rolling easier and prevent sticking, lightly dampen your hands with water. This will keep the truffles from clinging to your fingers while shaping them.
- Shape the Truffles: Scoop out small portions of the mixture, roughly a tablespoon each. Roll each portion between your palms to form smooth, even balls. Take your time to ensure each truffle is well-shaped; a uniform size helps them look professional and ensures even servings.
- Coat in Cocoa Powder: Once the truffles are shaped, gently roll each one in the cocoa powder until fully coated. This not only adds a finishing touch but also enhances the chocolate flavor while preventing the truffles from sticking together. Shake off any excess cocoa before placing the truffle on the parchment-lined tray.
- Chill the Truffles: After all the truffles are rolled and coated, place the tray in the refrigerator. Allow them to chill for at least 30 minutes to firm up. Chilling not only improves their texture but also makes them easier to handle when serving or packaging.
- Store Properly: Once chilled, transfer the truffles into an airtight container. They can be stored in the fridge for up to 1 week or frozen for longer-term storage. Bring them to room temperature for a few minutes before serving for the best texture and flavor.
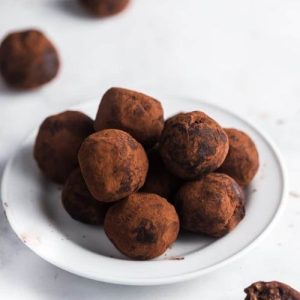
- Serve and Enjoy: Present your Chocolate Date Truffles on a small plate or in decorative paper cups for a treat-ready snack. Perfect for a quick energy boost, a dessert alternative, or even a thoughtful homemade gift. Savor the rich chocolate taste balanced with natural sweetness from dates and crunch from almonds in every bite.
Notes
- Use soft, fresh dates for the best texture; if using dry dates, soak them briefly in warm water.
- Almonds can be swapped with walnuts, cashews, or hazelnuts depending on your flavor preference.
- Peanut butter adds creaminess, but almond butter or cashew butter also work beautifully.
- For a sweeter truffle, add a drizzle of maple syrup or honey (if not strictly vegan).
- Rolling with damp hands helps prevent the mixture from sticking to your fingers.
- Dusting with cocoa powder adds a rich chocolate kick and prevents the truffles from clumping together.
- These truffles are naturally gluten-free, dairy-free, and refined-sugar-free.
- Great for meal prep—make a batch and store for grab-and-go snacks all week.
