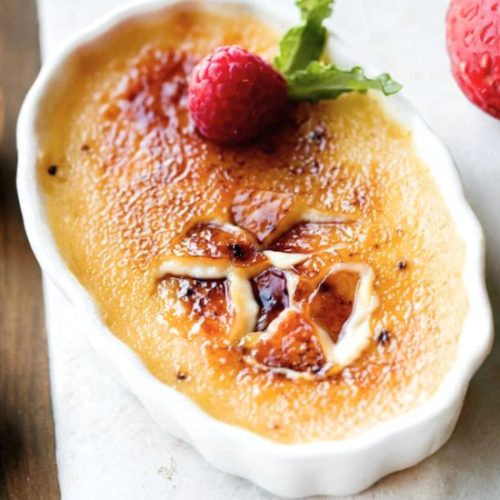
Crème Brûlée
A simple yet sophisticated crème brûlée flavored with espresso and vanilla, featuring a creamy custard base topped with a perfectly caramelized sugar crust. Ideal for dessert lovers seeking a classic French treat that is easy to make and elegant to serve.
Equipment
- 8 oval ramekins (4-ounce size)
- Medium saucepan (1.5–2 quarts)
- Whisk
- Large baking pan (9×13-inch or similar)
- Wire cooling rack
- Kitchen torch (optional but recommended)
Ingredients
- 5 large egg yolks
- ¾ cup 150 grams granulated sugar, divided
- 3 cups 720 milliliters heavy cream or heavy whipping cream
- ½ teaspoon espresso powder optional but adds depth
- ¼ teaspoon salt
- 1 ½ teaspoons pure vanilla extract
- Additional granulated sugar for caramelizing the top
Instructions
- Prepare the Oven and Ramekins: Preheat your oven to 325°F (163°C). Arrange eight shallow 4-ounce ramekins on a large baking sheet or in a deep roasting pan. This will be the vessel for baking the custards and the water bath.
- Combine Egg Yolks and Sugar: In a mixing bowl, whisk together the egg yolks and half of the granulated sugar (about 1/2 cup or 100 grams) until the mixture is smooth, pale, and slightly thickened. Set aside while you prepare the cream.
- Warm the Cream Mixture: In a medium saucepan, combine the heavy cream, espresso powder, and salt. Gently heat over medium heat until small bubbles appear around the edges (just before boiling). Remove from heat and stir in the vanilla extract.
- Temper the Eggs: Slowly pour about half a cup of the warm cream into the egg yolk mixture in a thin stream, whisking constantly to prevent the eggs from scrambling. Once combined, gradually whisk this egg-cream mixture back into the remaining warm cream in the saucepan until fully blended.
- Fill the Ramekins: Carefully pour the custard evenly into each ramekin, filling them nearly to the top. Place the ramekins into the baking pan. Then, pour hot water into the pan until it reaches about halfway up the sides of the ramekins, creating a water bath that will gently cook the custard.
- Bake the Custards: Transfer the pan to the preheated oven. Bake for about 30 to 35 minutes or until the custards are mostly set but still slightly wobbly in the center. You can test doneness by inserting an instant-read thermometer—the temperature should read about 170°F (77°C).
- Cool and Chill: Remove the ramekins from the water bath carefully and place them on a wire rack to cool to room temperature. Once cooled, cover them loosely with plastic wrap or foil and refrigerate for at least 4 hours, or up to 2 days. This chilling step allows the custard to fully set.
- Caramelize the Sugar Topping: When ready to serve, sprinkle a thin, even layer of granulated sugar over each chilled custard. Using a kitchen torch, carefully melt and caramelize the sugar until golden and crisp. Alternatively, if you don’t have a torch, place the ramekins under a hot oven broiler for 1-2 minutes, watching closely to avoid burning.
Notes
- Make-Ahead Tip: The custard mixture can be prepared and refrigerated (covered) for up to one day before baking. You can also bake the custards up to two days ahead and chill them until serving.
- Cream Substitution: For a lighter texture, replace heavy cream with half-and-half, though the custard will be less rich and silky.
- Espresso Powder: This ingredient is optional but highly recommended to enhance the flavor complexity. If unavailable, use two teaspoons of instant coffee granules instead.
- Vanilla Options: Pure vanilla extract works beautifully, but you can swap with vanilla bean seeds or vanilla bean paste for an even more aromatic custard.
- Ramekin Tips: Using small, shallow ramekins ensures even cooking and a perfect surface for the brûlée crust. Avoid metal dishes as they affect baking time and texture.
- Caramelizing Alternative: If you lack a kitchen torch, the oven broiler method works well, but keep a close eye to prevent burning.
